Learn how to make this fun paper pie craft with your kids this Thanksgiving season.


Hello my crafty friends! Are you ready to for a fun THANKSGIVING themed kid craft idea?! With our Build Your Own Stained Glass Pie kid craft idea and free printable template {found below} your child is going to BUILD their perfect PIE CREATION in celebration of the upcoming FEAST!
With today’s simple DIY tutorial, you can have children “get their chef hat out” while making their own version of what the “perfect pie” should hold! From cherry to pumpkin pie – it’s whatever your taste buds love in this pretend play craft idea!!!
So what will be in your child’s pie? Will it be the traditional? Maybe they want to go for tye-dye effect or completely outside the box? Whatever they decide to place in it – we hope they have fun “baking” it up!
Find the FULL step-by-step tutorial and free printable below & get ready to “bake up some awesome pieces” with just some simple craft materials!!!
Happy crafting my friends! I can’t wait to see pictures of your child’s beautiful pumpkin and apple stained glass pie pieces! Show them off on my Facebook page for everyone to see! #gluedtomycrafts


Who doesn’t LOVE pie? So let’s get those conversations started, with our latest and greatest “What Will Be In Your Pie?” craft idea!
Craft Supplies:
- Pie Template – on our landing page
- White Cardstock Paper
- Scissors
- Clear Contact Paper
- Tissue Paper
- Glue Dots or Tape
- White Cotton Balls
Directions:
- First download and print out the FREE pie template above. You will want one pie printable per kid & craft.
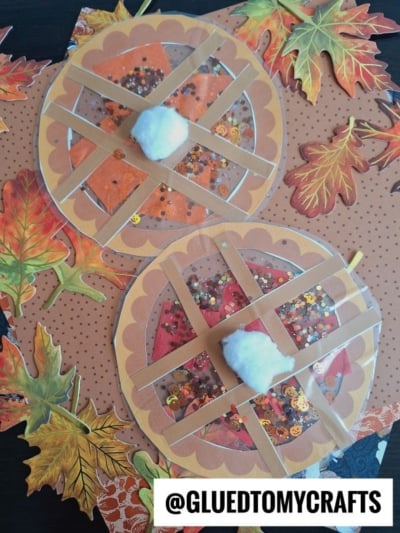
- Next grab your scissors. Trim out the circular pie shape from the printable, as well as the circular center from it and the “pie crust” lines. Discard excess paper.
- Now grab your clear contact paper. Cut out TWO pieces that are bigger than the pie cutout.
- Remove the backing from one piece of contact paper. Lay it on a flat surface.
- Now grab the long pieces from the pie cutouts. Place them on the contact paper, in a zig zag shape, face down.
- Now grab the circular shape. Place it also face down on the contact paper, on top of the long pieces you just placed down.
- Next have children decorate the inside of their pie with pieces of colored tissue paper.
- Once they are done “mixing” and making the perfect pie, grab the second piece of contact paper.
- Peel off the backing and place it on top of the other piece of contact paper, moving your hand around to “squish” everything together.
- To finish off the Mixed Media Stained Glass Pie craft, use your scissors to trim out the pie shape and remove the excess contact paper.
- Finally – take some glue dots or tape and adhere some cotton ball “whipped cream” to the pie shape.
- And that’s it! Display proudly for all to see!!!
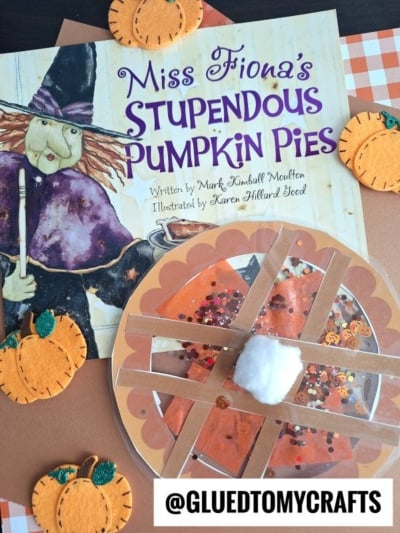
Book Pairings:
Here are some recommended books that beautifully complement our craft idea. You can conveniently purchase them through our affiliate links on Amazon.
- The 12 Days of Thanksgiving by Jenna Lettice
- Nothing’s Wrong!: A Hare, a Bear, and Some Pie to Share by
- How to Make an Apple Pie and See the World by Marjorie Priceman
- A Charlie Brown Thanksgiving by Charles M. Schulz
- I Know an Old Lady Who Swallowed a Pie by Alison Jackson
- The Night Before Thanksgiving by Natasha Wing
- I Am Thankful: A Thanksgiving Book for Kids by Sheri Wall
- Porcupine’s Pie by Laura Renauld
- Pookie’s Thanksgiving by Sandra Boynton
- Thanksgiving in the Woods by Phyllis Alsdurf
RELATED —> Paper Plate Pumpkin Pie
We LOVE sharing PIE themed crafts on Glued To My Crafts!
Be sure to also check out our popular Popsicle Stick Pumpkin Pie, Washi Tape Pie, and Paper Plate Cherry Pie craft posts! Both of which would pair nicely with today’s stained glass pumpkin and apple pie craft idea – hint hint!

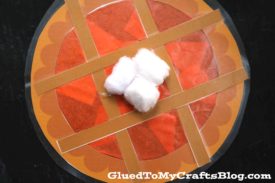
Paper Build Your Own Pie Craft
Learn how to make this fun paper pie craft with your kids this Thanksgiving season.
Here’s your checklist of supplies to bring this craft to life:
Prepare your creative haven by laying down a protective cover before the crafting magic begins!
Directions:
- First print out our provided printable, in color, on a single sheet of white cardstock paper. You only need one print per craft.
- Next grab your scissors. Trim out the circular pie shape from the printable, as well as the circular center from it and the "pie crust" lines. Discard excess paper.
- Now grab your clear contact paper. Cut out TWO pieces that are bigger than the pie cutout.
- Remove the backing from one piece of contact paper. Lay it on a flat surface.
- Now grab the long pieces from the pie cutouts. Place them on the contact paper, in a zig zag shape, face down.
- Now grab the circular shape. Place it also face down on the contact paper, on top of the long pieces you just placed down.
- Next have children decorate the inside of their pie with pieces of colored tissue paper.
- Once they are done "mixing" and making the perfect pie, grab the second piece of contact paper.
- Peel off the backing and place it on top of the other piece of contact paper, moving your hand around to "squish" everything together.
- To finish off the Mixed Media Stained Glass Pie craft, use your scissors to trim out the pie shape and remove the excess contact paper.
- Finally - take some glue dots or tape and adhere some cotton ball "whipped cream" to the pie shape.
- And that's it! Display proudly for all to see!!!


NEED MORE HELP DOWNLOADING OUR FREE PRINTABLES? PLEASE REFER TO OUR FAQ PAGE
If you've enjoyed our content or have any thoughts to share, we'd love to hear from you! Mention @gluedtomycrafts or tag #gluedtomycrafts on Instagram!