Whether you’re a mom who wants to share this activity with your kids, an educator looking for detailed craft ideas for your classroom, or simply someone who loves crafting, this guide has everything you need to create a gorgeous showstopper piece that’s sure to impress any audience.
So grab a cup of coffee, get those coffee filters ready and let’s get creative together!
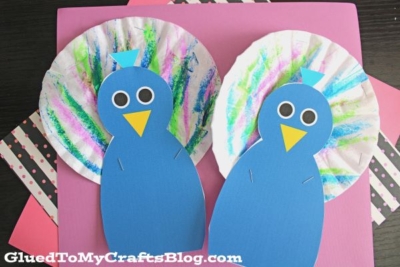
Are you looking for a creative, fun, and budget-friendly craft to do with kids? This coffee filter peacock craft is the perfect way to spark imagination and bring a splash of color into your day.
Kids love making these vibrant peacocks with their majestic, multicolored tails, and you’ll love how easy (and mess-free!) it is to set up. Whether you’re a parent, teacher, or babysitter, this project is ideal for engaging children in a creative activity that also enhances their fine motor skills.
Get ready to transform everyday coffee filters into stunning peacocks with this step-by-step guide. Perfect for kids aged 3 and up!

This beautiful coffee filter peacock craft is perfect for kids of all ages! It’s a great way to teach them about colors and patterns.
Craft Supplies:
Here’s what you’ll need to make your coffee filter peacock:
- White Coffee Filters
- Stapler
- Markers, Crayons, Craft Paint etc.
- White Cardstock Paper
- Peacock Printable – on our landing page
- Craft Scissors
Directions:
With these simple supplies, you’re ready to get started!
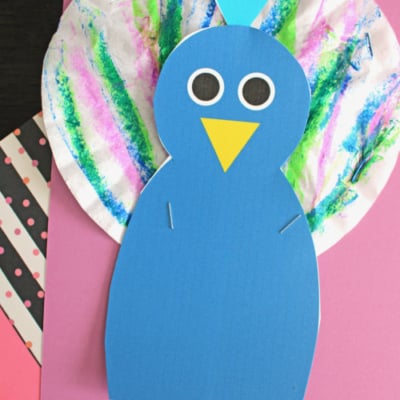
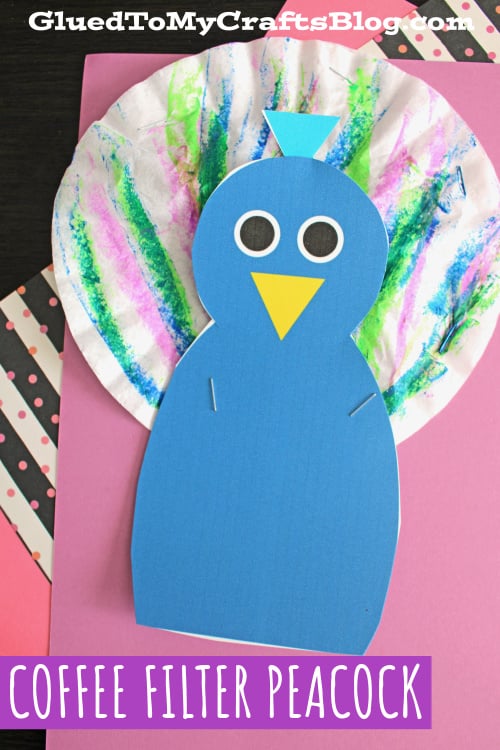
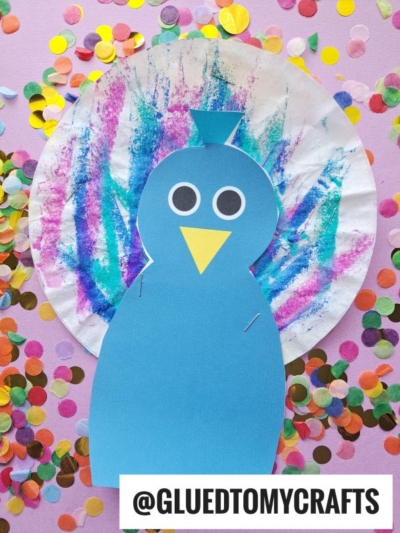
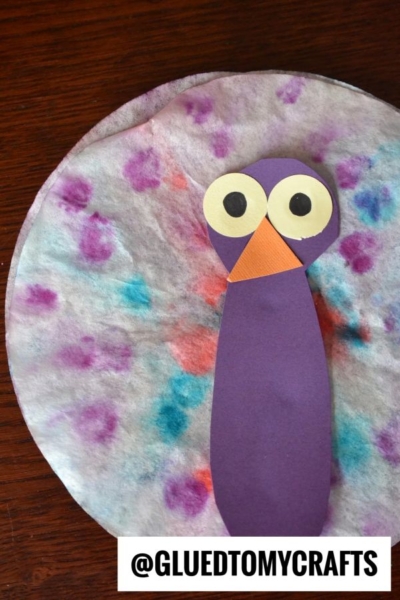
- First things first – grab two to three coffee filters PER peacock craft.
- Flatten each one out, with your hands.
- Now stack them on top of each other and staple a few times around the circular edge, to secure them in place. This will make it easier to decorate.
- Next up – hand over the coloring materials and tell your child to have at it. The more they colors they add on top of the coffee filters – the more of a colorful design they will get.
- Set aside the filters to dry completely. Be sure to separate/hang the layers, so it dries faster.
- While the coffee filters are drying, work on the body of the peacock. Simply print out of our FREE provided printable and cut out the peacock design.
- Once the filters are completely dry, secure the body cutout to the decorated coffee filter. And bam! You have a peacock!
RELATED —> Chalk Art Peacock
Who knew coffee filters could create such magic? This coffee filter peacock craft is a wonderful way to combine fun, education, and creativity. With just a few simple materials and an hour of crafting, you’ll have a stunning, colorful creation that kids can feel proud of.
Gather your supplies, set up a crafting station, and prepare to make some peacock magic! Your kids (or your inner child) will thank you.
BTW – stay tuned for more coffee filter crafts in the near future on Glued To My Crafts. Until then – you may enjoy these crafts that I have already shared on the blog, that used coffee filters as well!
- Coffee Filter Pumpkin
- Coffee Filter Boat On Paper
- Coffee Filter Monsters
- Coffee Filter Watermelon
- Coffee Filter Turkeys
FOLLOW US ON PINTEREST SO YOU NEVER MISS A NEW TUTORIAL FROM US!

Tye Dye Colored Coffee Filter Peacock Craft Idea
Here’s your checklist of supplies to bring this craft to life:
Prepare your creative haven by laying down a protective cover before the crafting magic begins!
Directions:
- First things first - grab two to three coffee filters PER peacock craft.
- Flatten each one out, with your hands.
- Now stack them on top of each other and staple a few times around the circular edge, to secure them in place. This will make it easier to decorate.
- Next up - hand over the coloring materials and tell your child to have at it. The more they colors they add on top of the coffee filters - the more of a colorful design they will get.
- Set aside the filters to dry completely. Be sure to separate/hang the layers, so it dries faster.
- While the coffee filters are drying, work on the body of the peacock. Simply print out of our FREE provided printable and cut out the peacock design.
- Once the filters are completely dry, secure the body cutout to the decorated coffee filter. And bam! You have a peacock!


NEED MORE HELP DOWNLOADING OUR FREE PRINTABLES? PLEASE REFER TO OUR FAQ PAGE