
Thanksgiving is just around the corner, which means it’s time to start thinking about crafts!
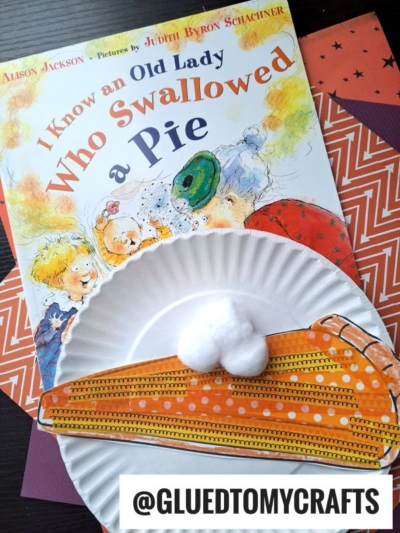
This paper and washi tape pumpkin pie craft is the perfect activity to do with your child. It’s simple, inexpensive, and best of all, completely calorie-free! Plus, thanks to the free printable template I’ve provided below, it’s easy to make as well.

Washi Tape Pumpkin Pie Craft
Are you looking for a fun and easy Thanksgiving craft for kids? Then look no further than this Paper & Washi Tape Pie art project idea!
Using just some inexpensive orange washi tape, cardstock paper and our free pie printable, you can make it with your child in no time.
Best part is it’s completely calorie free and you can “make” it over & over again – on the fly & cheap! So don’t bother getting the mixer out anytime soon – instead craft with this DIY activity up with your child today! It’s going to be a SWEET delight for both of you!
Happy crafting my friends!!! Don’t forget to share pictures of your paper and washi tape pumpkin pie creations with us on Facebook page I can’t wait to see how DELICIOUS it turns out!
RELATED —> Pumpkin Pie Tic Tac Toe Game

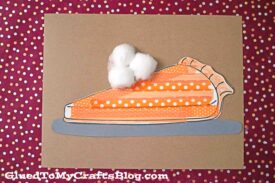
Gather up some orange washi tape, cardstock paper, and get started on this fun Thanksgiving craft today! Your child is sure to have a blast, and you’ll end up with a beautiful (and delicious-looking) pumpkin pie decoration for your home.
Craft Supplies:
- Pie Printable – on our landing page
- White Cardstock Paper
- Crayons, Coloring Pencils, Markers
- Scissors
- Brown Cardstock Paper
- Gray Cardstock Paper
- Adhesive
- Orange Washi Tape
- School Glue
- White Cotton Balls
Directions:
- First things first – go ahead and download the free blank pie design printable listed above.
- Print it out on a single sheet of white cardstock. You only need ONE print per craft. Feel free to print as many as you like though!
- Now grab your choice of coloring instrument and color in the “pie crust area” a light brown color.
- When done coloring, grab your rolls of orange washi tape.
- Start tearing off pieces of washi tape and placing them inside the pumpkin pie design {but not the crust} until it’s completely filled in. Since we are going to cut out the pie design in the next step, it’s ok to go over the edge slightly.
- Next, using your scissors, carefully trim out the pie design you just decorated, in the printable.
- Discard excess paper and set aside your pie cutout piece.
- Now grab a piece of brown cardstock {the background} as well as a gray piece of paper.
- Out of the gray cardstock, cut out a simple “plate” design. You want it slightly bigger than the pie shape.
- Secure that piece to the bottom of the larger, solid color. You now have your plate setting for your pie!
- Go ahead and secure the pie, in place, in the center of that.
- Finally – the last step. Add the whipped cream cotton balls with a little bit of school glue.
- And that’s it! If desired, add some other embellishments you see fit.
- Now display your beautiful washi tape pumpkin pie masterpiece proudly for ALL to see!
Although I focused on pumpkin pie in this washi tape craft tutorial, you can HOWEVER change up the colors and make OTHER pie flavors with just a simple swap. Red washi tape for apple or green for key lime – making this a great craft to do all year long if you like!
RELATED —> Paper Plate Pumpkin Pie Slice
If you are looking for even more creative Thanksgiving themed kid crafts to recreate this year, be sure to check out the fun posts listed below.
And if you decide to make today’s Paper and Washi Tape Pumpkin Pie Slice craft tutorial or any of our inspiring crafts found on the Glued To My Crafts blog – be sure to share a picture on our Facebook page for all of us to see! It seriously makes MY day when I hear from YOU!
Leaf Turkey Craft
Paper Plate Turkey
Cheerio Corn on the Cob
Stained Glass Turkeys
Handprint Turkey Craft
Paper Build Your Own Pie Craft
Paper Plate Cherry Pie
Paper Plate Apple Pie Slice

Paper & Washi Tape Pie Craft Idea For Thanksgiving
Here’s your checklist of supplies to bring this craft to life:
- 1 School Glue
- 1 Scissors
Prepare your creative haven by laying down a protective cover before the crafting magic begins!
Directions:
- First things first - grab your choice of coloring instrument and color in the "pie crust area" a light brown color, in the provided printable.
- When done coloring, grab your rolls of orange washi tape.
- Start tearing off pieces of washi tape and placing them inside the pumpkin pie design {but not the crust} until it's completely filled in. Since we are going to cut out the pie design in the next step, it's ok to go over the edge slightly.
- Next, using your scissors, carefully trim out the pie design you just decorated, in the printable.
- Discard excess paper and set aside your pie cutout piece.
- Now grab a piece of brown cardstock {the background} as well as a gray piece of paper.
- Out of the gray cardstock, cut out a simple "plate" design. You want it slightly bigger than the pie shape.
- Secure that piece to the bottom of the larger, solid color. You now have your plate setting for your pie!
- Go ahead and secure the pie, in place, in the center of that.
- Finally - the last step. Add the whipped cream cotton balls with a little bit of school glue.
- And that's it! If desired, add some other embellishments you see fit.
- Now display your beautiful washi tape pumpkin pie masterpiece proudly for ALL to see!


NEED MORE HELP DOWNLOADING OUR FREE PRINTABLES? PLEASE REFER TO OUR FAQ PAGE