
Looking for a fun Halloween craft that won’t break the bank? This paper plate spider tutorial is the perfect way to get creative with your kiddos this holiday season!

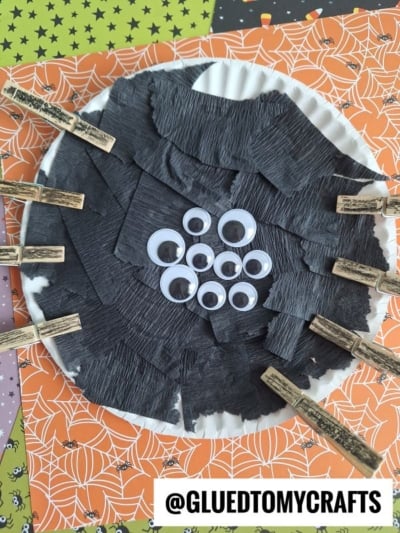
Paper Plate Black Spider Craft
Welcome friends! I’m so ecstatic that you landed on today’s Paper Plate Halloween Spider kids craft idea!!! It’s going to be simple fun for Halloween but it’s not scary at all! Promise!
If you haven’t noticed – I’ve been on a roll lately sharing kid friendly Halloween craft ideas on the blog. You guys seems to be enjoying it, so I’ll continue what I’m doing 😉
Although I’m normally not a spider person {I tend to jump on chairs & scream like a little girl} we recently made a Paper Plate Spider Kids Craft in honor of the upcoming “spook-tacular” holiday.
Lucky for me {and him} this paper plate creature is pretty cute and not frightening at all. And like always – it has simple supplies, directions and makes for great decorations too!
You can find all the details below! Happy crafting my friends and don’t forget to share pictures of your paper plate and tissue paper spider creations on our Facebook page! #gluedtomycrafts
RELATED: Popsicle Stick Spider and Build A Silly Monster Face

Get creative this Halloween with this easy and fun paper plate spider craft idea!
Craft Supplies:
- Large Paper Plate
- Black Tissue Paper
- Black Craft Paint
- Foam Paint Brush
- Wiggles Eyes
- 8 Wooden Clothespins
- School Glue
- Craft Scissors
- White Cardstock Paper
Directions:
- First cut your tissue paper into small squares.
- Put a good amount of glue all over the paper plate.
- Have your child place the tissue paper squares on top of the glue, until the plate is completely covered.
- Once covered, add several wiggle eyes to the center of the plate.
- Next cut triangles out of white cardstock and glue those on for the fangs of the spider.
- Now grab your clothespins and painting supplies.
- Have your child paint each wooden clothespin completely black.
- Set aside to let them dry completely.
- To finish off your spider, add the clothespins along the edge of the paper plate.
- Display proudly for all to see!
- Don’t forget to share pictures of the spider creation with us on our Facebook wall!
RELATED —> Pumpkin Cupcake

AFFILIATE LINK – PAIR OUR CRAFT IDEA WITH THE BOOK “HAPPY HALLOWEEN FROM THE VERY BUSY SPIDER”
Here are some other fun and rather simple Halloween craft ideas on Glued To My Crafts right now:
- Paper Plate Jack O’ Lantern
- Egg Carton Spider
- Terra Cotta Pot Pumpkin
- Paper Plate Spider Web
- Jack-O-Lantern Teddy Bear
- Watercolor Spider Web
- Cupcake Liner Spider
- Paper Straw Spider
- Popsicle Stick Frankenstein

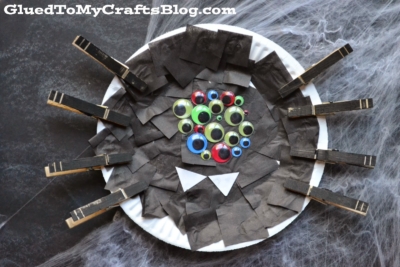
Paper Plate Halloween Spider Craft
Here’s your checklist of supplies to bring this craft to life:
- 1 Large Paper Plate
- Tissue Paper black
- Craft Paint black
- Cardstock Paper white
- 8 Wooden Clothespins
- Googly Eyes
Prepare your creative haven by laying down a protective cover before the crafting magic begins!
Directions:
- First cut your tissue paper into small squares.Tissue Paper
- Put a good amount of glue all over the paper plate.1 Large Paper Plate
- Have your child place the tissue paper squares on top of the glue, until the plate is completely covered.
- Once covered, add several wiggle eyes to the center of the plate.Googly Eyes
- Next cut triangles out of white cardstock and glue those on for the fangs of the spider.Cardstock Paper
- Now grab your clothespins and painting supplies.8 Wooden Clothespins
- Have your child paint each wooden clothespin completely black.Craft Paint
- Set aside to let them dry completely.
- To finish off your spider, add the clothespins along the edge of the paper plate.
- Display proudly for all to see!

Grab our favorite books via our Amazon affiliate link! In our Amazon storefront you will find books, toys and craft supplies we absolutely love using for our Glued To My Crafts tutorials!