
Our Q-Tip Painted Lavender craft tutorial is super simple and can become an artwork piece that can be displayed as instant spring decor!

Lavender Flower Craft Idea For Kids
As moms, teachers, educators and crafters, we’re always looking for fresh ideas to engage our children in fun activities. This dotted lavender plant craft is perfect for those moments when you need something creative to do with your little ones!
Not only will they have fun making it, but their flower creation will look stunning once complete! Best of all? All you need are supplies that are already around the house: Q-tips. cardstock paper and some craft paint!
Below you will find a free provided printable, as well as detailed instructions on how you can recreate your very own q-tip painted purple lavender plant together, for a memorable bonding experience that produces sweet results. Let’s begin crafting!
RELATED —> Cherry Blossom Tree Branch
This easy kids craft is perfect for spring! Learn how to make a lavender plant on paper using q-tips and craft paint!
Craft Supplies:
- White Cardstock Paper
- Lavender Printable – on our landing page
- Q-Tip
- Small Paper Plate
- Purple Craft Paint
- Brown Cardstock Paper
- Scissors
- Glue Stick
- Small Craft Bows
Directions:
- First things first – download and print the provided file in the supply list above. You only need ONE print per flower craft.
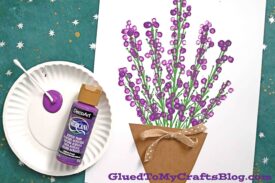
- Now grab your purple craft paint and squirt it on the paper plate.
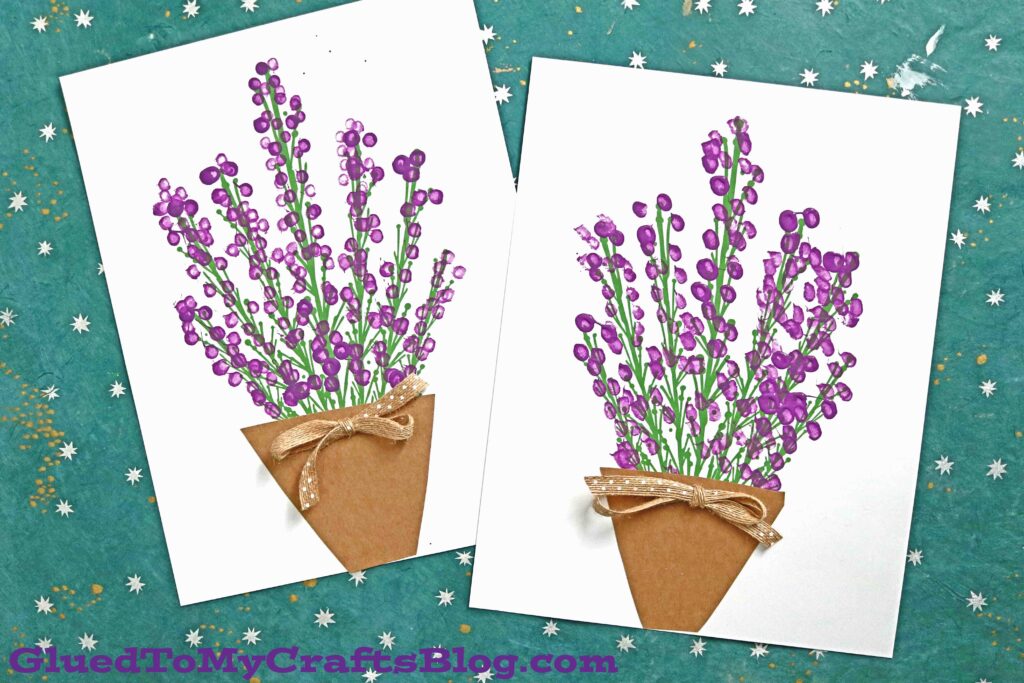
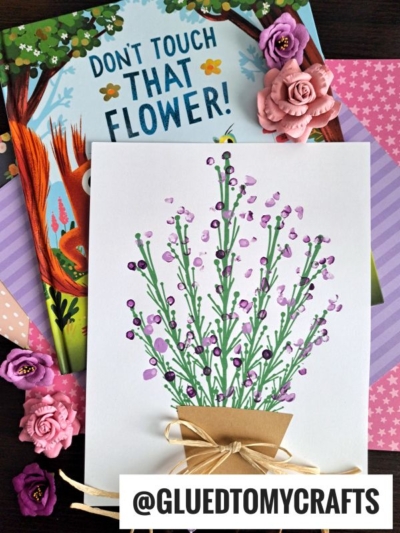
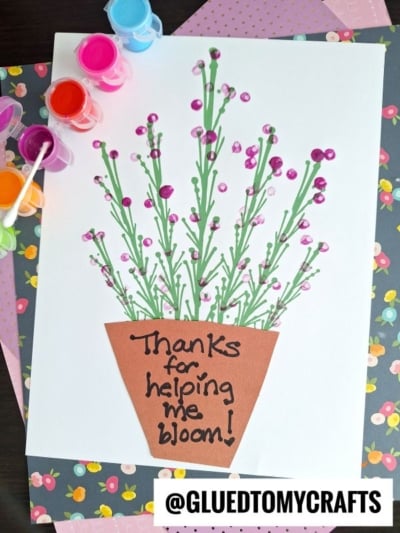
- Take a cotton swab, dip it into the paint, then onto the greenery in the printable, to create little flower buds ALL over the stems. Repeat until your lavender plant is nice and full with purple flowers ALL over.
- Now grab your choice of colored cardstock and scissors. I used a kraft/tan colored paper for mine.
- Cut out a simple flower pot shape, to hold your lavender flowers in. This can be a square, rectangle or even a trapezoid shape.
- Next grab your glue stick and glue the “pot” cutout to the bottom of your printable with the greenery.
- To finish off the Q-Tip Painted Lavender Flower craft – add other embellishments you see fit {like a decorative bow on the flower pot.}
- When done crafting, set aside to let it dry completely, before displaying proudly!!!
Customize It:
- Instead of using cotton swabs for this craft, you can also use small paint brushes, bubble wrap or even your fingers to create the purple buds {similar to our thumbprint dandelion tutorial that went viral a few years back!} The choice is yours!
- I also encourage you to think outside the box and change up the colors of your painted lavender print. From the color of the paper that you print the file on, to adding different shades of purple on your q-tips, I hope you are inspired to run with this idea & make it your own.
- Don’t have a printer? No worries my friends! Just hand-draw some greenery on white cardstock instead. Maybe even get out the ruler out to make sure the lines are straight.
- And one last note – you can easily add some wording around the finished q-tip print lavender design to turn it into a card. Maybe for the upcoming Mother’s Day holiday – hint hint!
RELATED —> Paint Splat Tulip
At Glued To My Crafts, we are FULL of awesome tutorials for ALL skill levels and ages to recreate!
So before you leave, come check out our popular Handprint Cherry Blossom Tree, In The Sea Card and Popsicle Stick Food Truck craft posts. All three are super unique to our website and sure to impress the crafty fingers that recreate them!
FOLLOW US ON PINTEREST SO YOU NEVER MISS A NEW TUTORIAL FROM US!

Q-Tip Painted Lavender Plant Craft
Here’s your checklist of supplies to bring this craft to life:
- Craft Paint purple
- Cardstock Paper brown and white
- Lavender Printable - on our landing page
- Embellishments
Prepare your creative haven by laying down a protective cover before the crafting magic begins!
Directions:
- First print out our provided printable, in color, on a single sheet of white cardstock paper. You only need one print per craft.
- Now grab your purple craft paint and squirt it on the paper plate.
- Take a cotton swab, dip it into the paint, then onto the greenery in the printable, to create little flower buds ALL over the stems. Repeat until your lavender plant is nice and full with purple flowers ALL over.
- Now grab your choice of colored cardstock and scissors. I used a kraft/tan colored paper for mine.
- Cut out a simple "flower pot" shape, to hold your lavender flowers in. This can be a square, rectangle or even a trapezoid shape.
- Next grab your glue stick and glue the "pot" cutout to the bottom of your printable with the greenery.
- To finish off the Q-Tip Painted Lavender Flower craft – add other embellishments you see fit {like a decorative bow on the flower pot.}
- When done crafting, set aside to let it dry completely, before displaying proudly!!!


NEED MORE HELP DOWNLOADING OUR FREE PRINTABLES? PLEASE REFER TO OUR FAQ PAGE