
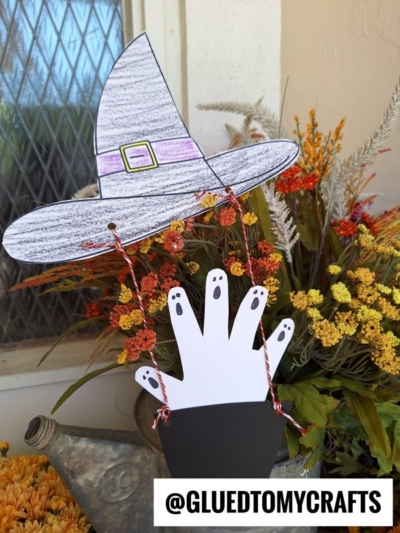
Our “not so spooky” ghost friends have found a NEW way to ride in style on Halloween night, with our latest Paper Witch Hat Hot Air Balloon kid craft idea!
Keep scrolling for the ALL the details, so you can recreate the “hot air boo-loon” magic with your child today!

Halloween Hot Air Balloon Craft
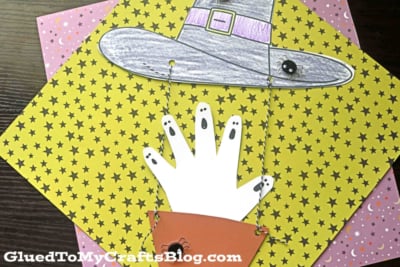
Our Witch Inspired Hot Air Balloon craft tutorial is just a matter of doing some cutting and assembling to bring it to life! My favorite part is probably the handprint ghosts that are hitching a ride inside!
So what are you waiting for?! Make the most of the season, by checking out {and recreating} our effortless Halloween craft tutorial {and free printable!} that can be found below.
Happy crafting, my dear friends! Keep reading to check out our how-to instructions for making this ghost riding hot air balloon craft today. Make sure you also scroll all the way to the bottom of this post for even more Halloween crafts for kids to make at home this season!
Don’t forget to snap a few pictures to share with us on our Facebook page! I can’t wait to see the witch hat themed hot air balloons you design for your kiddos! #gluedtomycrafts
RELATED: Paper Witch House and Halloween Truck

Get crafty this fall with this super fun and easy witch hat hot air BOO-loon tutorial! You won’t believe how easy it is to make and will love the final results!
Craft Supplies:
- Hat Printable – on our landing page
- Coloring Pencils, Crayons or Markers
- Scissors
- Brown Cardstock Paper
- White Cardstock Paper
- Hole Punch
- School Glue or Glue Stick
- Yarn or Twine
- Halloween stickers
Directions:
- First things first – grab your choice of coloring utensil and color in the hat design in the printable, however you like.
- When done coloring, go ahead and grab your scissors & the decorated printable.
- Trim out the witch hat design and discard excess paper.
- Now grab another sheet of white cardstock paper.
- Trace and trim out a basic handprint shape for your ghosts.
- Use a marker to draw on faces on each finger tip.
- Next up – grab the brown cardstock paper and cut out a large basket shape for the ghosts to ride in.
- Go ahead and glue the white handprint cutout to the back of it.
- We are heading towards the final steps! Now take the hole punch and punch two holes in the witch hat cutout {I made two marks in the printable} as well as the basket cutout you just made, for where the strings will go.
- Now cut TWO long strands of string {about 6 inches, give or take} making sure they are both the same length.
- Go ahead and thread your string through the holes you made in all your pieces, to tie together the hot air balloon {just make sure not to pull too tight or your paper pieces might rip}
- Cut off excess string if need be.
- Go ahead and add any other embellishments you see fit.
- Then display your witch hat hot air balloon piece proudly for all to see!
- Don’t forget to snap a few pictures to share with us! #gluedtomycrafts
RELATED —> Paper Plate Cauldron

Get ready to wow your child this #cutenotscary Halloween season with the help of your new friends at Glued To My Crafts!
Keep the crafty fun going and check out these past impressive blog posts from us, listed below and recreate them with your child today!
Pom Pom Stamped Monster Wreath
Paper Halloween Witch Keepsake

Witch Hat Hot Air Balloon Craft Idea
Here’s your checklist of supplies to bring this craft to life:
Prepare your creative haven by laying down a protective cover before the crafting magic begins!
Directions:
- First things first - grab your choice of coloring utensil and color in the witch hat design in the printable completely orange.
- When done coloring, go ahead and grab your scissors & the decorated printable.
- Trim out the hat design and discard excess paper.
- Now grab another sheet of white cardstock paper.
- Trace and trim out a basic handprint shape for your ghosts.
- Use a marker to draw on faces on each finger tip.
- Next up - grab the brown cardstock paper and cut out a large basket shape for the ghosts to ride in.
- Go ahead and glue the white handprint cutout to the back of it.
- We are heading towards the final steps! Now take the hole punch and punch two holes in the witch hat cutout {I made two marks in the printable} as well as the basket cutout you just made, for where the strings will go.
- Now cut TWO long strands of string {about 6 inches, give or take} making sure they are both the same length.
- Go ahead and thread your string through the holes you made in all your pieces, to tie together the hot air balloon {just make sure not to pull too tight or your paper pieces might rip}
- Cut off excess string if need be.
- Go ahead and add any other embellishments you see fit.
- Then display your haunted hot air balloon piece proudly for all to see!


NEED MORE HELP DOWNLOADING OUR FREE PRINTABLES? PLEASE REFER TO OUR FAQ PAGE