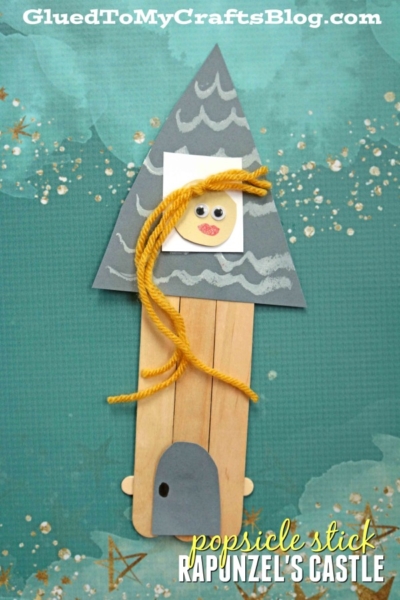
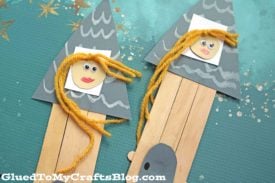
Create a magical Popsicle Stick Rapunzel's Castle with this fun and engaging craft! Perfect for kids, using simple materials to spark imagination and joy.


Does your little one dream of fairy tales and magical kingdoms? Creating a Rapunzel castle using popsicle sticks combines creativity, fine motor skill development, and storytelling into one enchanting craft project. This hands-on activity transforms simple wooden sticks into a towering castle complete with Rapunzel’s famous tower.
Crafting with popsicle sticks offers children the perfect opportunity to explore their imagination while developing essential skills. Your kids will love building their own fairy tale castle where Rapunzel can let down her golden hair, and you’ll appreciate how this affordable craft keeps them engaged for hours.

If you’re looking for a fun and easy craft idea that celebrates your favorite fairy story,” look no further than this popsicle stick fairy tale castle tutorial!
Craft Supplies:
Gathering your materials is the first step toward creating castle magic. Most of these items are likely already in your craft supplies or easily found at any dollar store.
- Jumbo Popsicle Sticks – 3 per craft
- Mini Popsicle Sticks – 2 per craft
- School Glue
- Craft Paint
- Paint Brushes
- Cardstock Paper
- Scissors
- Markers
- Small Wiggle Eyes
- Yellow Craft Yarn
Directions:
- First things first – assemble the base of the popsicle stick castle. You will want to lay your three jumbo popsicle sticks next to each other and secure them with glue, with the two mini popsicle sticks across, just like a small fence.
- Set aside to let it dry.
- Next up – the cardstock paper. Cut out a triangle top for the castle, as well as a large window, door and circular face for Rapunzel.
- Once the popsicle stick shape is dry enough, go ahead and glue your cardstock pieces in place on the wood shape.
- Next add the wiggle eyes to the cardstock Rapunzel head, so she can see.
- Go ahead and also draw on some facial embellishments with the markers.
- Finally – take about three long yellow strands of tie them together for Rapunzel’s golden hair.
- Glue it to your castle piece to finish it off!
- Set it all aside to let it dry completely.
- Then display proudly for ALL to see!!!
RELATED —> Popsicle Stick Tin Can Man
We have a few more “princess” themed kids craft ideas on Glued To My Crafts so please don’t click away just yet!
Be sure to check out our Paper Plate Ballerina, Handprint Princess Dress and Paper Plate Castle DIY posts for more inspiration!
All of which would pair nicely with today’s Popsicle Stick Rapunzel’s Castle tutorial – hint hint!

Popsicle Stick Rapunzel's Castle Craft Idea
Create a magical Popsicle Stick Rapunzel's Castle with this fun and engaging craft! Perfect for kids, using simple materials to spark imagination and joy.
Here’s your checklist of supplies to bring this craft to life:
Prepare your creative haven by laying down a protective cover before the crafting magic begins!
Directions:
- First things first - assemble the base of the popsicle stick castle. You will want to lay your three jumbo popsicle sticks next to each other and secure them with glue, with the two mini popsicle sticks across, just like a small fence.
- Set aside to let it dry.
- Next up - the cardstock paper. Cut out a triangle top for the castle, as well as a large window, door and circular face for Rapunzel.
- Once the popsicle stick shape is dry enough, go ahead and glue your cardstock pieces in place on the wood shape.
- Next add the wiggle eyes to the cardstock Rapunzel head, so she can see.
- Go ahead and also draw on some facial embellishments with the markers.
- Finally - take about three long yellow strands of tie them together for Rapunzel's golden hair.
- Glue it to your castle piece to finish it off!
- Set it all aside to let it dry completely.
- Then display proudly for ALL to see!!!

CLICK HERE TO PRINT THE DIRECTIONS FOR THIS CRAFT
If you've enjoyed our content or have any thoughts to share, we'd love to hear from you! Mention @gluedtomycrafts or tag #gluedtomycrafts on Instagram!