
A creative “pretend play” fish bowl idea for kids!
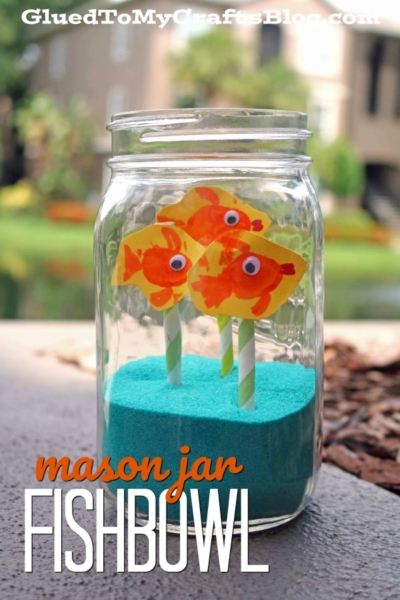
Fish Bowl Made From A Mason Jar
I’m always brainstorming NEW and creative tutorials to present to you guys on Glued To My Crafts. My brain is ALWAYS spinning for that “next viral idea.”
So on one of my recent weekly trips to Michaels {where I gather most of my ideas that you see here} I came up with my latest Glass Jar Fish Bowl kid craft idea, that has thumbprint fish “floating” in the inside.
And a quick side story – this is the only pet “fish” we are ever going to have in our home…. especially since we have had “carnival fish” twice now on separate occasions and BOTH TIMES, sadly, the fish did not survive.
I can safely say, if you make this mason jar fishbowl with your child today, you won’t have to worry about cleanup or feedings. Perhaps you are like me and pretty content with that type of fish in your home! 😉
Without further ado – on to the DIY! Find the full tutorial below! Happy crafting, my friends!!! #gluedtomycrafts
FOLLOW US ON FACEBOOK SO YOU NEVER MISS A NEW TUTORIAL FROM US!

Let your little ones get creative with this fun Mason Jar w/Fingerprint Fish Bowl craft project! Get their little hands involved for truly one-of-a-kind thumbprint fish designs.
Craft Supplies:
- Large Mason Jar
- Decorative Sand
- Styrofoam Block
- Cardstock Paper
- Craft Paint
- Small Paper Plate
- Baby Wipes
- Extra Small Wiggle Eyes
- Markers
- Craft Scissors
- Hot Glue Gun
- Hot Glue Sticks
- Paper Straws
RELATED —> Paper Plate Fish
Directions:
- First you will want to make your thumbprint fish. Two to four fish is a good amount for one large mason jar, depending on the size of your thumbprints.
- Go ahead and squirt some paint on a paper plate and dip your thumb in it. Now take your paint covered thumb and press it on a single sheet of cardstock, multiple times, leaving space between each. Use the baby wipes to remove excess paint. Set aside your piece of cardstock to let it dry a bit.
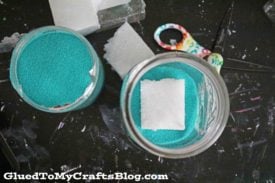
- Now grab your mason jar, colored sand and styrofoam block. Trim down the styrofoam so it will fit inside the jar. It doesn’t need to be perfect, in fact I just used my scissors to “saw” it down.
- Place your block inside the jar and cover it & around with the decorative sand until completely covered. Set aside.
- Now back to the fish. Glue on a small wiggle eye and draw on some fish embellishments, to each, with the markers.
- Trim out each thumbprint fish with scissors.
- Get the glue gun hot and ready.
- Cut your paper straws down in size, so they fit inside the mason jar.
- Hot glue a thumbprint fish to each paper straw.
- Finally – and carefully – press your finished paper straws inside the mason jar/inside the styrofoam so they stand nicely. Adjust as needed.
- Then display your mason jar fish bowl as is or add other embellishments {like small seashells or sequins} to the bottom for added flair!
RELATED —> Thumbprint Dandelion

We also have a paper plate fish bowl craft that is pretty popular on Glued To My Crafts! Be sure to check it out and pair it along with today’s fish bowl mason jar tutorial – hint hint!

Mason Jar Fish Bowl w/Thumbprint Fish Craft Idea
Here’s your checklist of supplies to bring this craft to life:
Prepare your creative haven by laying down a protective cover before the crafting magic begins!
Directions:
- First you will want to make your thumbprint fish. Two to four fish is a good amount for one large mason jar, depending on the size of your thumbprints.
- Go ahead and squirt some paint on a paper plate and dip your thumb in it.
- Now take your paint covered thumb and press it on a single sheet of cardstock, multiple times, leaving space between each.
- Use the baby wipes to remove excess paint. Set aside your piece of cardstock to let it dry a bit.
- Now grab your mason jar, colored sand and styrofoam block.
- Trim down the styrofoam so it will fit inside the jar. It doesn't need to be perfect, in fact I just used my scissors to "saw" it down.
- Place your block inside the jar and cover it & around with the decorative sand until completely covered. Set aside.

- Now back to the fish. Glue on a small wiggle eye and draw on some fish embellishments, to each, with the markers.
- Trim out each thumbprint fish with scissors.
- Get the glue gun hot and ready.
- Cut your paper straws down in size, so they fit inside the mason jar.
- Hot glue a thumbprint fish to each paper straw.
- Finally - and carefully - press your finished paper straws inside the mason jar/inside the styrofoam so they stand nicely. Adjust as needed.
- Then display your mason jar fish bowl as is or add other embellishments {like small seashells or sequins} to the bottom for added flair!

CLICK HERE TO PRINT THE DIRECTIONS FOR THIS CRAFT