Get crafty with the kiddos this winter and make this fun paper plate tree craft! Who knows, maybe they'll even be inspired to create a whole forest!

Keep the kids entertained over winter break with this fun and festive paper plate winter tree craft idea! Get creative and make your own snowy forest!
Bring the beauty of a winter wonderland indoors with this charming Paper Plate Winter Tree Craft! Perfect for kids of all ages, this simple and creative project turns ordinary paper plates into magical snowy trees.
With just a few basic supplies and a sprinkle of imagination, little crafters can create their own frosty forest, complete with snow, glitter, and all the cozy winter vibes.
Whether it’s for a classroom activity, a snowy day at home, or holiday decorating, this craft is a fun way to celebrate the season. Let’s grab our supplies and get started on this wintery adventure! ❄️🌲✨
Get creative with your kids this winter and make a darling snow-covered tree out of paper plates & cotton balls! This festive craft is a great way to celebrate the season together.
Craft Supplies:
- Large Paper Plate – one per craft
- Blue Craft Paint
- Paint Brush
- Brown Cardstock Paper
- Scissors
- Pencil
- Stapler
- White Cotton Balls – six to eight per craft
- White School Glue
- Mini Red Cupcake Liner – one per craft
- Embellishments For Bird
- optional – Loose Craft Glitter
Directions:
- First things first – painting the paper plate. Squirt some blue paint in the middle of the paper plate and use the paint brush to move it around until completely covered.
- The next step is completely optional but if you choose to, sprinkle some loose craft glitter on top of the wet paint.
- When done painting, set aside the paper plate to allow it to dry completely.
- To make the trunk of the tree, have your child lay one hand in the center of the brown paper.
- Using a pencil, trace your child’s hand and part of their arm.
- Cut out the traced design with the scissors.
- Go ahead and staple that piece to the blue painted paper plate to make the tree trunk for the craft.
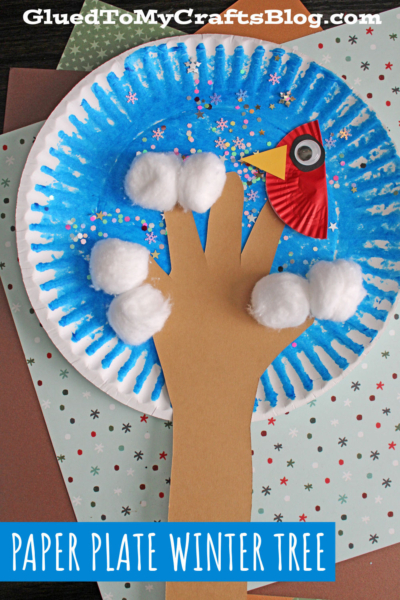
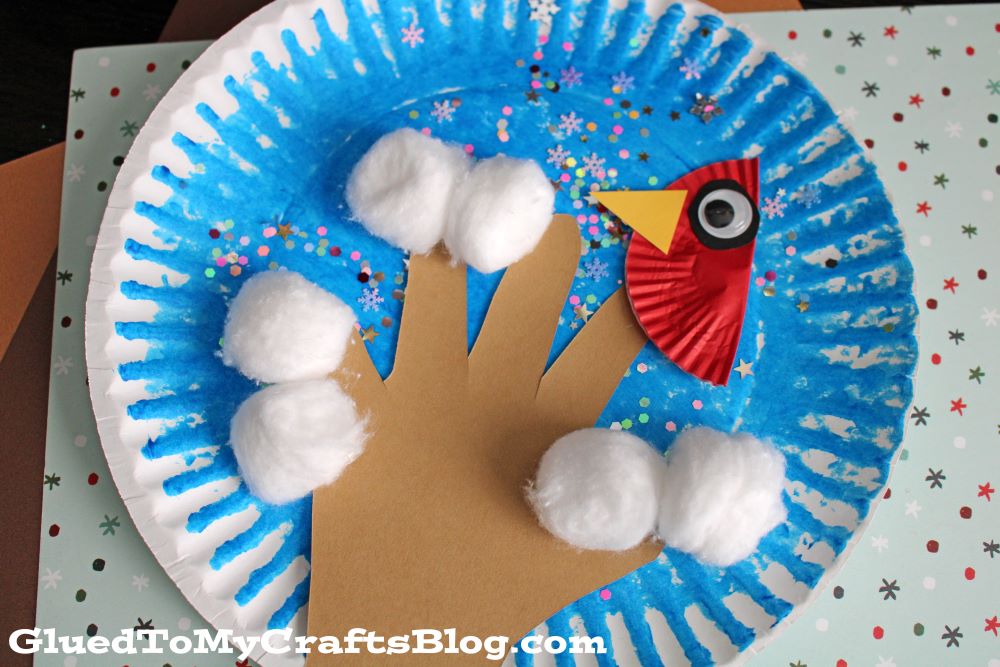
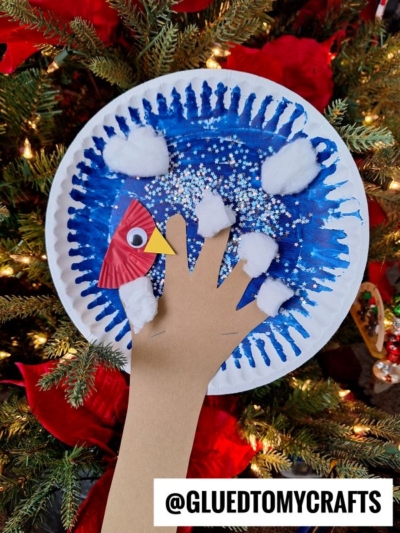
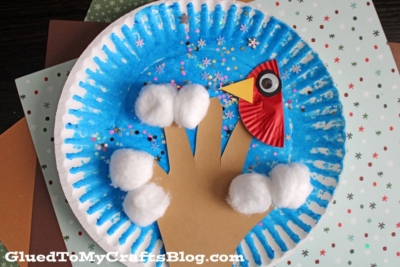
- To finish off the Paper Plate Snowy Winter Tree – add the cotton ball snow, as well as a cardinal bird made out of the mini cupcake liner.
- And that’s it! Now display it proudly for ALL to see!
RELATED —> Handprint Penguins


AFFILIATE LINK – PAIR OUR CRAFT IDEA WITH THIS BOOK RECOMMENDATION
Now wasn’t that super easy? So whether buried in drifts or living in a mild temperature climate – this “paper plate snowy tree” craft idea is a MUST DO this winter season! We hope it inspired you and your child to recreate!
RELATED —> Paper Plate Winter Wonderland

Paper Plate Winter Tree Craft Idea For Kids
Get crafty with the kiddos this winter and make this fun paper plate tree craft! Who knows, maybe they'll even be inspired to create a whole forest!
Here’s your checklist of supplies to bring this craft to life:
- 1 Large Paper Plate
- Cardstock Paper brown
- Craft Paint
- White Cotton Balls
- Mini Cupcake Liners red
- Embellishments
- School Glue
Prepare your creative haven by laying down a protective cover before the crafting magic begins!
Directions:
- First things first - painting the paper plate. Squirt some blue paint in the middle of the paper plate and use the paint brush to move it around until completely covered.
- The next step is completely optional but if you choose to, sprinkle some loose craft glitter on top of the wet paint.
- When done painting, set aside the paper plate to allow it to dry completely.
- To make the trunk of the tree, have your child lay one hand in the center of the brown paper.
- Using a pencil, trace your child’s hand and part of their arm.
- Cut out the traced design with the scissors.
- Go ahead and staple that piece to the blue painted paper plate to make the tree trunk for the craft.
- To finish off the Paper Plate Winter Tree - add the cotton ball snow, as well as a cardinal bird made out of the mini cupcake liner.
- And that's it! Now display it proudly for ALL to see!

If you've enjoyed our content or have any thoughts to share, we'd love to hear from you! Mention @gluedtomycrafts or tag #gluedtomycrafts on Instagram!