
There is NOTHING scary about today’s tutorial. In fact – whether you like a little silly or spooky mixed into your fall plans, you and your child are going to love this wooden spoon scarecrow craft idea!

Wooden Spoon Scarecrow – Kids Craft Idea For Fall
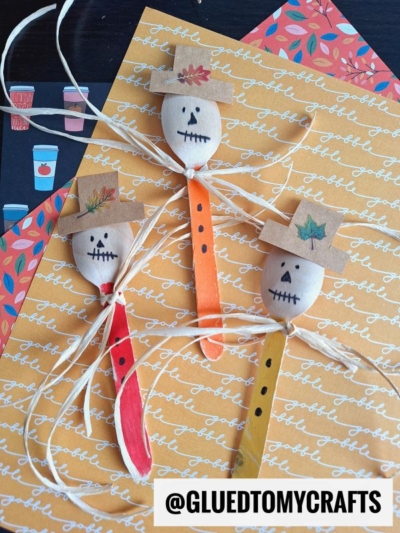
Hi friends! Today we are going to show you how to make customizable scarecrow puppets made from wooden spoons, cardstock paper scraps and Sharpie markers.
It’s FALL FUN for everyone and only involves a few basic materials that you can mix & match to create the perfect scarecrow friend. It’s just a matter of pulling out the materials, mapping out the design in your head and making it happen! Even better, this DIY can be made in 30 minutes or less, so that means less stress for you as well!
I promise – it’s a cinch to make these scarecrow friends! If you can cut and color, you can dress up some basic wooden spoons and have a fun scarecrow puppet show in the living room, within minutes! Plus everyone can make their scarecrow puppet friend slightly different/however they like because there is no right or wrong way to do it! Just think of all the colors and random materials you might have in your craft stash right now, that could be used for this fun craft activity! Just like building a REAL strawman in the corn field, the possibilities are endless!
So on that note, don’t delay – let’s make it happen! I’ll show you below how easy it really is to accomplish. You don’t even have to be an artist to complete this fall themed wood spoon straw man tutorial. Keep scrolling and be sure to snap a few pictures afterwards to share with us on our Facebook page wall! I can’t wait to see how you make your scarecrow stand out from the crowd!
Happy crafting, my dear friends! #gluedtomycrafts
RELATED —> Paper Plate Scarecrow

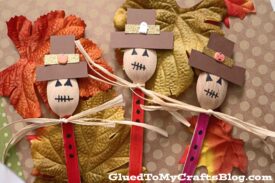
Get creative with your kids and their imaginations by making this cute Wooden Spoon Scarecrow Puppet! It’s a great activity to do together and will have them entertained for hours!
Craft Supplies:
- Wooden Craft Spoons
- Sharpie Markers
- Cardstock Paper
- Craft Scissors
- School Glue
- Raffia Ribbon
- Embellishments
Directions:
- First color in the “body” {the long part} of the wooden craft spoon whatever color you like. This will be the clothing of the scarecrow.
- Go ahead and also draw on three small buttons {in a line} to tie the theme together. Think of a long button down shirt, while you are doing this step.
- Next up – the scarecrow’s face. Using a different colored Sharpie marker {preferably one with a very thin tip} draw on some triangle eyes and a stitched mouth to the larger part of the spoon. Make sure not to press the marker down too hard on the spoon, so it won’t make the design bleed.
- Now grab your choice of colored cardstock.
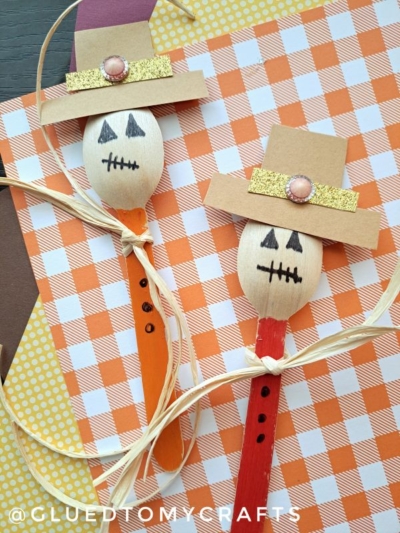
- Cut out a small hat for the scarecrow puppet.
- Go ahead and use school glue to secure it to the head of the craft. You don’t want it to cover the eyes though.
- To finish off the Wooden Spoon Scarecrow – cut off a few strands of raffia ribbon and wrap/tie them around the neck of the decorated spoon. You could also make it a little lower on the decorated spoon for arms.
- If desired, when you are done with the above steps, you can also add a few custom embellishments on the hat and body of the scarecrow. Small pumpkin stickers or glitter glue would be perfect to make it your own!
- Once done decorating the spoon, be sure to set aside to let it dry completely before displaying/playing with proudly!!!
- Don’t forget that you can tag us on Instagram when you complete any of our tutorials! #gluedtomycrafts
Our Favorite Fall Books:
Here are some recommended books that beautifully complement our craft idea. You can conveniently purchase them through our affiliate links on Amazon.
- Goodbye Summer, Hello Autumn by Kenard Pak
- The Scarecrow: A Fall Book for Kids by Beth Ferry
- It’s Fall! by Renée Kurilla
- Otis and the Scarecrow by Loren Long
- There Was an Old Lady Who Swallowed Some Leaves! by Lucille Colandro
- Halloween in the Orchard by Phyllis Alsdurf
- Pete the Cat Falling for Autumn: A Fall Book for Kids by James Dean
RELATED —> Silly Leaf Hair Craft
WE WANT TO BE YOUR ONE STOP SHOP FOR KIDS CRAFT TUTORIALS!
So before you leave our website, come check out the super popular Paper Plate Leaves, Chalk Art Fall Gnome and Handprint Raccoon craft tutorials! All three of which are super easy like today’s idea and pair nicely together!
Also – one last note – we always LOVE talking crafts with our lovely readers. Come join our private Facebook group where we chit chat, share and laugh together! Everyone is welcomed so come join the fun!!! #gluedtomycrafts

Wooden Spoon Scarecrow Puppet Craft Idea For Fall
Here’s your checklist of supplies to bring this craft to life:
- 1 Wooden Craft Spoon
- Cardstock Paper
- Embellishments
- Raffia Ribbon
Prepare your creative haven by laying down a protective cover before the crafting magic begins!
Directions:
- First color in the "body" {the long part} of the wooden craft spoon whatever color you like. This will be the clothing of the scarecrow.
- Go ahead and also draw on three small buttons {in a line} to tie the theme together. Think of a long button down shirt, while you are doing this step.
- Next up - the scarecrow's face. Using a different colored Sharpie marker {preferably one with a very thin tip} draw on some triangle eyes and a stitched mouth to the larger part of the spoon. Make sure not to press the marker down too hard on the spoon, so it won't make the design bleed.
- Now grab your choice of colored cardstock.
- Cut out a small hat for the scarecrow puppet.
- Go ahead and use school glue to secure it to the head of the craft. You don't want it to cover the eyes though.
- To finish off the Wooden Spoon Scarecrow - cut off a few strands of raffia ribbon and wrap/tie them around the neck of the decorated spoon. You could also make it a little lower on the decorated spoon for arms.
- If desired, when you are done with the above steps, you can also add a few custom embellishments on the hat and body of the scarecrow. Small pumpkin stickers or glitter glue would be perfect to make it your own!
- Once done decorating the spoon, be sure to set aside to let it dry completely before displaying/playing with proudly!!!

CLICK HERE TO PRINT THE DIRECTIONS FOR THIS CRAFT