Get creative this Halloween and make your own DIY gnomes with popsicle sticks! Let the kids bring their imagination to life and have some spooky crafting fun.

Are you looking for a fun and easy Halloween kids craft? Learn how to make spooky popsicle stick Halloween gnomes with this step-by-step guide from us!

Halloween is just around the corner, and what better way to celebrate than with a family-friendly craft that adds a touch of spooky charm to your home? Enter the Popsicle Stick Halloween Gnome craft, a creative and simple activity that’s perfect for kids and parents alike.
This easy project combines whimsical gnome designs with Halloween-inspired colors, making it a fantastic addition to your festive decorations.

Have some spooky fun crafting this Halloween gnome with your kids! It’s the perfect activity to keep them entertained and get them excited for the holiday. Grab a few popsicle sticks, some paint, and let their imaginations run wild.
Craft Supplies:
Before beginning your gnome adventure, make sure you have the following supplies ready. These items are commonly found at home or can be purchased for a small cost at any craft store.
- Jumbo Wood Sticks – 3 per craft
- School Glue
- Craft Paint
- Small Paper Plate
- Foam Paint Brush
- Scissors
- Halloween Scrapbook Paper
- Cardstock Paper
- Glitter Cardstock Paper
- Embellishments
Directions:
Now, onto the craft! Follow these simple steps to create an adorable Halloween gnome.
- Let the fun begin! Start by setting the stage for spooky creativity—clear off your craft table and lay out all your supplies.
- Take three popsicle sticks (you’ll need three per Halloween gnome) and grab your craft paint supplies.
- Squeeze a bit of your chosen paint color onto a paper plate.
- Using a paintbrush, completely paint all three popsicle sticks.
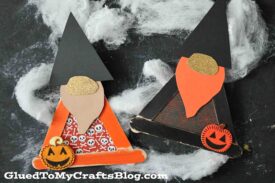
- Once painted, glue the sticks together in a triangle shape using school glue.
- Set your popsicle stick triangle aside and let it dry completely. Repeat for as many ghoulish gnomes as you’d like to create!
- While the triangles dry, grab your patterned scrapbook paper and scissors.
- Cut a triangular piece of scrapbook paper to serve as the gnome’s body, which will fit inside the popsicle stick frame.
- From the colored cardstock, cut out a long, flowing beard, a triangle hat, a glittery nose, and any other fun embellishments you can imagine.
- To assemble your Popsicle Stick Halloween Gnome, glue the paper triangle to the back of the popsicle stick frame for the body. Then, attach the beard, hat, nose, and other accents to the front of the frame using school glue.
- Enhance the spooky vibe with extra details like pumpkin or spider stickers, glitter, or other embellishments to give your gnome a festive flair.
- Once everything is in place, allow your gnome to dry completely before proudly displaying it.
- Don’t forget to share your creations with us on social media using #gluedtomycrafts—we’d love to see your spooky masterpieces!
RELATED —> Paper Plate Witch House
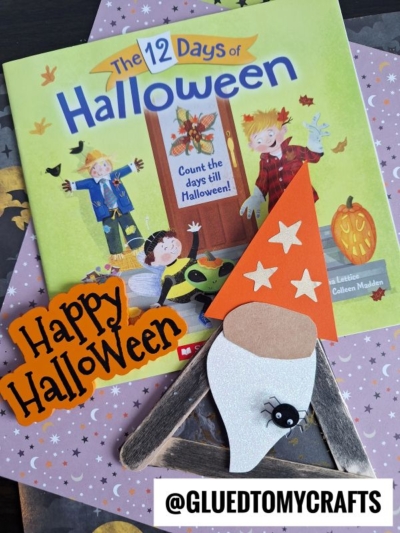
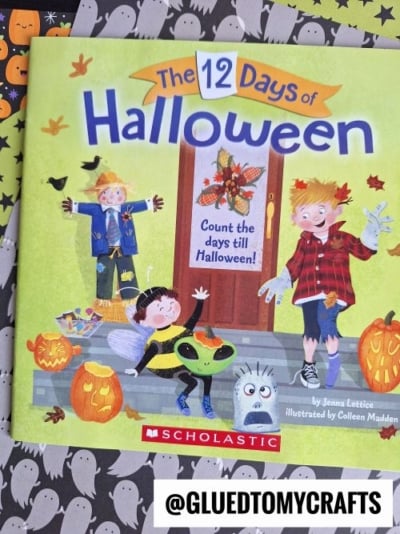
AFFILIATE LINK – PAIR OUR CRAFT IDEA WITH THIS BOOK RECOMMENDATION
We got ALL the fun, crafty stuff you love! If you are looking for even MORE easy Halloween themed kid craft ideas, from Glued To My Crafts, be sure to check out these fun posts listed below.
And “if” you decide to make our Wood Craft Stick Halloween Gnome kid craft, please share a picture on our Facebook page or tag us on Instagram with #gluedtomycrafts for us to see. We love seeing our inspiration come to life in your home!
Flying Witch Cat On Halloween Night
Jack-O-Lantern Scarecrow Puppet
Paper Black Cat and Candy Corn
Popsicle Stick Sanderson Sisters

Popsicle Stick Halloween Gnome Craft
Get creative this Halloween and make your own DIY gnomes with popsicle sticks! Let the kids bring their imagination to life and have some spooky crafting fun.
Here’s your checklist of supplies to bring this craft to life:
- 3 Jumbo Popsicle Sticks
- Craft Paint
- Cardstock Paper
- Scrapbook Paper
- Embellishments
- School Glue
Prepare your creative haven by laying down a protective cover before the crafting magic begins!
Directions:
- Let the fun begin! Start by setting the stage for spooky creativity—clear off your craft table and lay out all your supplies.
- Take three popsicle sticks (you’ll need three per Halloween gnome) and grab your craft paint supplies.
- Squeeze a bit of your chosen paint color onto a paper plate.
- Using a paintbrush, completely paint all three popsicle sticks.
- Once painted, glue the sticks together in a triangle shape using school glue.
- Set your popsicle stick triangle aside and let it dry completely. Repeat for as many ghoulish gnomes as you’d like to create!
- While the triangles dry, grab your patterned scrapbook paper and scissors.
- Cut a triangular piece of scrapbook paper to serve as the gnome’s body, which will fit inside the popsicle stick frame.
- From the colored cardstock, cut out a long, flowing beard, a triangle hat, a glittery nose, and any other fun embellishments you can imagine.
- To assemble your Popsicle Stick Halloween Gnome, glue the paper triangle to the back of the popsicle stick frame for the body. Then, attach the beard, hat, nose, and other accents to the front of the frame using school glue.
- Enhance the spooky vibe with extra details like pumpkin or spider stickers, glitter, or other embellishments to give your gnome a festive flair.
- Once everything is in place, allow your gnome to dry completely before proudly displaying it.
- Don’t forget to share your creations with us on social media using #gluedtomycrafts—we’d love to see your spooky masterpieces!

CLICK HERE TO PRINT THE DIRECTIONS FOR THIS CRAFT
If you've enjoyed our content or have any thoughts to share, we'd love to hear from you! Mention @gluedtomycrafts or tag #gluedtomycrafts on Instagram!