
Get crafty this Halloween! Inspire your little witches and wizards to make this fun and festive chalk art flying witch cat. It’s sure to be a spooky treat!

Cat On Halloween Night Craft
Today’s latest children’s paper craft tutorial from us, is a Halloween DIY for preschoolers to recreate during the month of October.
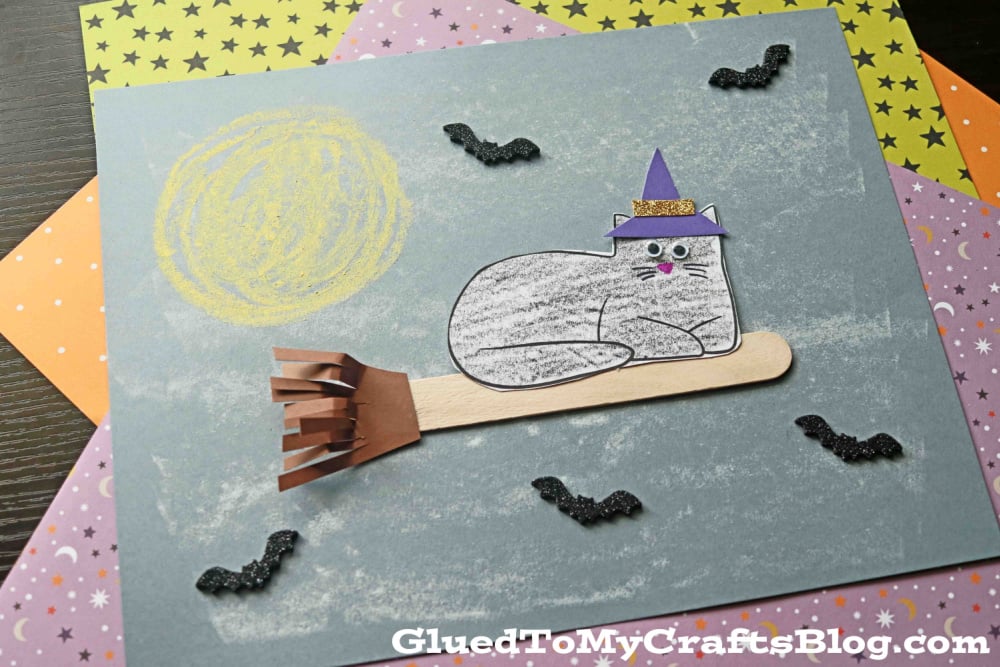
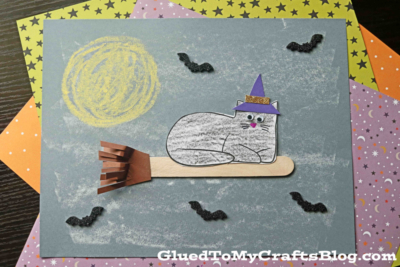
I’ve titled it Chalk Art Flying Black Cat In The Night and that’s exactly what she is doing. Our #cutenotscary feline friend, who happens to be wearing a witch hat, is riding on a broomstick, in the moonlight glow. Do you see my vision?
To recreate this Halloween night idea, all you need is some inexpensive supplies like sidewalk chalk, a jumbo popsicle stick, cardstock paper and the FREE cat printable I’ve included below! That’s it! You too can pull together our cat and moon craft idea, for cheap and within a few minutes! It’s a Halloween craft made simple and I just know you are going to love it as much as I do!
Quick to make, yet spooky enough to display! Find all the crafty details below for this paper chalk art craft that is perfect for boys and girls to recreate!
Happy crafting my friends! Don’t forget to share pictures of your flying witch cat in the night paper creations on our Facebook page! #gluedtomycrafts
RELATED POSTS: Flying Pumpkin Witch and Chalk Art Bat
Get ready for Halloween by craftin’ up some spooky fun! Kids will love this easy-to-make flying witch cat chalk art idea!
Craft Supplies:
- Halloween Printable – Landing Page
- White Cardstock Paper
- Gray Cardstock Paper
- Brown Cardstock Paper
- Coloring Utensils
- White Sidewalk Chalk
- Yellow Sidewalk Chalk
- Baby Wipes
- Jumbo Popsicle Stick
- Scissors
- School Glue
- Tiny Wiggle Eyes
- Embellishments
Directions:
- First things first – grab your single sheet of gray cardstock paper and the two pieces of sidewalk chalk.
- Rub your white chalk all over the paper to create a smoky, Halloween night sky.
- Follow that up by adding a medium sized circle moon, in one of the corners of the gray paper, with the yellow chalk.
- When done, use baby wipes to clean off the excess chalk from your fingers.
- Set aside the gray paper till later.
- Now grab your cat printable and choice of coloring utensils.
- Color in one of the four cat designs.
- When done, trim it out with the scissors and save the remaining paper to repeat the craft again.
- Next grab your jumbo popsicle stick and brown cardstock paper.
- Cut out the bottom broom portion from it.
- Follow that up by gluing it onto the jumbo popsicle stick.
- Go ahead and now glue that piece to the center of your decorated gray cardstock paper from earlier.
- To finish off the Chalk Art Cat On Halloween Night craft, add your paper cutout on top of the popsicle stick broom.
- Then add any other embellishments you see fit and display proudly for ALL to see!
- Don’t forget to share pictures of your paper creations with us on your various social media sites! #gluedtomycrafts
RELATED —> Paper Plate Cauldron

Don’t forget – at Glued To My Crafts the craft fun never has to end! Seriously – with over 250+ posts just for the Halloween season alone, we have you covered!
So on that note, please be sure to also check out our paper plate version of a black cat in the night! It has a free printable to get you started as well!
And “if” you decide to recreate our chalk art flying Halloween cat kids craft from today, please share a picture on our Facebook page or tag us on Instagram with #gluedtomycrafts for us to see. We love seeing our inspiration come to life!

Chalk Art Flying Witch Cat Craft
Here’s your checklist of supplies to bring this craft to life:
Prepare your creative haven by laying down a protective cover before the crafting magic begins!
Directions:
- First things first - grab your single sheet of gray cardstock paper and the two pieces of sidewalk chalk.Cardstock Paper
- Rub your white chalk all over the paper to create a smoky, Halloween night sky.
- Follow that up by adding a medium sized circle moon, in one of the corners of the gray paper, with the yellow chalk.
- When done, use baby wipes to clean off the excess chalk from your fingers.
- Set aside the gray paper till later.
- Now grab your cat printable and choice of coloring utensils.
- Color in one of the four cat designs.
- When done, trim it out with the scissors and save the remaining paper to repeat the craft again.
- Next grab your jumbo popsicle stick and brown cardstock paper.1 Jumbo Popsicle Stick
- Cut out the bottom broom portion from it.
- Follow that up by gluing it onto the jumbo popsicle stick.
- Go ahead and now glue that piece to the center of your decorated gray cardstock paper from earlier.
- To finish off the Flying Witch Cat On Halloween Night craft, add your cat cutout on top of the popsicle stick broom.
- Then add any other embellishments you see fit and display proudly for ALL to see!Embellishments


NEED MORE HELP DOWNLOADING OUR FREE PRINTABLES? PLEASE REFER TO OUR FAQ PAGE