Glued To My Crafts

Join thousands of others who have gotten GLUED to our craft tutorials!

  • Home
  • Privacy Policy
  • Craft Safety Guidelines
  • Seasonal Themes
    • New Years
    • Valentine’s Day
    • St. Patrick’s Day
    • Spring
    • Easter
    • Mother’s Day
    • Summer
    • Father’s Day
    • Patriotic
    • Halloween
    • Thanksgiving
    • Fall
    • Winter
    • Christmas
    • Snowmen
    • Story Time
  • About Us
  • Our Amazon Storefront
  • Monthly Themes
    • January Craft Ideas
    • February Craft Ideas
    • March Craft Ideas
    • April Craft Ideas
    • May Craft Ideas
    • June Craft Ideas
    • July Craft Ideas
    • August Craft Ideas
    • September Crafts
    • October Crafts
    • November Crafts
    • December Crafts

Popsicle Stick Taxi Car Craft

When engaging in craft activities, it is important for young children to have adult supervision at ALL times. It is also recommended to use supplies that are suitable for your child's age. Feel free to modify materials or steps to meet your specific requirements. Please refer to our safety guidelines for more information.

As an Amazon Associate I earn from qualifying purchases. This post may contain affiliate links. For more information, please see our disclosure policy.

UPDATE FOR 2026 - To reduce storage costs and download fees, we recently made some changes to our website. The password for all our files this year is GLUEDTOMYCRAFTS2026. No sign-up is required to download our free printables! You can enjoy our printables without creating an account or paying for Box.com. Simply follow the download instructions on our FAQ PAGE.

Let your little ones get creative and construct their own taxi car with popsicle sticks!
SKIP THE FLUFF AND PRINT THE DIRECTIONS
SUPER FAST Popsicle Stick Taxi Car - Kid Craft Tutorial

This popsicle stick taxi car tutorial is a great craft idea for kids! It’s easy to make and perfect for summertime fun!

SUPER FAST Popsicle Stick Taxi Car - Kid Craft Tutorial

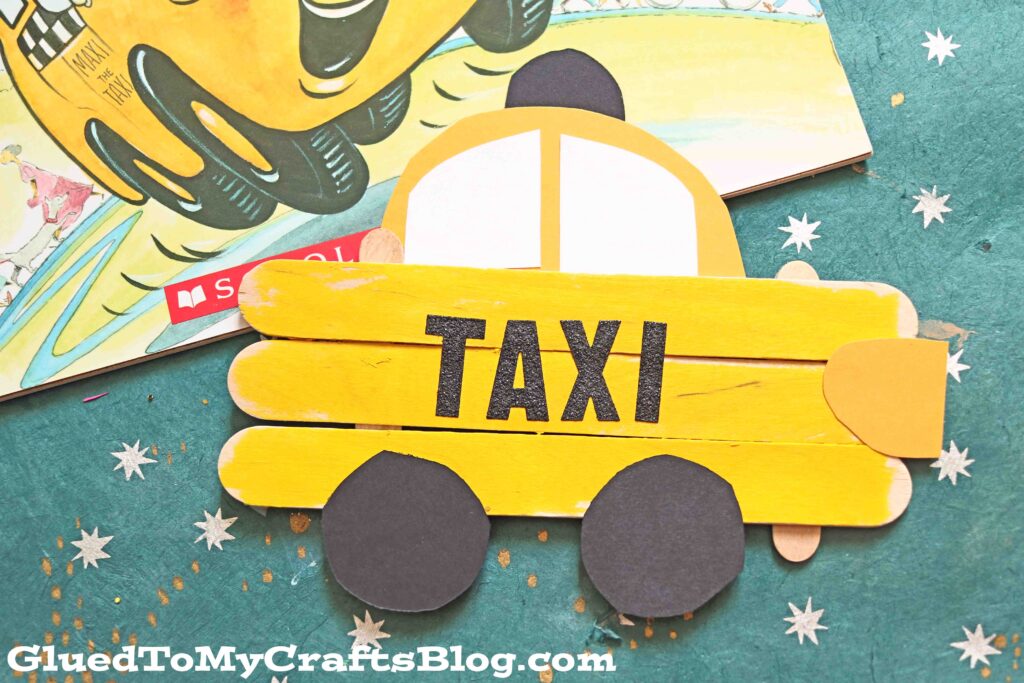
Popsicle Stick Yellow Taxi Car

Inspired by my son’s love of cars and anything with wheels, today I present to YOU our Popsicle Stick Taxi kid craft idea! It’s a unique and first seen here idea on Glued To My Crafts today!

This crafty yellow taxi craft idea actually goes along PERFECTLY with our new favorite book “Maxi The Little Taxi” by Elizabeth Upton. This means you can make story time AND craft time extra special with just a few steps!!!

SUPER FAST Popsicle Stick Taxi Car - Kid Craft Tutorial

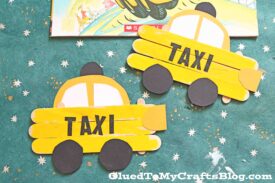
This popsicle stick taxi is a great craft idea for kids that will keep them entertained for hours! We hope you give it a try today!

Craft Supplies:

  • Jumbo Popsicle Sticks – 3 per craft
  • Mini Popsicle Sticks – 2 per craft
  • Yellow Craft Paint
  • Paint Brush
  • Small Paper Plate
  • White Cardstock Paper
  • Yellow Cardstock Paper
  • Black Cardstock Paper
  • Basic Craft Scissors
  • School Glue
  • Sticker Embellishments

Directions:

  • Grab THREE jumbo popsicle sticks and TWO mini sized ones.
  • Lay the three popsicle sticks next to each other, one by one, on a flat surface.
  • Now grab your other two mini popsicle sticks and glue them the other direction to create a fence.
  • Once all the popsicle sticks are glued together, set aside to let it all dry completely.
  • Repeat for each car you want to make.
  • When dry have children paint the front of their popsicle stick shape completely yellow, while you cut out some wheels & other car features from the cardstock.
  • To finish off the Popsicle Stick Taxi Cab, glue the cardstock paper pieces in place on the popsicle stick frame, as well as any other embellishments you see fit {think rhinestones, glitter, letter stickers}
  • Then display or show off proudly!
  • Don’t forget to share pictures of your craft stick yellow cab with us! #gluedtomycrafts

RELATED —> Paper Plate Beach Camper

SUPER FAST Popsicle Stick Taxi Car - Kid Craft Tutorial

If you are looking for even more great craft ideas for kids, be sure to check out these past blog posts on Glued To My Crafts right now:

  • Popsicle Stick Carrot Cars
  • Paper Plate Ice Cream Truck
  • Paper Plate Carrot Car
  • Paper Plate Easter Bunny Cars
  • Cupcake Liner Car Cards
  • Paper Plate Turkey Cars
  • Popsicle Stick Race Cars
  • Thumbprint Wheel Barrel
  • Paper Plate Race Cars
  • Popsicle Stick Monster Truck

stacey-signature-2023


SUPER FAST Popsicle Stick Taxi Car - Kid Craft Tutorial
PRINT

Popsicle Stick Taxi Car Craft

Let your little ones get creative and construct their own taxi car with popsicle sticks!

Here’s your checklist of supplies to bring this craft to life:

  • 3 Jumbo Popsicle Sticks
  • 2 Mini Popsicle Sticks
  • Craft Paint
  • Cardstock Paper
  • Embellishments
  • Paint Brush
  • Small Paper Plate
  • Craft Scissors
  • School Glue

Prepare your creative haven by laying down a protective cover before the crafting magic begins!

Directions:

  • Grab THREE jumbo popsicle sticks and TWO mini sized ones.
  • Lay the three popsicle sticks next to each other, one by one, on a flat surface.
  • Now grab your other two mini popsicle sticks and glue them the other direction to create a fence.
  • Once all the popsicle sticks are glued together, set aside to let it all dry completely.
  • Repeat for each car you want to make.
  • When dry have children paint the front of their popsicle stick shape completely yellow, while you cut out some wheels & other car features from the cardstock.
  • To finish off the Popsicle Stick Taxi Cab Cars, glue the cardstock pieces in place on the popsicle stick frame, as well as any other embellishments you see fit {think rhinestones, glitter, letter stickers}
  • Then display or show off proudly!
    SUPER FAST Popsicle Stick Taxi Car - Kid Craft Tutorial
MINI-HEARTS-page-separator-logo-gluedtomycrafts

CLICK HERE TO PRINT THE DIRECTIONS FOR THIS CRAFT

If you've enjoyed our content or have any thoughts to share, we'd love to hear from you! Mention @gluedtomycrafts or tag #gluedtomycrafts on Instagram!

Craft Activity Safety Guidelines:

Always Ensure Adult Supervision - Young children should be supervised at all times when engaging in craft activities. This is essential to keep them safe and ensure materials are used correctly. Use Age-Appropriate Supplies - Choose craft supplies that are suitable for your child’s age. Check labels for recommendations and avoid items with small parts or sharp edges for younger children. Modify as Needed - Feel free to adapt materials or steps to meet your child's abilities and safety needs. For example, substitute scissors with safety scissors if necessary. Keep an Eye on Allergies - Be mindful of potential allergens in craft materials like glue, paint, or certain fabrics. Opt for non-toxic and hypoallergenic options whenever possible. Organize and Secure Supplies - Keep all craft tools and materials organized. Store sharp objects, small parts, and potentially hazardous items out of reach when not in use. Following these guidelines will ensure that crafts remain fun, creative, and, most importantly, safe for everyone involved!


OUR PRIVACY POLICY

OUR COPYRIGHT POLICY

  • Email
  • Facebook
  • Instagram
  • Pinterest
  • Twitter
  • YouTube

LOOKING FOR SOMETHING?

EXPLORE OUR SITE:

TRENDING TODAY:

  • A pink hand-shaped bookmark with red heart stickers and star confetti surrounds a round note that reads a heartfelt message about love and reading. The image is from GluedToMyCraftsBlog.com. Handprint Bookmark Keepsake: A Gift That Holds Your Spot
  • A colorful craft project featuring a yellow felt moon, sparkly stars, and heart shapes, with glue and a heartfelt message. Torn Paper Love You To The Moon and Back Card Craft Idea For Kids
  • A handmade card with a rocket drawing, hearts, and messages of love. Felt hearts and an envelope are around it. Handprint Rocket Keepsake - I Love You Because
  • A vibrant Valentine's Day craft showcasing a torn-paper bumblebee with googly eyes on a white sheet, accompanied by the text "MY VALENTINE!" The scene is decorated with felt hearts, heart-shaped gems, and patterned papers, with a glue bottle and crafting supplies adding to the creative atmosphere. Torn Paper Bee My Valentine Card Craft Idea For Valentine's Day
  • A flat lay of handmade Valentine’s Day cards and decorations, including paper flowers, felt hearts, an envelope, and printed cards with romantic poems, arranged on a gray and pink background. Capture Memories With These 6 Handprint Flower Poems
  • Flat lay of a torn paper dandelion craft featuring a white sheet with a black dandelion outline. Torn yellow, pink, and purple paper pieces are glued to the dandelion head, simulating seeds. Surrounding the craft are Elmer's glue, felt hearts, paper flowers, and patterned scrapbook paper. The text 'MAKING WISHES, ONE PIECE OF PAPER AT A TIME.' and 'GluedToMyCraftsBlog.com' are printed on the white sheet. Torn Paper Dandelion Craft: Making Wishes, One Piece at a Time
  • A playful torn paper cactus craft with hearts and flowers. Includes glue and felt hearts. Torn Paper Cactus Card: A Sweet Mother's Day Craft
  • A colorful handprint craft made from purple paper with glitter edges sits on a multicolored polka dot background. A round tag with a poem is attached below, tied with red and white string. Flowers are visible in the corner. Easy Handprint Flower Craft with Poem – Perfect Spring DIY for Kids
  • A purple paper butterfly made from handprint cutouts is decorated with glitter and a smiling face. A round poem about sending love is in the center. The background is colorful and the GluedToMyCraftsBlog.com watermark is visible. Handprint & Popsicle Stick Butterfly Poem Keepsake
  • A craft project with yellow crepe paper fries in a red-striped paper container, a label reading Youre UN-FRY-GETTABLE!, red heart decorations, Elmers glue, and a roll of yellow crepe paper on a purple background. Torn Crepe Paper Fries Craft Idea For Kids

© 2012–2026 Glued To My Crafts
All activities should be supervised by an adult at all times. Please refer to our safety guidelines for more information.


Please note that all the content of the website, including printables, are for classroom and personal use only. This means that any digital item you download from our site can be used for non-commercial use only. We kindly request that you do not reproduce or sell our creations. We appreciate your understanding and cooperation in respecting our content and intellectual property rights.

Accessibility Adjustments

Powered by OneTap

How long do you want to hide the toolbar?
Hide Toolbar Duration
Select your accessibility profile
Vision Impaired Mode
Enhances website's visuals
Seizure Safe Profile
Clear flashes & reduces color
ADHD Friendly Mode
Focused browsing, distraction-free
Blindness Mode
Reduces distractions, improves focus
Epilepsy Safe Mode
Dims colors and stops blinking
Content Modules
Font Size

Default

Line Height

Default

Color Modules
Orientation Modules