
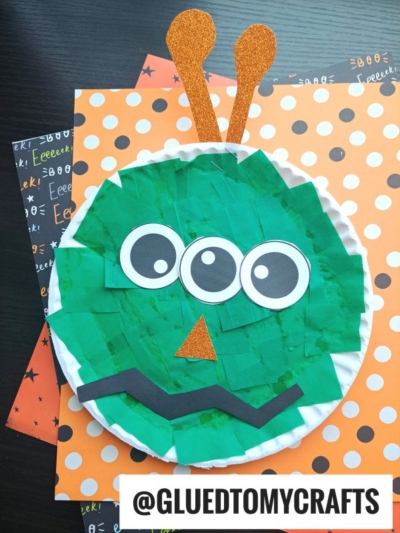
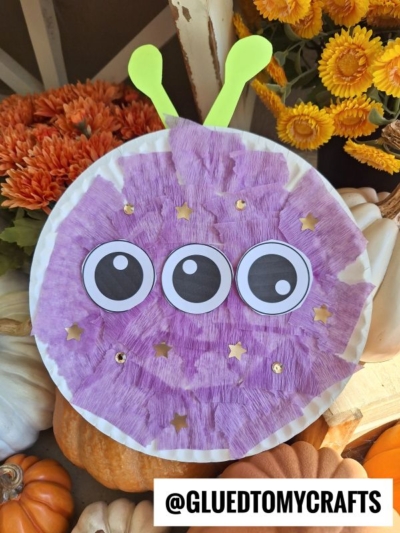
This paper plate monster craft is a fun and inexpensive activity that’s sure to engage your little ones. Come give it a try!

Paper Plate Halloween Monsters
Don’t be scared my crafty friends! Today’s Paper Plate Monster kid craft idea is PERFECT for children of ALL ages and honestly has no real rules or a wrong way to do it!
With complete customization at your child’s fingertips this inexpensive paper plate craft is sure to bring endless fun this upcoming Halloween season!!!
Make your new monster friend be super “scary” or just festive for the season! Whatever you do – have fun with it!!! The full monster made from a paper plate tutorial can be found below and the supplies are probably hiding in your home right now {hello inexpensive!} So let’s get to creating!
Happy crafting my super creative and crafty little monsters!!! Be sure to share your finished paper monster pieces on my Facebook page!!! I love seeing our ideas come to life! #gluedtomycrafts
RELATED —> Witch Cauldron


Get the kids involved in this fun and creative paper plate monster craft. Perfect for parents looking to find new craft ideas for kids!
Craft Supplies:
- Paper Plates {large or small}
- Tissue Paper
- EYEBALL Printable – on our landing page
- White Cardstock Paper
- Colored Cardstock Paper
- School Glue Paper
- Craft Scissors
- Stapler
Directions:
- First things first – if you haven’t already, go ahead and print off our FREE EYEBALL PRINTABLE listed above.
- Once you have it printed out on a single sheet of white cardstock, go ahead and cut out the eyeball shapes for your monster.
- Now grab your paper plate, tissue paper and glue.
- Cut out a few squares of tissue paper for your monster.
- Go ahead a put a good layer of glue all over the paper plate and start laying your tissue paper squares on top, until it’s completely covered.
- When done with that step, set it aside till later.
- Now grab your remaining sheets of colored cardstock and start cutting out some other features for the monster. Think teeth, ears, antennas, hair etc {whatever you want for your monster!}
- To finish off the Paper Plate Monster kid craft – staple/glue the cardstock pieces in their designated spots on the tissue paper covered paper plate, as well as the decorative eyes.
- Then display proudly! {or add other embellishments to really make it your own!}
RELATED —> Paint Splat Witch Face
For crafty memories kids will treasure long after the holidays – please check out our popular Craft Stick Monsters, Paint Splat Magic Ball and Chalk Art Monster Hair craft tutorials for you to check out today!
Don’t forget to also join our private Glued To My Crafts community on Facebook so you never miss a new tutorial from us!

Paper Plate Monster Craft Idea For Halloween
Here’s your checklist of supplies to bring this craft to life:
Prepare your creative haven by laying down a protective cover before the crafting magic begins!
Directions:
- First things first - if you haven't already, go ahead and print off our FREE EYEBALL PRINTABLE.
- Cut out the eyeball shapes for your monster.
- Now grab your paper plate, tissue paper and glue.
- Cut out a few squares of tissue paper for your monster.
- Go ahead a put a good layer of glue all over the paper plate and start laying your tissue paper squares on top, until it's completely covered.
- When done with that step, set it aside till later.
- Now grab your remaining sheets of colored cardstock and start cutting out some other features for the monster. Think teeth, ears, antennas, hair etc {whatever you want for your monster!}
- To finish off the Paper Plate Monster craft – staple/glue the cardstock pieces in their designated spots on the tissue paper covered paper plate, as well as the decorative eyes.
- Then display proudly!


NEED MORE HELP DOWNLOADING OUR FREE PRINTABLES? PLEASE REFER TO OUR FAQ PAGE