
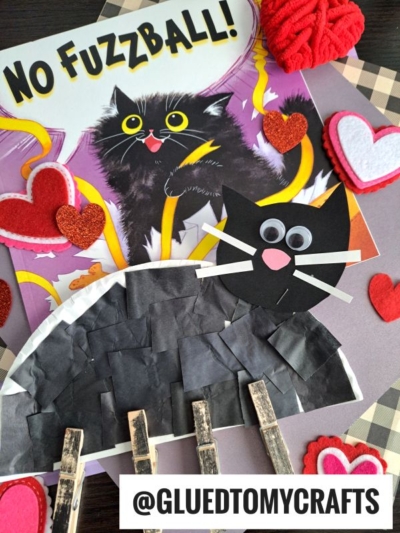
With a few paper plates, clothespins, and some tissue paper you can create this super cute black cat that’s sure to bring a smile to everyone’s face. Show us what you’ve come up with!

Clothespin & Paper Plate Black Cat Craft
Every good witch needs a friendly feline to join her in her “spook-tacular” adventures this time of year and that’s exactly what inspired today’s Clothespin Black Cat kids craft post!!!
It’s inexpensive, super simple and perfect to be used as a Halloween decoration as well!!! Using a paper plate half, black tissue paper and some simple wooden clothespins – you too can whip this Black Cat craft together with your child in no time!
Sounds purrrr-rific right? I know, I know – super cheesy but I really hope this kid friendly idea inspires you!
Happy crafting my friends! Don’t forget to share pictures of your paper plate and clothespin cats with us on our Facebook page! #gluedtomycrafts
RELATED —> Flying Witch Cat

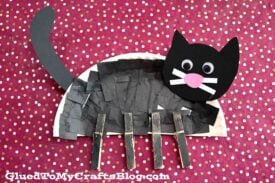
Get your little ones in the Halloween spirit with this super fun and easy paper plate & clothespin black cat craft! Get creative and make your own one-of-a-kind, spooky masterpiece today!
Craft Supplies:
- Large Paper Plate
- School Glue
- Black Tissue Paper
- Large Wooden Clothespins – 4 per craft
- Black Cardstock Paper
- White Cardstock Paper
- Pink Cardstock Paper
- Large Wiggle Eyes
- Black Marker {or black paint}
- Craft Scissors
- Office Stapler
Directions:
- First have your child their paper plate in half. Straight up the center to make TWO equal pieces.
- Reserve one half for today and the other for a rainy day!
- Next have them cut their black tissue paper into small squares.
- Squirt some glue all over your paper plate half.
- Have children take the tissue paper and place it on top of the glue, until it’s completely covered.
- While they are working on that, cut some cat features from the cardstock. Think pointy ears, tail, nose, whiskers etc.
- Set aside the paper pieces.
- Finally have children “paint” their FOUR wooden clothespins completely black to represent the cat’s legs.
- To finish off the Clothespin Black Cat – glue/staple on the cardstock pieces in place, along with the wiggle eyes, whiskers and nose.
- Then “pinch” the clothespin legs on the paper plate half and display it proudly for all to see!!!
- Don’t forget to share pictures with us! #gluedtomycrafts
RELATED —> Paint Splat Witch’s Cauldron

HEY FRIENDS – although this black cat tutorial was originally intended for Halloween, you can easily change it up for an EVERYDAY CRAFT IDEA!
Just change up the colors in your supplies, to make cats in ALL THE SHADES! Simply swap out the colors of your tissue paper and cardstock to your desired shade!
Are you by chance looking for even more fun Halloween kid crafts tutorials from Glued To My Crafts? Check out these past posts from us, listed below, for some more spooky craft inspiration!
Popsicle Stick Witch Hats
Popsicle Stick Beaker
Terra Cotta Pot Pumpkin
Paper Bag Black Cat
Popsicle Stick Jack-O-Lanterns
Handprint Jack-O-Lantern Pumpkin
Popsicle Stick Pumpkin
Paper Plate Pumpkin

Paper Plate and Clothespin Black Cat Craft
Here’s your checklist of supplies to bring this craft to life:
- School Glue
Prepare your creative haven by laying down a protective cover before the crafting magic begins!
Directions:
- First have your child their paper plate in half. Straight up the center to make TWO equal pieces.
- Reserve one half for today and the other for a rainy day!
- Next have them cut their black tissue paper into small squares.
- Squirt some glue all over your paper plate half.
- Have children take the tissue paper and place it on top of the glue, until it’s completely covered.
- While they are working on that, cut some cat features from the cardstock. Think pointy ears, tail, nose, whiskers etc.
- Set aside the paper pieces.
- Finally have children "paint" their FOUR wooden clothespins completely black to represent the cat's legs.
- To finish off the Clothespin Black Cat – glue/staple on the cardstock pieces in place, along with the wiggle eyes, whiskers and nose.
- Then "pinch" the clothespin legs on the paper plate half and display it proudly for all to see!!!

Grab our favorite books via our Amazon affiliate link! In our Amazon storefront you will find books, toys and craft supplies we absolutely love using for our Glued To My Crafts tutorials!