Create a playful Paper Plate Apple Core with this fun and easy craft! Perfect for kids, using simple materials to spark creativity and crafty fun.

Looking for a fun and simple craft project to do with your kids? This paper plate apple core art tutorial is perfect!

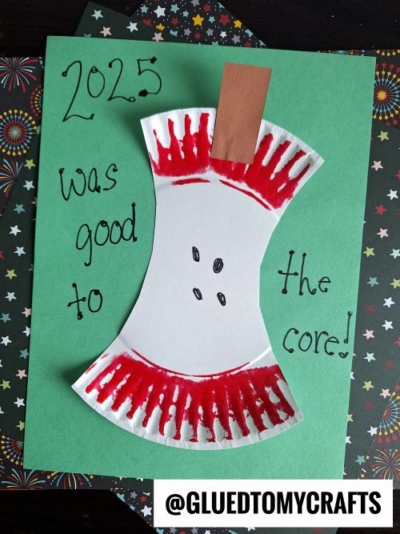
Apple picking season is commonly associated with this time of year and change of season, so that’s exactly what inspired this simple Paper Plate Apple Core kid craft idea!
It’s a simple cut and paint craft that is beautiful on a budget & honestly fun for children of ALL ages. You can easily turn the finished painted apple core paper plate pieces into decorations for a back-to-school bulletin board or just display them proudly on your fridge as is.
So what are you waiting for? Grab your craft supplies, check out the full tutorial below and get ready to inspire those young creative minds. It’s the perfect excuse to encourage some fun family time together on the kitchen table, with our small-scale art project idea!
Happy crafting my friends! Don’t forget to share pictures of your apple cores made from paper plates by tagging us on Instagram. We can’t wait to see what you create!


This simple and cute craft is perfect for kids of all ages and can be done in under 30 minutes.
Craft Supplies:
- Paper Plates – Large or Small
- Craft Scissors
- Red or Green Craft Paint
- Foam Paint Brush
- Green Cardstock Paper
- Brown Cardstock Paper
- Stapler
- Black Sharpie Marker
Directions:
- First you need to cut your paper plate down to look like an apple core. I did this by cutting two small football/diamond shapes out on the left & right side of the paper plate.
- Discard the paper plate cutouts {or save them for a rainy day craft!}
- Repeat for each apple you want to make today.
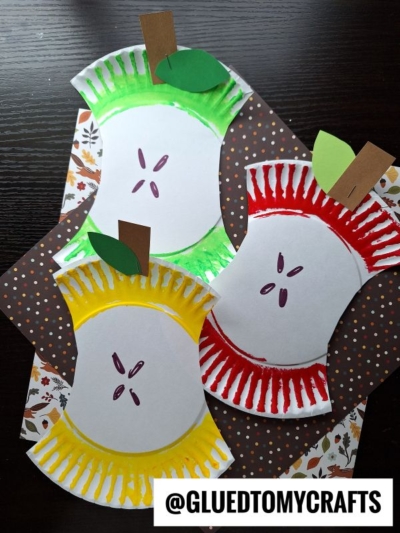
- Next grab your choice of color in craft paint, along with the foam paint brush.
- Squirt a small amount on the top and bottom of the paper plate piece. You just want to paint the rim of the paper plate to create the outside skin of the apple.
- When done painting, set aside the paper plate piece to allow it to dry a bit.
- Next grab your two sheets of cardstock paper, along with the scissors again.
- Trim out a small stem piece from the brown cardstock, while cutting out a large leaf shape from the green.
- To finish off the Paper Plate Apple craft, simply staple the colored paper pieces to the decorated paper plate.
- Now take your black Sharpie marker and draw three small apple seeds in the center of the paper plate.
- That’s it! Now display it proudly and admire your hard work!
Book Pairing Ideas:
Looking for the perfect reads to complement our latest craft tutorial? Here are some book suggestions that pair beautifully with your creative journey! Dive into these titles and let your imagination flow while you craft. Happy reading and crafting!
- Sour Apple by Linda Liu
- Little Naturalists: Johnny Appleseed by Kate Coombs
- Goodbye Summer, Hello Autumn by Kenard Pak
- It’s Fall! by Renée Kurilla
- Bad Apple: A Tale of Friendship by Edward Hemingway
- Apple Countdown by Joan Holub
- Halloween in the Orchard by Phyllis Alsdurf
- The Biggest Apple Ever by Steven Kroll
- How to Make an Apple Pie and See the World by Marjorie Priceman
- Winston and the Missing Apples by Simply Country Ranch
RELATED —> Love You To The Core Canvas

If you are looking for even MORE fall themed art project ideas, that I’ve shared on the Glued To My Crafts blog thus far, be sure to check out these posts listed below! All of which would pair nicely with today’s paper plate apple core craft tutorial – hint hint!
- Popsicle Stick Owls
- Popsicle Stick Apple Core
- Cupcake Liner Pumpkin Pie
- Paper Plate Apple Pie Slice
- Handprint Tree Canvas
- Popsicle Stick Apple Core
- Toilet Paper Roll Apple
- Love You To The Core Cards

Paper Plate Apple Core Craft
Create a playful Paper Plate Apple Core with this fun and easy craft! Perfect for kids, using simple materials to spark creativity and crafty fun.
Here’s your checklist of supplies to bring this craft to life:
Prepare your creative haven by laying down a protective cover before the crafting magic begins!
Directions:
- First you need to cut your paper plate down to look like an apple core. I did this by cutting two small football/diamond shapes out on the left & right side of the paper plate.
- Discard the paper plate cutouts {or save them for a rainy day craft!}
- Repeat for each apple you want to make today.
- Next grab your choice of color in craft paint, along with the foam paint brush.
- Squirt a small amount on the top and bottom of the paper plate piece. You just want to paint the rim of the paper plate to create the outside skin of the apple.
- When done painting, set aside the paper plate piece to allow it to dry a bit.
- Next grab your two sheets of cardstock paper, along with the scissors again.
- Trim out a small stem piece from the brown cardstock, while cutting out a large leaf shape from the green.
- To finish off the Paper Plate Apple Core - Kid Craft staple the colored paper pieces to the paper plate.
- Now take your black Sharpie marker and draw three small apple seeds in the center of the paper plate.
- That's it! Now display it proudly and admire your hard work!

CLICK HERE TO PRINT THE DIRECTIONS FOR THIS CRAFT
If you've enjoyed our content or have any thoughts to share, we'd love to hear from you! Mention @gluedtomycrafts or tag #gluedtomycrafts on Instagram!