Keep scrolling to learn how I made this Seashell Covered Vase come to life within minutes and how you can do the same in your home today, as well!

Seashell Covered Vase Craft
For the past few weeks, I have seen some fellow craft bloggers playing with the NEW Mod Podge Collage Clay that recently hit the market.
After seeing all their wonderful posts and DIY craft ideas, I decided I wanted to play with some too. {It’s like permanent frosting for your crafts!} So I headed to my local Michaels to scoop some up for my own craft collection and here we are today!
After playing with some ideas in my head, I came up with today’s super simple shell vase decor piece idea. All it takes is painting on the “glue material” and layering the seashells on top. Super easy stuff – even kids could do this!
I just love the fact that it was soooo easy and affordable! {with a coupon from Michaels, I spent less than $10 for ALL my supplies and I still have plenty of shell vase filler pieces and collage clay left to do another project!}
So below is my quick vase tutorial and my inspiration for you! Hopefully I inspire you to grab some of the new clay material and make a vase of your own today! Remember – it’s the perfect way to add some easy beach decoration to your home, on the cheap!
RELATED —> Tissue Paper Mason Jar Vase
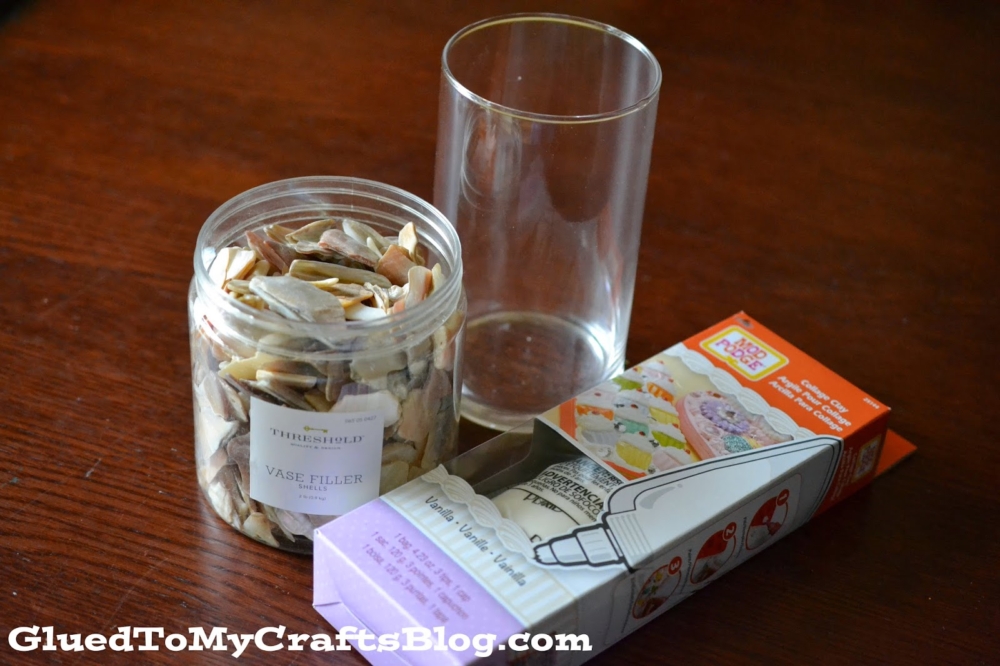
Shell Covered Vase Craft Supplies:
- Large Flat Surface Glass Vase
- Flat Seashell Vase Filler Pieces
- Mod Podge Collage Clay {Michaels}
- Fresh Flowers For In Your Vase
RELATED —> Paper Seashell Owl

Directions:
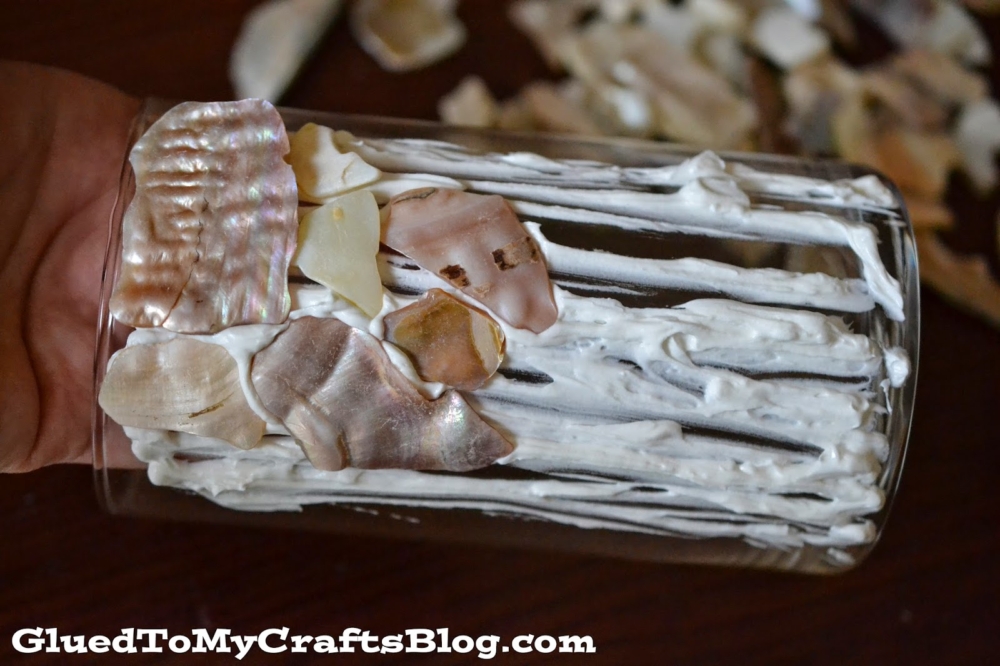
- First things first – make sure your vase is nice and clean on the outside. Run a dry cloth over it to remove any dust or lint.
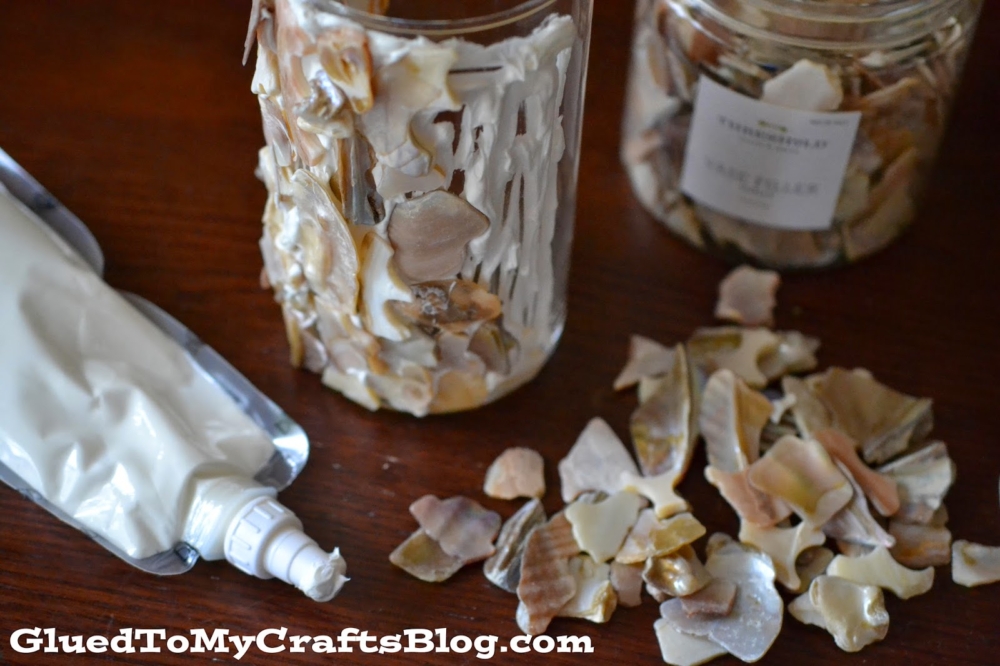
- Next up – grab your modge podge bag and start working in small sections, to slather a good amount of the collage clay on the vase.
- Now, working it like a puzzle, place your shell pieces on top of the glue.
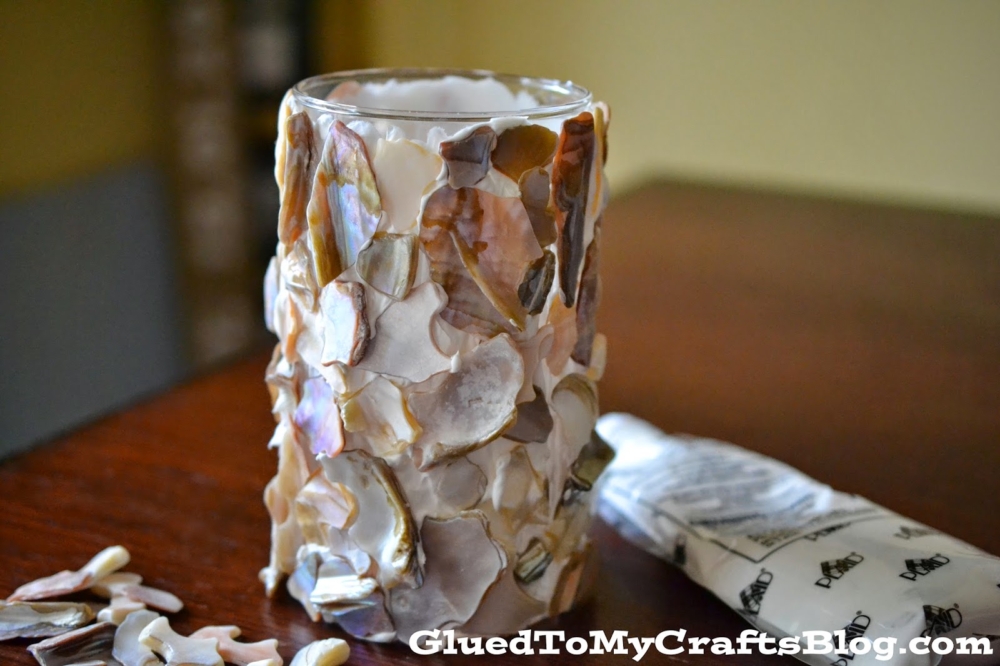
- Repeat this process until your vase is completely covered and you have the look you like.
- Once done, set aside the decorated vase to let the glue air-dry for 24 hours.
- Then use your new beautiful vase like you normally would. Perhaps even buy yourself some flowers as a pat-on-the-back for a job well done!
- Now display it proudly for ALL to see!
RELATED —> Seashell Picture Frame

If you enjoyed this DIY Seashell Covered Vase craft tutorial, you may also enjoy these projects listed below, from the Glued To My Crafts website!
- Clay Unicorn Magnets
- Paper Boot Flower Vase
- Paper Plate Seashell
- Keepsake Ideas for Grandparents
- Thumbprint Heart Magnets
- Painted Sweetheart Mugs
- Pretend Felt Band-Aids
