
Easter is a time for joy, celebration, and creativity. If you’re looking for a fun and affordable craft project to enjoy with your kids, salt dough Easter tags are the perfect choice! Not only are they simple to make, but they also allow kids to express their creativity while creating unique keepsakes or thoughtful gifts.
This post will guide you through everything you need to know about making salt dough Easter tags, from gathering supplies to decorating your finished pieces. Whether you’re crafting with toddlers or older kids, this easy project is sure to bring a smile to everyone’s face.

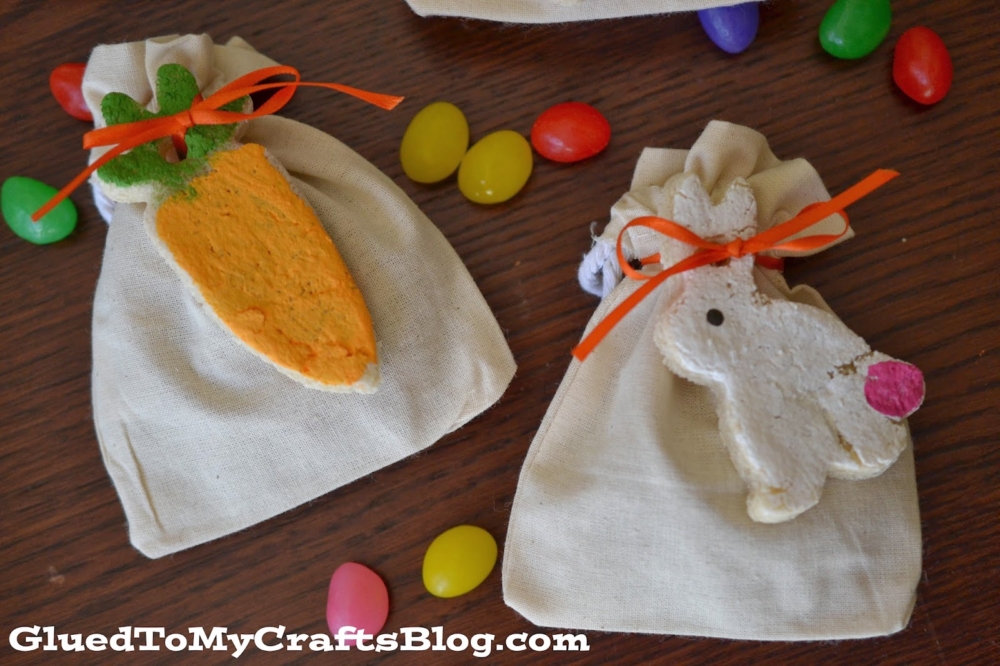
Roll up those sleeves today & make something handmade for the upcoming Easter holiday! Check out our Salt Dough Easter Gift Tags tutorial!
Craft Supplies:
Before getting started, gather the following supplies for your salt dough Easter tags project. You probably already have most of these at home!
- 1 cup White Flour
- 1 cup Table Salt
- 1/2 cup Tap Water
- Easter Cookie Cutters
- Plastic Straw
- Rolling Pin
- Wax Paper On Cookie Sheet
- Craft Paint
- Paint Brushes
Directions:
Once you’ve gathered your supplies, follow these simple steps to create your salt dough Easter tags.
- First things first – combine your measured out flour, salt and water in large mixing bowl.
- Mix/knead the three ingredients together until they are well combined and smooth. Almost like pizza dough. If the dough is too sticky – add more flour. If too dry – add more water.
- Now set your oven to the lowest temperature it will go.
- Grab your mixing bowl and drop the dough on the flat surface. Roll out your salt dough mixture and start cutting out shapes with the cookie cutters. As you go along, keep re-rolling out the dough and cutting out shapes until it’s all gone.
- At this point in time, if you want to make your cutouts into gift tags, use the straw to make a hole where the ribbon will go through.
- When done cutting out the shapes, carefully lift them up and place each one on your cookie sheet, with wax paper on it. You will want to leave a little room between each one.
- Now place your cookie sheet in the oven. Bake the salt dough tags for three hours, turning every hour.
- When the time is up, pull the cookie sheet out and let it cool completely.
- Now you are ready to decorate them with paint or other embellishments. Use orange and green for the carrots and white for the bunnies.
- When done painting, let them dry completely.
- Then use for gifts or even ornaments! The choice is yours on your finished salt dough Easter tags!
- BTW – I tied our painted salt dough pieces to some plain fabric gift bags with some basic, thin craft ribbon. With a thin-tip Sharpie marker, you can easily address your gifts to a receiver or write a special message on the back.
RELATED —> Paper Plate Carrot House
Recreating these salt dough Easter tags is a simple yet meaningful activity that brings joy, creativity, and a sense of accomplishment to kids and parents alike. With just a few basic ingredients and plenty of imagination, you can create unique keepsakes to cherish for years.
If you’re inspired to try this project, why not gather the family this weekend and make it happen? Share your creations with us on social media using #GluedToMyCrafts – we’d love to see what you and your little ones create! Happy crafting, my friends!
- Carrot Garden Sensory Bin
- Wooden Spoon Bunnies
- Terra Cotta Pot Easter Friends
- Cupcake Liner Bunnies
- Popsicle Stick Flowers
- Paper Plate Bird Nest
- Thumbprint Bunny Cards
- Cotton Ball Bunny Cupcake
