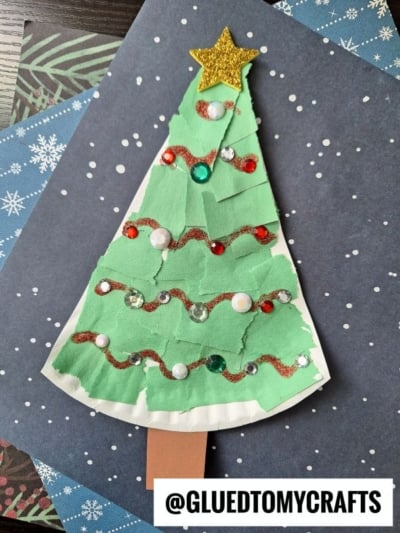
Unleash your creativity with a Torn Paper Christmas Tree. Follow our simple steps using paper plates and decorations you have at home.
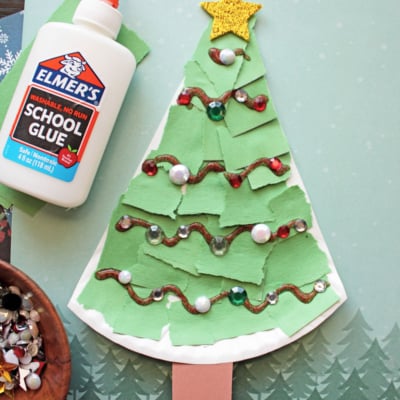
Get ready for some festive fun with a craft that’s perfect for little hands! This paper plate and torn paper Christmas tree is a wonderful activity for a chilly afternoon.
It’s incredibly simple, uses materials you likely already have, and the results are always unique and charming. Plus, tearing paper is a fantastic way for kids to work on their fine motor skills while getting creative! On that note, let’s gather our supplies and make some beautiful holiday decorations!

Learn to make a Torn Paper Christmas Tree using easy materials like paper plates and colorful construction paper. Fun for all ages!
Craft Supplies:
One of the best parts about this green holiday tree craft is its simplicity. You won’t need much to get started.
- Large Paper Plates: One per tree. The cheap, flimsy kind works perfectly.
- Green Construction Paper: A few different shades of green will make your tree look more interesting.
- Brown Construction Paper: Just a small piece for the tree trunk.
- Scissors
- Glue: A glue stick is great for younger children, while school glue works well too.
- Optional Decorations: Pom-poms, sequins, glitter, star stickers, or anything else you have on hand to decorate your tree.
Directions:
Got everything? Great! Here’s the step-by-step guide:
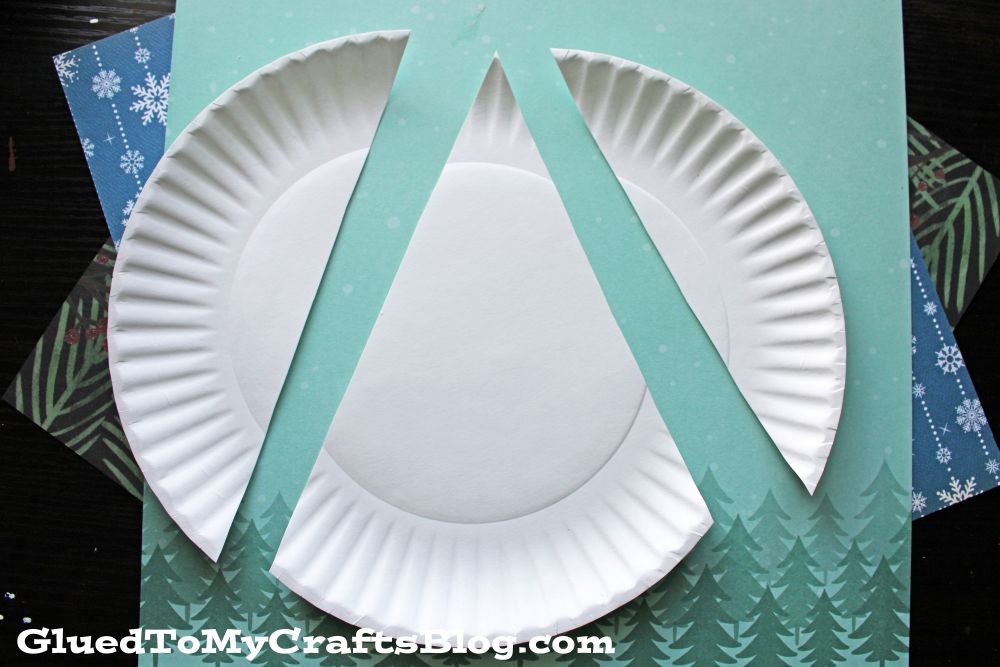
- Prepare the Paper Plate – First, cut the paper plate into thirds. You will only need one-third of the plate for each tree. This piece will be the base for your craft. An adult should handle this step for younger children.
- Make the Trunk – Cut a small rectangle from the brown construction paper. Glue it to the bottom of the flat edge of your paper plate wedge. This will be the trunk of your Christmas tree.
- Tear the Paper – Now for the fun part! Take your sheets of green construction paper and have your child tear them into small pieces. Don’t worry about making them perfect; the variety in shapes and sizes is what gives the tree its character. This is a great sensory activity and helps build hand strength.
- Glue the Green Pieces – Apply glue all over the paper plate wedge, above the trunk. Let your child stick the torn green paper pieces onto the glued area. Encourage them to cover the entire surface to make a full, leafy tree. If desired – using different shades of green adds wonderful texture and depth.
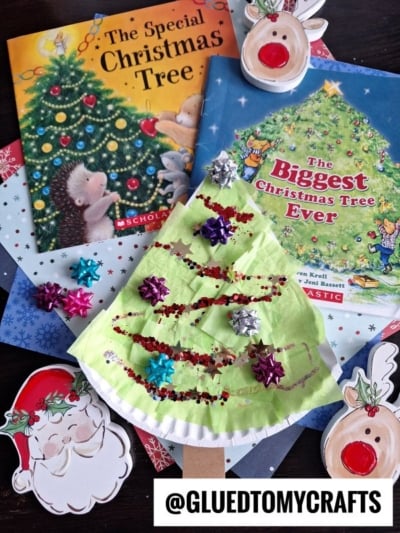
- Now Decorate – Once the green paper is in place, it’s time to decorate the tree. This is where your child’s personality can really shine.
- Before Displaying – Let the glue dry completely and your beautiful Christmas tree is complete!
RELATED —> Torn Paper Reindeer Craft Idea
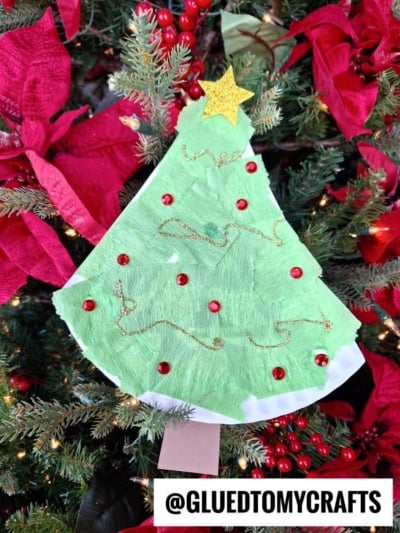
Recreating this paper plate and torn paper green Christmas tree is a simple, fun, and meaningful way to celebrate the magic of the season with your kids. Not only do they get to create something they’ll be proud to display, but they also get to spend quality time with you in the process.
Get crafting and don’t forget to share your creations with friends and family! Better yet, make this an annual tradition and watch how your child’s skills and creativity grow each year! Happy holidays from our family to yours! 🎄
- Paper Plate Elf
- Christmas Tree Gnome
- Paper Plate Ornament
- Paper Plate Santa
- Sequined Christmas Ornaments
- Popsicle Stick Christmas Trees
- Christmas Gnome Keepsake
- Christmas Tree Cards
- Thumbprint Christmas Tree

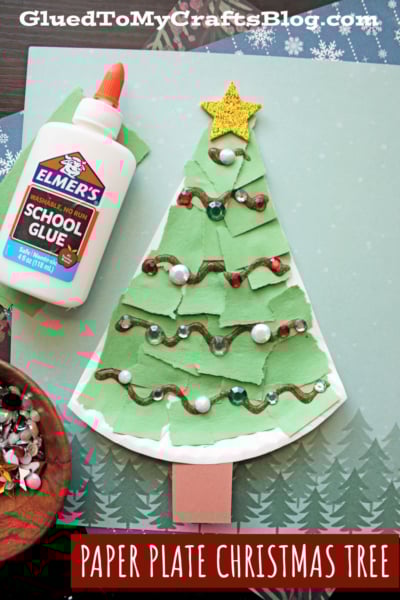
Paper Plate and Torn Paper Christmas Tree Craft for Kids
Unleash your creativity with a Torn Paper Christmas Tree. Follow our simple steps using paper plates and decorations you have at home.
Here’s your checklist of supplies to bring this craft to life:
- Large Paper Plate
- Construction Paper
- Embellishments
Prepare your creative haven by laying down a protective cover before the crafting magic begins!
Directions:
- Prepare the Paper Plate - First, cut the paper plate into thirds. You will only need one-third of the plate for each tree. This piece will be the base for your craft. An adult should handle this step for younger children.
- Make the Trunk - Cut a small rectangle from the brown construction paper. Glue it to the bottom of the flat edge of your paper plate wedge. This will be the trunk of your Christmas tree.
- Tear the Paper - Now for the fun part! Take your sheets of green construction paper and have your child tear them into small pieces. Don't worry about making them perfect; the variety in shapes and sizes is what gives the tree its character. This is a great sensory activity and helps build hand strength.
- Glue the Green Pieces - Apply glue all over the paper plate wedge, above the trunk. Let your child stick the torn green paper pieces onto the glued area. Encourage them to cover the entire surface to make a full, leafy tree. If desired - using different shades of green adds wonderful texture and depth.
- Now Decorate - Once the green paper is in place, it’s time to decorate the tree. This is where your child's personality can really shine.
- Before Displaying - Let the glue dry completely and your beautiful Christmas tree is complete!


CLICK HERE TO PRINT THE DIRECTIONS FOR THIS CRAFT
If you've enjoyed our content or have any thoughts to share, we'd love to hear from you! Mention @gluedtomycrafts or tag #gluedtomycrafts on Instagram!