What makes the torn paper raccoon craft so delightful is its adaptability. It’s simple enough for toddlers but offers opportunities for older kids to experiment with design and detail. Plus, by encouraging the use of torn paper rather than cutting, this project keeps the focus on creativity, texture, and fun over perfection.
Crafting is one of the best ways to engage kids in creative play, enhance their motor skills, and encourage self-expression. Whether you’re a parent, teacher, or caregiver, today’s torn paper raccoon craft is a delightful activity that will both entertain and educate!
Easy to set up and adaptable for different ages, it’s perfect for at-home fun or classroom art projects.
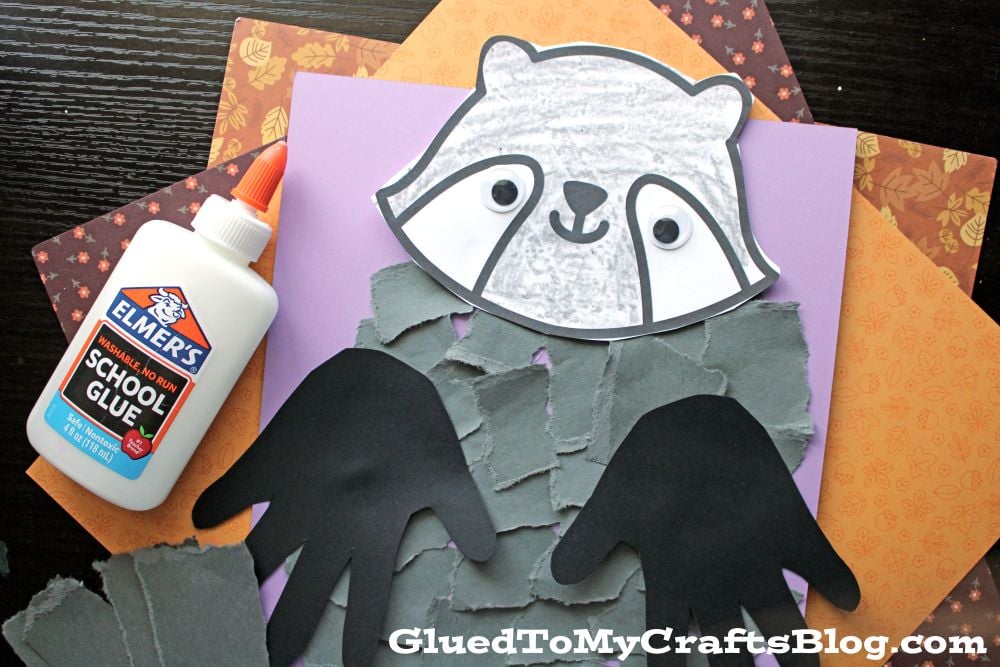
Craft Supplies:
Before starting the craft, gather all necessary materials. Here’s what you’ll need:
- Raccoon Head Printable – on our landing page
- White Cardstock Paper
- Gray Construction Paper
- Black Construction Paper
- Construction Paper {choice of color}
- Crayons
- Scissors
- School Glue
- Small Googly Eyes
Having everything ready before you begin will make the crafting process smoother and more enjoyable for both you and the children.
Directions:
Recreating this torn paper raccoon craft is simple and rewarding. Follow these steps to make him come to life:
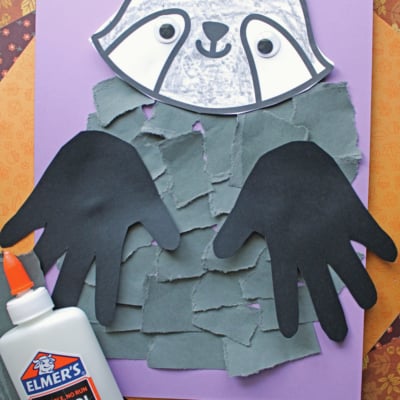
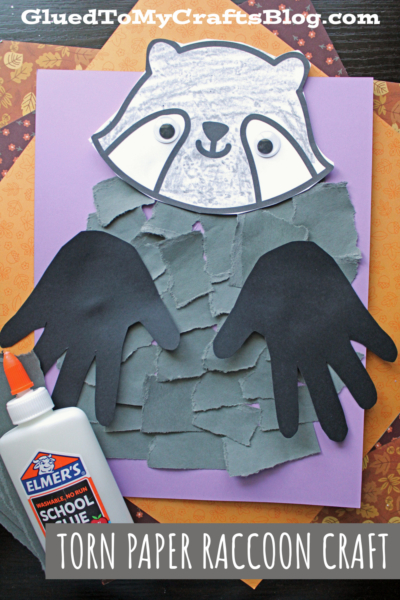
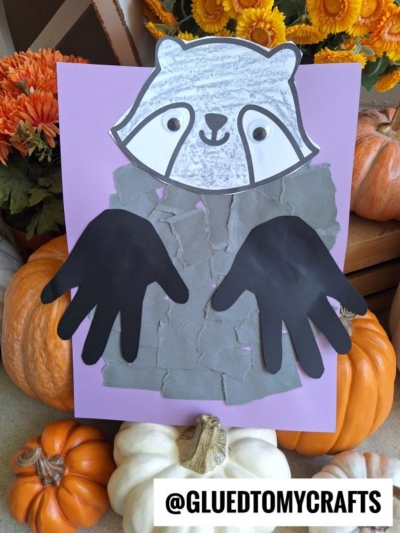
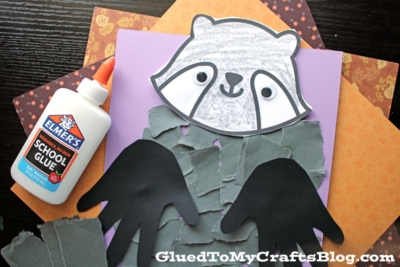
- First download and print out the FREE “raccoon head” template listed above, on a single piece of cardstock paper. One print will give you TWO opportunities to do this craft.
- Have kids color in ONE of the raccoon head shapes and help them trim it out with scissors.
- At this point in time you should help them cut out TWO handprint cutouts for the raccoon’s hands.
- Now help your child cut/tear one their sheet of gray construction paper {the color they chose for the raccoon’s body} into small pieces.
- Next grab the school glue and put a good amount of glue ALL over the remaining sheet of construction paper.
- Have children place their paper pieces on top of the glue {adding more glue if needed} until they have a “body’ shape they like.
- Follow that up by gluing down the raccoon’s head towards the top of the decorated paper.
- The final step is to add the two “hands” and googly eyes so it can see.
- Once done decorating, set aside to let it all dry completely before displaying/gifting proudly!
- Don’t forget to share pictures of your adorable paper raccoon craft with us! #gluedtomycrafts
RELATED —> Paper Plate Raccoon
Crafting is more than just pasting and gluing – it’s a hands-on way to teach kids patience, creativity, and problem-solving. This torn paper raccoon project is an engaging activity that can brighten up a rainy afternoon, enhance a classroom lesson about wildlife, or simply inspire joy in creating something cute.
So on that note, gather your materials, get ready to tear some paper, and have fun building your raccoon masterpiece. We’d love to see your creations – feel free to share your unique designs by tagging us on social media. Happy crafting!

Torn Paper Raccoon Craft Idea For Kids
What makes the torn paper raccoon craft so delightful is its adaptability. It’s simple enough for toddlers but offers opportunities for older kids to experiment with design and detail. Plus, by encouraging the use of torn paper rather than cutting, this project keeps the focus on creativity, texture, and fun over perfection.
Here’s your checklist of supplies to bring this craft to life:
- Construction Paper
- Raccoon Printable - Landing Page
- Embellishments
- School Glue
Prepare your creative haven by laying down a protective cover before the crafting magic begins!
Directions:
- First download and print out the FREE "raccoon head" template listed above, on a single piece of cardstock paper. One print will give you TWO opportunities to do this craft.
- Have kids color in ONE of the raccoon head shapes and help them trim it out with scissors.
- At this point in time you should help them cut out TWO handprint cutouts for the raccoon's hands.
- Now help your child cut/tear one their sheet of gray construction paper {the color they chose for the raccoon's body} into small pieces.
- Next grab the school glue and put a good amount of glue ALL over the remaining sheet of construction paper.
- Have children place their paper pieces on top of the glue {adding more glue if needed} until they have a "body' shape they like.
- Follow that up by gluing down the raccoon's head towards the top of the decorated paper.
- The final step is to add the two "hands" and googly eyes so it can see.
- Once done decorating, set aside to let it all dry completely before displaying/gifting proudly!


NEED HELP DOWNLOADING OUR FREE PRINTABLES? PLEASE REFER TO OUR FAQ PAGE
If you've enjoyed our content or have any thoughts to share, we'd love to hear from you! Mention @gluedtomycrafts or tag #gluedtomycrafts on Instagram!