This Christmas, get creative with your decorations! Instead of buying a pre-made piece, why not make your own wood slice BEAR ornament with this easy tutorial from us?!

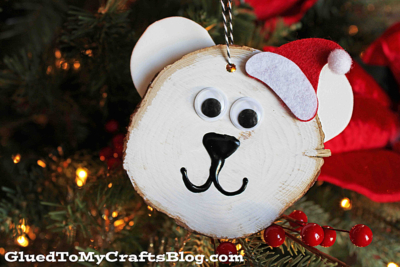
Add a handmade touch to your tree this year with this lovely hand-crafted wood slice bear ornament. Get in the festive spirit and give your tree a unique, one of a kind addition!
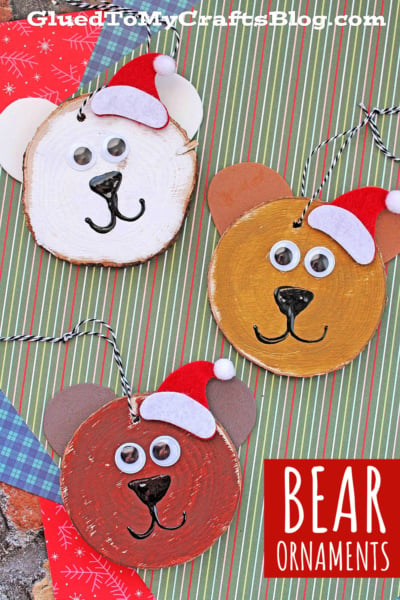
Do you and your child want to create a truly special and unique ornament for your Christmas tree this year? If so, why not try recreating our wood slice bear face tutorial!
Not only is it an easy craft project, but the end result will be something that can be cherished for years to come. Plus, with just some scraps of wood and a few simple supplies – like paint and craft foam sheets – you can make these charming wooden arctic bears in no time at all.
So grab your crafting supplies and join us as we teach you how to step-by-step make these delightful woodland inspired decorations – perfect for adding an extra layer of charm to any holiday tree!


Perfect for kids and adults alike, these cute teddy ornaments will spark joy and creativity as well as give any tree a natural touch. Make sure to get creative with colors and patterns too as each ornament looks unique! So let’s get started crafting our own little teddy bear ornaments!
Craft Supplies:
- Circular Wood Slices {I found mine at Hobby Lobby
- Craft Paint {white or brown}
- Paint Brushes
- Tulip Puffy Paint
- Craft Foam Sheets
- Scissors
- Googly Eyes
- Twine
- Hot Glue Gun {adult supervision}
Directions:
- First things first – make sure you have a good working area. I suggest placing your wood slice on a large paper plate to protect your work surface.
- Start off by getting the glue gun hot and ready.
- Take your craft foam sheet and cut out TWO small half circle shapes for the bear’s ears.
- Hot glue those two pieces to the back of the wood shape.
- Next up – squirt your choice of colored craft paint {brown or white} on another paper plate.
- Using your paint brush, paint the entire front side of the wood slice, until it’s completely covered.
- Follow that up by drawing on a face with puffy paint.
- Finally – hot glue the wiggle eyes so your little bear can see.
- And that’s it! At this point in time you can also hot glue the Santa hat in place.
- You will then set it aside to let it dry completely before you hot glue some twine or a piece ribbon to the back for easy hanging.
- Then hang it on the tree for everyone to admire! It’s easy peasy – just how we LOVE it on Glued To My Crafts!
RELATED —> Wood Slice Christmas Gnome

What better way to celebrate the Christmas season, than with some awesome craft time?! At Glued To My Crafts, we can help you find the right tutorial!
Are you by chance looking for more Christmas themed kid crafts from us? Check out these awesome blog posts from Glued To My Crafts:
Paper Plate Reindeer
Thumbprint Christmas Tree
Popsicle Stick Charlie Brown & Snoopy
Paper Plate Christmas Gnome
Wood Slice Grinch Ornament
Santa In The Chimney Craft
Popsicle Stick Christmas Trees
Footprint Reindeer Keepsake Card
Cork Reindeer Ornaments
Be sure to also follow us on Facebook and Pinterest so you never miss a new tutorial from us!

Wood Slice Bear Ornament For The Tree
This Christmas, get creative with your decorations! Instead of buying a pre-made piece, why not make your own wood slice BEAR ornament with this easy tutorial from us?!
Here’s your checklist of supplies to bring this craft to life:
- Large Circular Wood Slice
- Craft Foam Sheets
- Tulip Puffy Paint black
- Craft Paint brown and white
- Twine or Ribbon
- Googly Eyes
- Embellishments
Prepare your creative haven by laying down a protective cover before the crafting magic begins!
Directions:
- First things first - make sure you have a good working area. I suggest placing your wood slice on a large paper plate to protect your work surface.
- Start off by getting the glue gun hot and ready.
- Take your craft foam sheet and cut out TWO small half circle shapes for the bear's ears.
- Hot glue those two pieces to the back of the wood shape.
- Next up - squirt your choice of colored craft paint {brown or white} on another paper plate.
- Using your paint brush, paint the entire front side of the wood slice, until it's completely covered.
- Follow that up by drawing on a face with puffy paint.
- Finally - hot glue the wiggle eyes so your little bear can see.
- And that's it! At this point in time you can also hot glue the Santa hat in place.
- You will then set it aside to let it dry completely before you hot glue some twine or a piece ribbon to the back for easy hanging.
- Then hang it on the tree for everyone to admire!

CLICK HERE TO PRINT THE DIRECTIONS FOR THIS CRAFT
If you've enjoyed our content or have any thoughts to share, we'd love to hear from you! Mention @gluedtomycrafts or tag #gluedtomycrafts on Instagram!