Get your kids crafty this Easter! We've got a fun and easy foam egg snail craft idea that is perfect for some creative Easter fun!

OOPS – I’ve done it again! I’m sharing another EGG SHAPED tutorial that is sure to inspire you. All it takes is some basic decorating, cutting and pasting!
So don’t SLOW-POKE it! Grab a pack of inexpensive egg shapes from your favorite craft store and make your own Easter egg shaped snail friend come alive this afternoon!

These adorable snails are made from craft foam egg shapes & can be customized any way you like. Bring them to life in your home this spring!
Craft Supplies:
- Foam Egg Shapes
- Wine Cork
- White Craft Paint
- Paper Plate
- Scissors
- Pastel Cardstock Paper
- Wiggle Eye Stickers
- Black Marker
- School Glue
Directions:
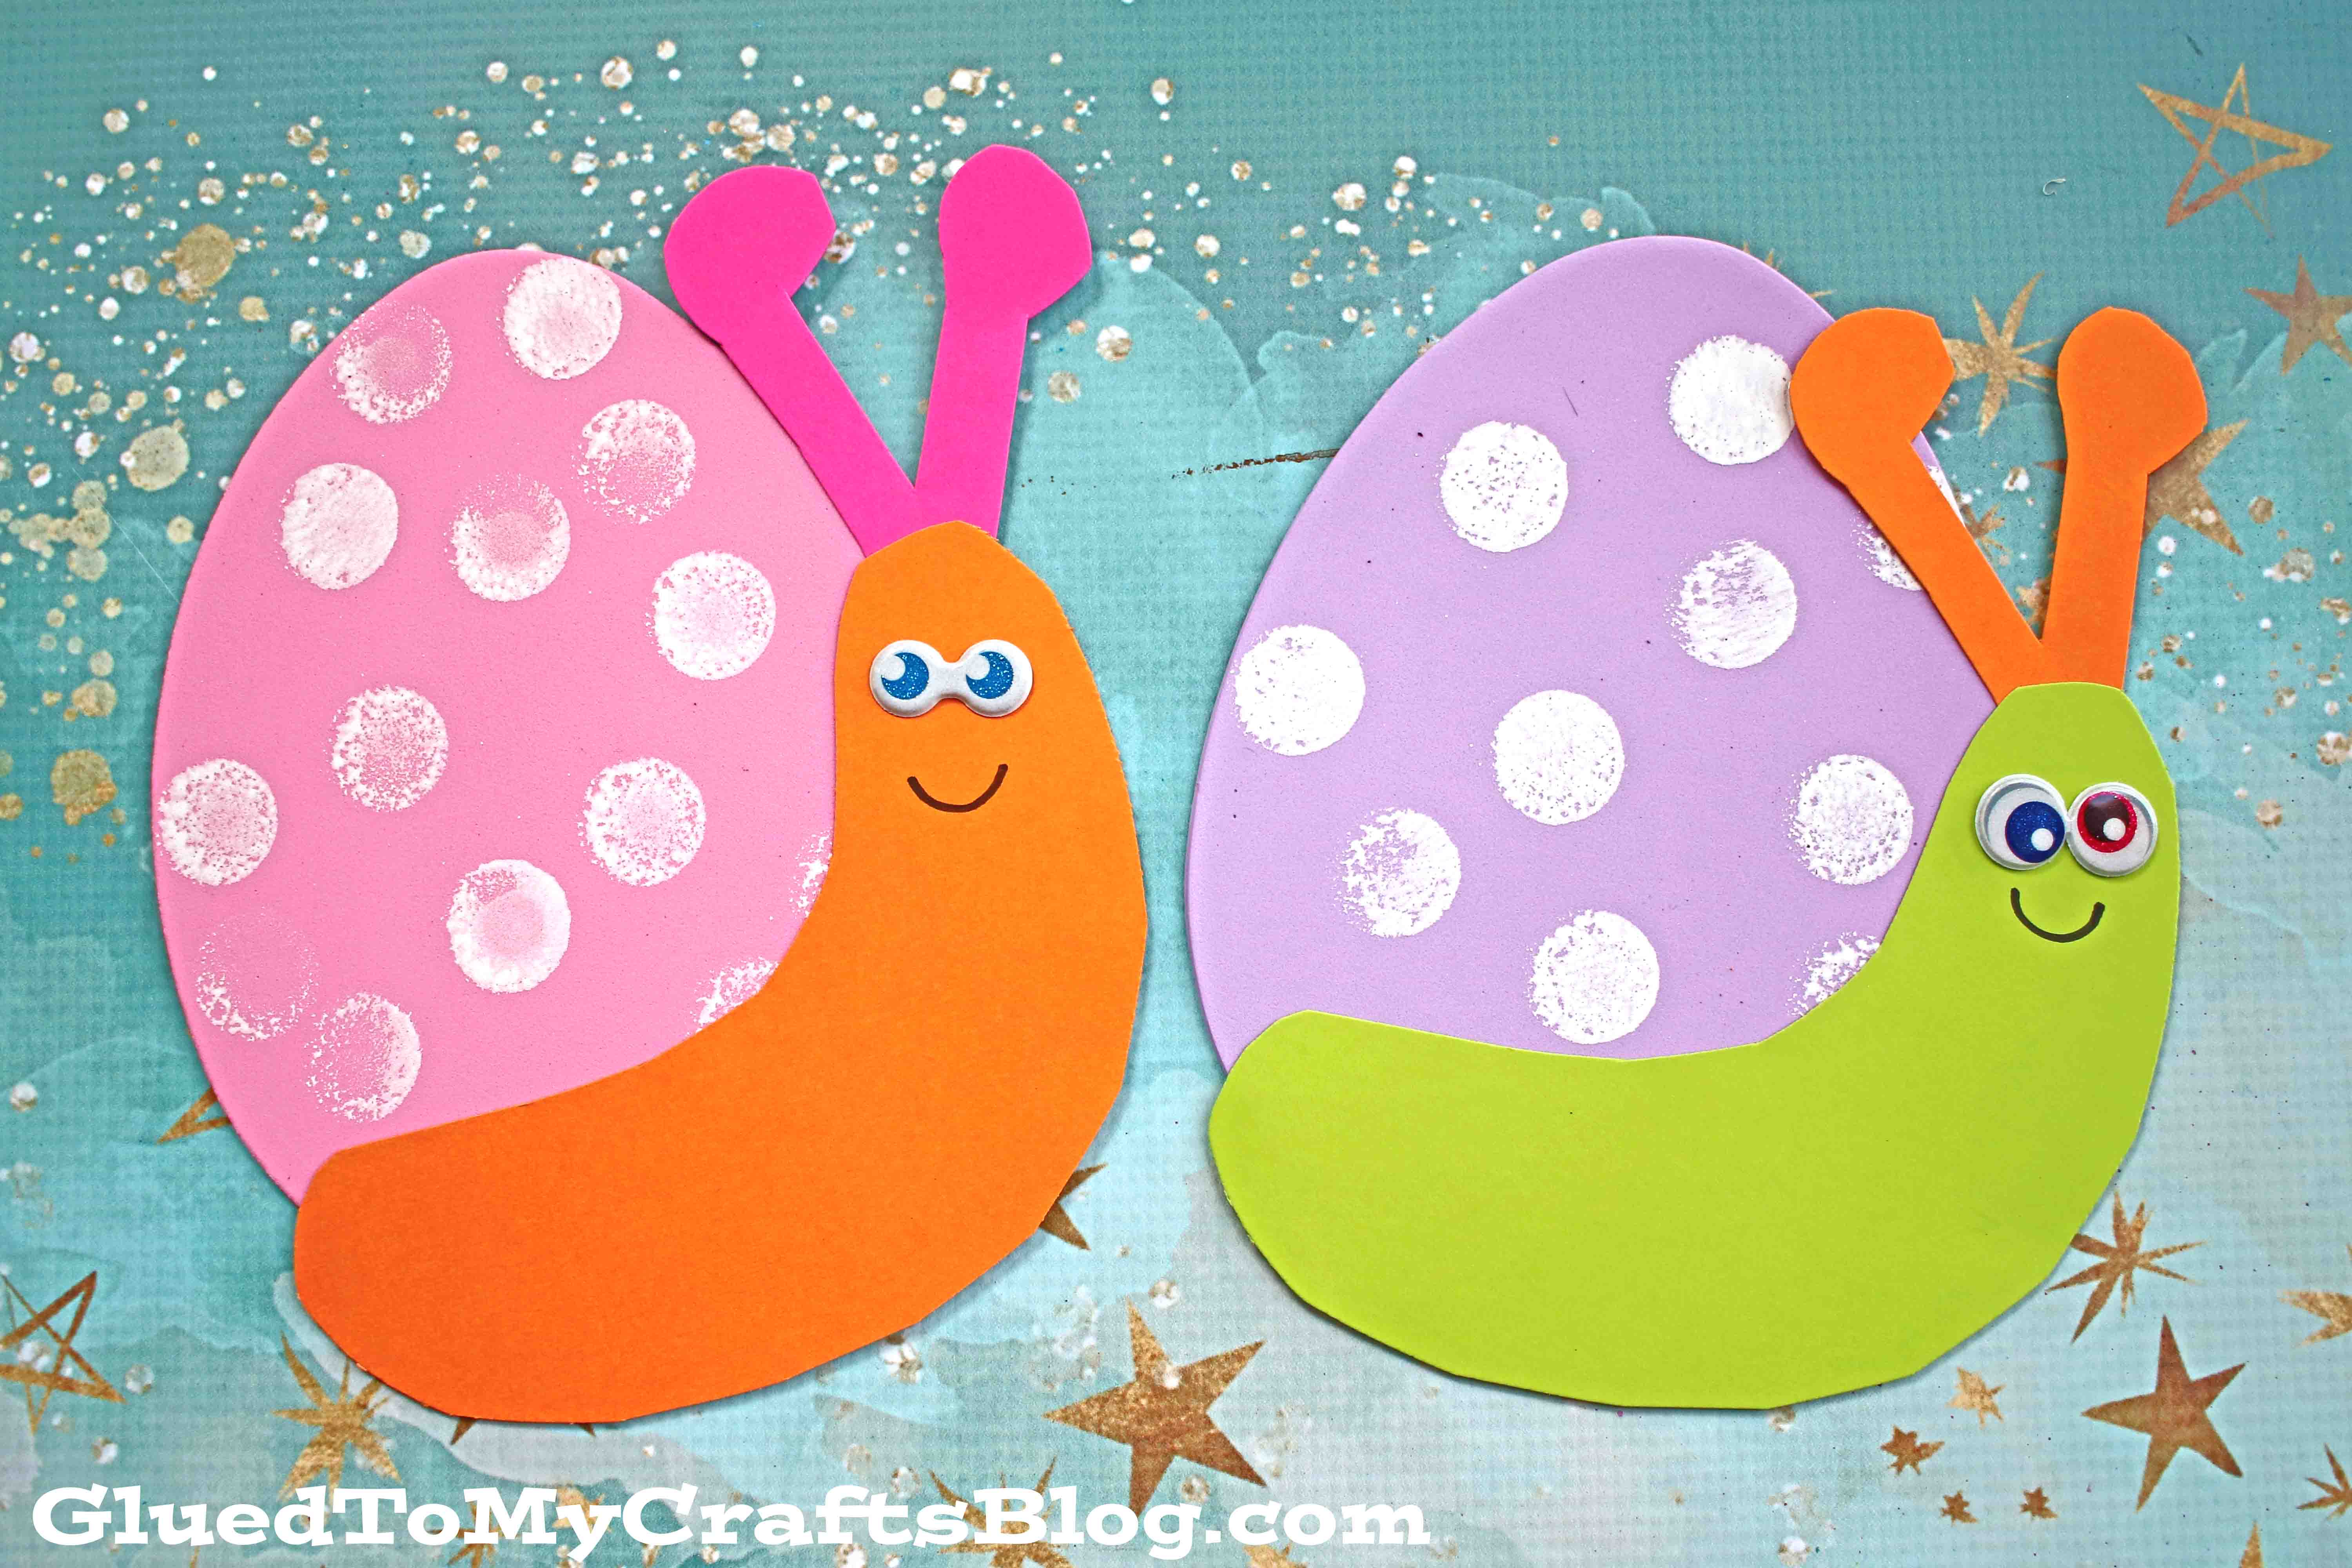
- First things first – grab one of your craft foam egg shapes and all your painting supplies.
- Squirt some white craft paint on the paper plate.
- Now take either your wine cork and make POLKA DOTS all over the “shell of the snail” with the white paint.
- At this point in time, if desired, go ahead and also add other decorations and/or embellishments to the egg shape. Aim high and really make your snail friend stand out from the crowd!
- When done decorating the egg shape, set it aside till later.
- Now grab all your sheets of pastel colored cardstock and scissors.
- Cut out a simple hot dog shape out of the cardstock for his body.
- Go ahead and also cut out TWO antennas for on his head.
- Next adhere some wiggle eyes and draw on a smile with the Sharpie marker, on the larger cardstock piece.
- Finally, to finish off the Easter Egg craft project, glue the snail’s body to the decorated foam piece from the first step. Follow that up by adhering the antennas in place as well.
- Then allow it to dry completely before you display it proudly for all to see!
- Don’t forget to share pictures with us, of your finished spring inspired snail piece, on your various social media sites! You can always tag us on Instagram! #gluedtomycrafts
RELATED —> Popsicle Stick Snails

Just like today’s craft foam Easter egg snail art project idea, our spring inspired craft tutorials are SOOOOOO simple to make but really have the wow factor for even the littlest crafter in your home! It usually starts with a basic craft supply and blossoms from there!
On that note, we want YOU to check out our Egg Shaped Craft Roundup for TONS of ideas to inspire you and your child this spring season!

Craft Foam Easter Egg Snail
Get your kids crafty this Easter! We've got a fun and easy foam egg snail craft idea that is perfect for some creative Easter fun!
Here’s your checklist of supplies to bring this craft to life:
- School Glue
Prepare your creative haven by laying down a protective cover before the crafting magic begins!
Directions:
- First things first - grab one of your craft foam egg shapes and all your painting supplies.1 Craft Foam Egg Shape
- Squirt some white craft paint on the paper plate.Craft Paint
- Now take either your wine cork or circular shaped paint brush & make POLKA DOTS all over the craft foam shape, with the white paint.
- When done decorating the egg shape, set it aside till later.
- Now grab all your sheets of pastel colored cardstock and scissors.Cardstock Paper
- Cut out a simple hot dog shape out of the cardstock for his body.
- Go ahead and also cut out TWO antennas for on his head.
- Next adhere some wiggle eyes and draw on a smile with the Sharpie marker, on the larger cardstock piece.2 Wiggle Eyes
- Finally, to finish off the Easter Egg Snail project, glue the snail's cardstock body to the decorated foam piece from the first step. Follow that up by adhering the antennas in place as well.
- Then allow it to dry completely before you display it proudly for all to see!


CLICK HERE TO PRINT THE DIRECTIONS FOR THIS CRAFT
If you've enjoyed our content or have any thoughts to share, we'd love to hear from you! Mention @gluedtomycrafts or tag #gluedtomycrafts on Instagram!