This would make an awesome handmade card for any occasion.

Have some fun by creating your own unique pancake inspired cards using cupcake liners as the star of the show! Get creative and start “flipping” those cards.

Inspired by our “Cupcake Liner Tough Cookie” handmade card post from last month on Glued To My Crafts, I decided to alter that particular tutorial “just a tiny bit” and make smiling pancake friends instead! Breakfast is my favorite meal of the day, so “that” might have inspired all this as well… just saying!
These happy and extra smiley pancake cards are just as clever as my previous cupcake liner card tutorials and super easy to recreate too!
Perfect to give to friends who need a pick me up or a little “hello” to get them through the day. I’m sure the lucky recipient of this card will be thrilled to get something like this {think Valentine’s Day, Mother’s Day or just because!}
So why are we delaying the fun? Keep scrolling to the full tutorial below, so you can whip up these simple DIY breakfast pancake cards using tan colored cupcake liners, a little puffy paint and tons of creativity to bring them to life!
Be sure to also give them your own spin and personality as well! Maybe even include a small gift card to a local breakfast shop OR slide it on the table if YOU decide to make a pancake breakfast for someone else in their home – hint hint! The ideas are limitless on this one!

This is a perfect craft idea for kids and also makes a great homemade gift for them to give away today!
Craft Supplies:
- Tan Cupcake Liners
- Cardstock Paper
- Scissors
- Glue Stick
- Gold Glitter Glue
- Gold Glitter Paper
- Large Wiggle Eyes
- Black Marker
Directions:
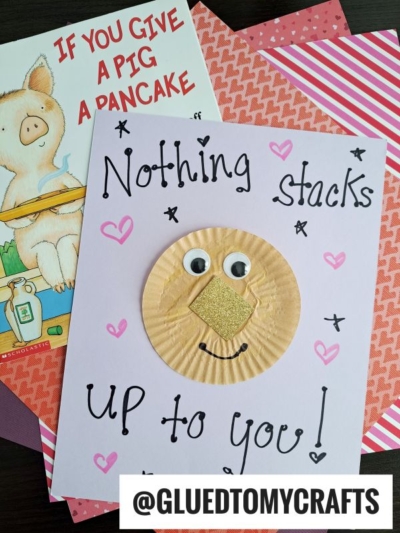
- First things first – grab your brown cupcake liner and flatten it out with your fingers.
- Put glue on the back of the flattened liner and place it in the center of a single sheet of cardstock paper.
- Use your fingers to flatten out the cupcake liner some more and make sure it sticks to the card.
- Add more glue to the back of areas that aren’t sticking to the card.
- Next up – the embellishments. Use the gold glitter glue to make “syrup” lines on the cupcake liner.
- Now grab your gold glitter paper. Cut out a square for the “butter” of the pancake.
- Stick it on top of the wet gold glue, so it “dries” in place. This is the pancake’s nose.
- While the gold glitter is still wet, lay the wiggle eyes down in place.
- Now grab black marker and draw on a smile for your pancake friend, as well as writing a catchy phrase around the finished design.
- Set aside your cupcake liner pancake card masterpieces to let them dry completely before gifting them away!
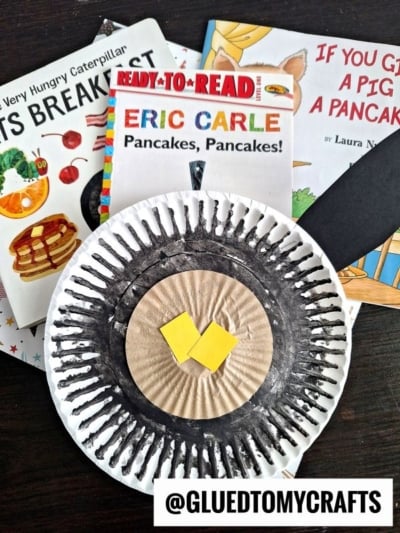
RELATED —> Handprint Pancake Keepsake

AFFILIATE LINK – PAIR OUR CRAFT IDEA WITH THIS BOOK RECOMMENDATION
If you loved today’s cupcake liner pancake friend card tutorial, be sure to also check out our fun and funky Polar Bear Card, Birthday Cake Card and Emoji Card craft posts!
All three of which are super unique to our website AND sure to be loved by the lucky receiver who gets their hands on them!

Cupcake Liner Pancake Card Craft Idea For Kids
This would make an awesome handmade card for any occasion.
Here’s your checklist of supplies to bring this craft to life:
Prepare your creative haven by laying down a protective cover before the crafting magic begins!
Directions:
- First make your card and card front. I went with a square card. You just need to make sure your cupcake liner will fit to the front of the card.Cardstock Paper
- Now you are ready for the "pancake" part. Grab your brown cupcake liner and flatten it out our fingers.1 Cupcake Liner
- Put glue on the back of the flattened liner and place it in the center of the card. Use your fingers to flatten out the cupcake liner some more and make sure it sticks to the card. Add more glue to the back of areas that aren't sticking to the card.
- Next up - the embellishments. Use the gold puffy paint to make "syrup" lines on the cupcake liner.Tulip Puffy Paint
- Grab your gold glitter craft foam. Cut out a square for the "butter" of the pancake. Stick it on top of the wet gold puffy paint, so it "dries" in place. This is the pancake's nose.
- While the gold paint is still wet, lay the wiggle eyes down in place.2 Large Wiggle Eyes
- Now grab the black puffy paint and draw on a smile for your pancake friend.
- Add heart stickers in the corners of the mouth, if desired.
- Now set aside your cupcake liner pancake card masterpieces to let them dry completely before gifting them away!


CLICK HERE TO PRINT THE DIRECTIONS FOR THIS CRAFT
If you've enjoyed our content or have any thoughts to share, we'd love to hear from you! Mention @gluedtomycrafts or tag #gluedtomycrafts on Instagram!