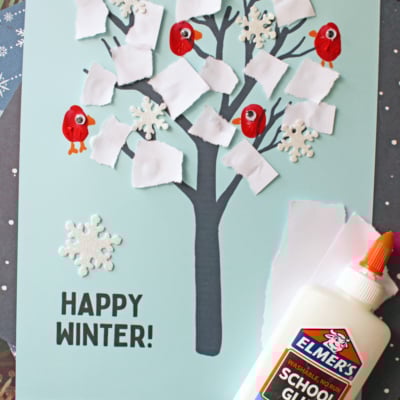
This torn paper winter tree project, with the charming addition of fingerprint cardinals, is a fantastic sensory activity for kids.
Bring a touch of winter wonder and a splash of color into your home with a craft that’s perfect for a cozy afternoon.
This torn paper winter tree project, now with the charming addition of fingerprint cardinals, is a fantastic sensory activity for kids. It helps them develop fine motor skills through the simple act of tearing paper, while also allowing for a bit of messy fun with paint.

This tutorial will guide you through creating a beautiful winter scene using basic craft supplies. We’ll cover the materials list, provide easy-to-follow instructions, and share helpful tips for parents and teachers. You’ll also find creative ideas to customize this project further.
Craft Supplies:
Most of these supplies are likely already in your craft bin, making this an easy and affordable activity.
- White Computer Paper
- Gray or Light Blue Cardstock Paper
- Winter Tree Printable – from our landing page
- School Glue
- Red Washable Craft Paint
- Markers
- Embellishments
Directions:
Ready to get crafting? Follow these steps to make your own torn paper snowy tree complete with sweet little birds.
- Start by downloading the free printable “happy winter” tree template.
- Print the template directly onto a sheet of gray or blue cardstock. This sturdy paper will serve as the base for your artwork and provides the tree outline.
- Grab your white computer paper and start tearing it into small, uneven pieces. Aim for pieces about the size of a penny or a postage stamp. This is a perfect task for little hands, as there’s no right or wrong way to do it!
- Using a glue stick or school glue, have your child begin gluing the torn white paper pieces onto the tree design on the printable. Encourage them to cover the branches and create a snowy look. Remind them that the goal is to have fun, not to achieve perfection.
- Pour a small amount of red washable paint onto a paper plate. You only need a thin layer for fingerprints.
- Have your child press their thumb or fingertip lightly into the red paint.
- Carefully guide them to press their painted finger onto a few of the tree branches. These red prints will be the bodies of your cardinals. You can add one or two on the “ground” below the tree as well.
- Set the artwork aside and allow the red paint fingerprints to dry completely before moving to the next step.
- Once the paint is dry, take the fine-tipped orange marker.
- Add a small triangle for a beak and a couple of tiny stick legs to each red fingerprint to bring your cardinals to life.
RELATED —> Popsicle Stick Cardinal
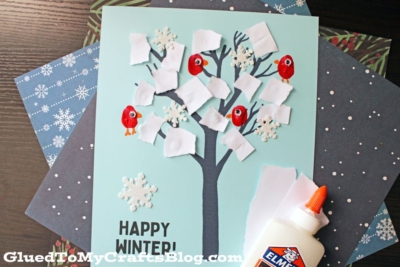
This torn paper winter tree with fingerprint cardinals is a wonderful craft for kids of all ages. It combines sensory play, fine motor practice, and a dash of creativity.
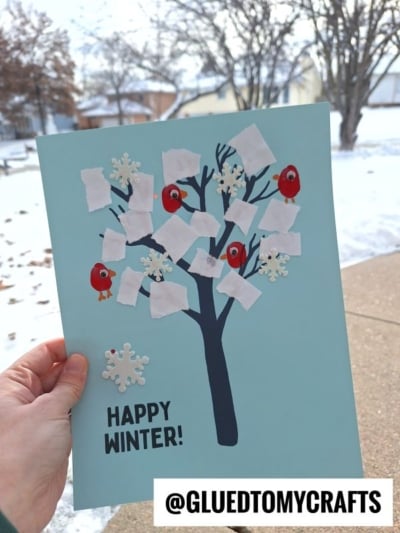
We would be thrilled to see your winter masterpieces! Share a photo of your finished art with us on social media. Now, grab your paper and paint, and let the winter crafting begin! Happy crafting, my friends!

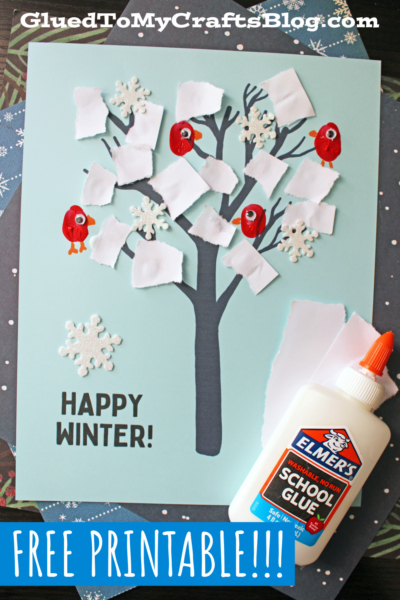
Torn Paper Winter Tree Craft Idea w/Fingerprint Cardinals
This torn paper winter tree project, with the charming addition of fingerprint cardinals, is a fantastic sensory activity for kids.
Here’s your checklist of supplies to bring this craft to life:
- Cardstock Paper
- White Computer Paper
- Winter Torn Paper Printable - Landing Page
- Washable Craft Paint
- Embellishments
- School Glue
Prepare your creative haven by laying down a protective cover before the crafting magic begins!
Directions:
- Start by downloading the free printable "happy winter" tree template.
- Print the template directly onto a sheet of gray or blue cardstock. This sturdy paper will serve as the base for your artwork and provides the tree outline.
- Grab your white computer paper and start tearing it into small, uneven pieces. Aim for pieces about the size of a penny or a postage stamp. This is a perfect task for little hands, as there's no right or wrong way to do it!
- Using a glue stick or school glue, have your child begin gluing the torn white paper pieces onto the tree design on the printable. Encourage them to cover the branches and create a snowy look. Remind them that the goal is to have fun, not to achieve perfection.
- Pour a small amount of red washable paint onto a paper plate. You only need a thin layer for fingerprints.
- Have your child press their thumb or fingertip lightly into the red paint.
- Carefully guide them to press their painted finger onto a few of the tree branches. These red prints will be the bodies of your cardinals. You can add one or two on the "ground" below the tree as well.
- Set the artwork aside and allow the red paint fingerprints to dry completely before moving to the next step.
- Once the paint is dry, take the fine-tipped orange marker.
- Add a small triangle for a beak and a couple of tiny stick legs to each red fingerprint to bring your cardinals to life.


NEED HELP DOWNLOADING OUR FREE PRINTABLES? PLEASE REFER TO OUR FAQ PAGE
If you've enjoyed our content or have any thoughts to share, we'd love to hear from you! Mention @gluedtomycrafts or tag #gluedtomycrafts on Instagram!