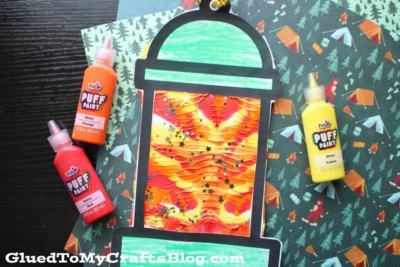
Craft a vibrant paint splat camping lantern with your family! This fun and creative DIY project is perfect for adding a splash of color to your next adventure.

Summer is the perfect time for crafty family fun, and if you’re camping or simply enjoy the outdoors, today’s unique Paint Splat Camping Lantern craft idea is a must-try project for kids. Not only is it an engaging way to inspire creativity, but it also allows your little ones to play with paint colors and create something unique they can display on the fridge or window!
This guide will walk you through how to make a vibrant Paint Splat Lantern using simple materials you probably already have at home. By the end, you’ll have a fun DIY activity that the whole family can enjoy making together!

Discover a fun summer DIY! Learn how to create a glowing paint splat camping lantern with your kids for your next outdoor adventure. Perfect for creative fun!
Craft Supplies:
Here’s a quick list to keep things simple. Everything is easy to find and budget-friendly.
- LANTERN PRINTABLE – FROM OUR LANDING PAGE
- White Cardstock Paper {2 sheets per craft}
- Tulip Puffy Paint
- Loose Craft Glitter
- Scissors
- School Glue
- Baby Wipes
- Single Hole Punch
- Pipe Cleaners {1 per craft}
Directions:
Crafting can get messy, so before you start, protect your table with newspaper, a drop cloth, or an old tablecloth. Dress kids in older clothes or smocks, as paint stains are part of the fun!
- Set up your workspace in an area that can get messy—paint will likely squeeze out of the sides during this craft!
- Start by folding a sheet of white cardstock in half (you’ll need one sheet per craft).
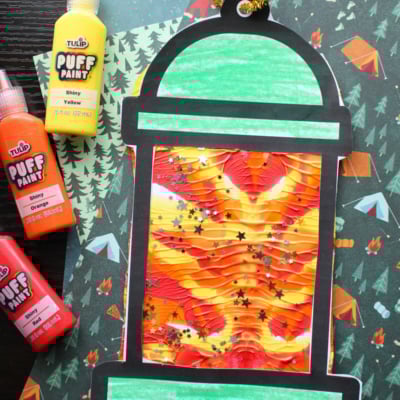
- Unfold the cardstock and apply paint to one side of the paper. Tulip Puffy Paint works particularly well for this step, thanks to its controlled squirt bottle. Be sure to keep the paint within the edges of the paper and use just enough to create a marbled effect—avoid overloading it.
- Once you’ve added the paint, fold the paper in half again, pressing it together firmly. Rub your hands over the folded surface to spread the paint evenly inside. Take note—paint may seep out of the edges, so have baby wipes handy for cleanup!
- Carefully unfold the paper to reveal your unique splatter design. This will serve as the “inside” of your lantern. If desired, sprinkle glitter or rhinestones over the wet paint to add some sparkle. Set the piece aside to dry completely.
- Now grab your lantern printable along with your scissors.
- To finish the St. Patrick’s Day Cauldron craft – place the cutout on top of the paint covered piece and staple the corners so the two pieces won’t come apart.
- When done with the craft, set aside your piece to let it dry completely before you display it proudly for ALL to see!
- Use the scissors to trim out the camping lantern shape {as well as the inners of it!}
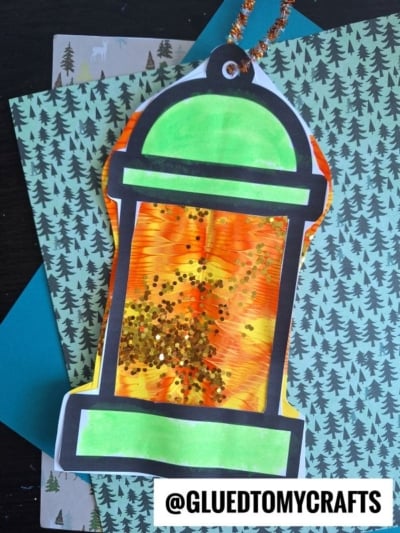
- To assemble your craft, apply glue to the back of the lantern piece and position it over your paint splatter design.
- Allow everything to dry completely before trimming any edges.
- The last step is use a hole punch to add a hole to the top and thread the pipe cleaner through it to make a loop.
- Display your finished masterpiece proudly!
RELATED —> Popsicle Stick Camping Lantern
There’s something magical about combining crafts and summer, isn’t there? On that note, make it a tradition to craft, connect, and create something truly memorable this summer season. Your child’s unique lantern will not only brighten their imagination but make some core memories as you spend time together!
BTW – looking for more craft inspiration and family-friendly ideas? Stay tuned to our blog for more activities to help make your summer unforgettable! Till then – happy crafting, my friends!

Paint Splat Camping Lantern Craft Idea
Craft a vibrant paint splat camping lantern with your family! This fun and creative DIY project is perfect for adding a splash of color to your next adventure.
Here’s your checklist of supplies to bring this craft to life:
Prepare your creative haven by laying down a protective cover before the crafting magic begins!
Directions:
- Set up your workspace in an area that can get messy—paint will likely squeeze out of the sides during this craft!
- Start by folding a sheet of white cardstock in half (you’ll need one sheet per craft).
- Unfold the cardstock and apply paint to one side of the paper. Tulip Puffy Paint works particularly well for this step, thanks to its controlled squirt bottle. Be sure to keep the paint within the edges of the paper and use just enough to create a marbled effect—avoid overloading it.
- Once you've added the paint, fold the paper in half again, pressing it together firmly. Rub your hands over the folded surface to spread the paint evenly inside. Take note—paint may seep out of the edges, so have baby wipes handy for cleanup!
- Carefully unfold the paper to reveal your unique splatter design. This will serve as the "inside" of your lantern. If desired, sprinkle glitter or rhinestones over the wet paint to add some sparkle. Set the piece aside to dry completely.
- Now grab your lantern printable along with your scissors.
- To finish the St. Patrick's Day Cauldron craft - place the cutout on top of the paint covered piece and staple the corners so the two pieces won't come apart.
- When done with the craft, set aside your piece to let it dry completely before you display it proudly for ALL to see!
- Use the scissors to trim out the camping lantern shape {as well as the inners of it!}
- To assemble your craft, apply glue to the back of the lantern piece and position it over your paint splatter design.
- Allow everything to dry completely before trimming any edges.
- The last step is use a hole punch to add a hole to the top and thread the pipe cleaner through it to make a loop.
- Display your finished masterpiece proudly!


NEED MORE HELP DOWNLOADING OUR FREE PRINTABLES? PLEASE REFER TO OUR FAQ PAGE
If you've enjoyed our content or have any thoughts to share, we'd love to hear from you! Mention @gluedtomycrafts or tag #gluedtomycrafts on Instagram!