
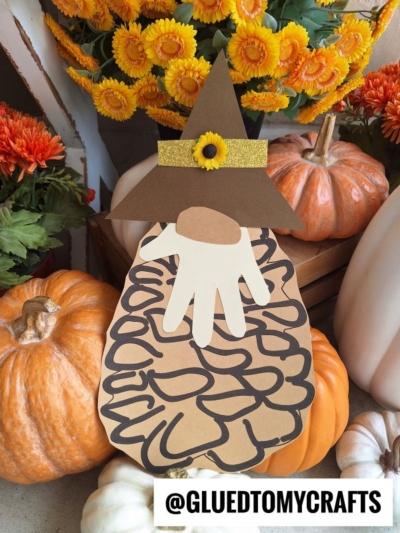
Let your little ones get creative this autumn season with this handprint paper pinecone gnome craft! It’s the perfect way to put those little hands and imaginations to work!

Pinecone Gnome Craft Idea
Today I’m going to show you how EASY it is to make this first-seen-here pine cone body gnome craft with a few simple steps like tracing, cutting and gluing. I promise YOU that this DIY has very basic directions but the end result will give you such a cute craft to show off on the fridge ALL season long.
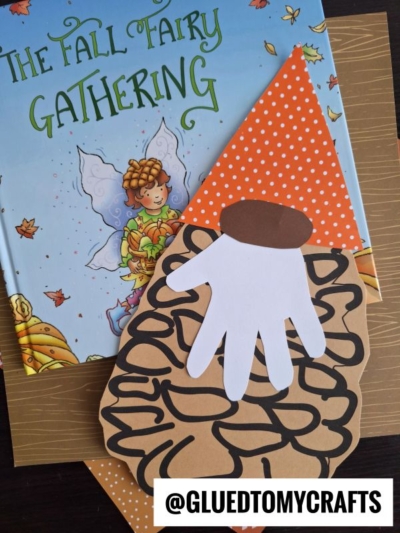
By the end of this paper craft tutorial, not only will have this awesome UNIQUE handprint fall gnome craft to show off, but you will have the perfect excuse to slip it in a scrapbook afterwards, so you can enjoy it year after year!
So are you ready to make it happen?! We have it SUPER easy just for our readers! Just grab the file{s} below, print them out and do some cutting to assemble your new paper gnome pinecone friend within minutes. That’s it! Easy peasy pinecone craft fun!
BTW – it’s going to be the CUTEST fall themed kids craft you make this autumn season because that handprint cutout for the pinecone gnome beard is going to steal the show regardless. Just keep scrolling for ALL the details and free files!
Happy crafting, my dear friends! Be sure to give us a follow on Pinterest, so you never miss a new tutorial from us!
RELATED —> Popsicle Stick Pirate

Here’s a fun and easy pinecone gnome craft idea for kids, that is simply perfect for the autumn season!
Craft Supplies:
- PINECONE PRINTABLE – on our landing page
- White Cardstock Paper
- Brown Cardstock Paper
- Scrapbook Paper
- Crayons, Markers or Coloring Pencils
- Pencil or Pen
- Craft Scissors
- Adhesive
Directions:
- First things first, grab the free “pinecone” file {listed above in the supply list} and print it out on either white cardstock paper or brown. The choice is yours!
- If choosing to print out the free file on white cardstock paper, go ahead and use your choice of coloring material to color in the pinecone design however you like.
- Now we are ready to trim out the pinecone shape from the paper.
- Discard excess paper when done cutting.
- Next grab a piece of white cardstock paper and your pencil.
- Lay your child’s hand FLAT on the paper and trace around it.
- When done tracing, trim out the handprint design on the paper. This will be the beard for your gnome.
- Finally – cut out a small oval nose shape, as well as a large triangle hat from the remaining pieces of paper.
- Now you are ready to assemble it all together.
- Start off my gluing down the white handprint cutout onto pinecone design {right along the edge.} You want the fingertips facing downward on the paper. Ultimately, the pinecone is his body.
- Follow up that step by gluing down the triangle hat on the palm of the handprint cutout.
- To finish off your Paper Pine Cone Gnome Keepsake, glue down the oval nose in the center of it all.
- Now you can stop here or add any other embellishments you see fit, to give it a creative spin.
- Then display your handprint gnome pine cone paper piece proudly for ALL to see!!
- Don’t forget to snap a few pictures of your finished handprint pinecone gnome on your phone and tag us on your social media sites! #gluedtomycrafts
RELATED —> Pinecone Pumpkin
If you LOVE this paper fall gnome craft idea, you may also enjoy our Pinecone Owls & Fork Painted Squirrel craft posts as well!

Handprint Paper Pinecone Gnome Craft
Here’s your checklist of supplies to bring this craft to life:
- Pencil or Pen
Prepare your creative haven by laying down a protective cover before the crafting magic begins!
Directions:
- First print out our provided printable, in color, on a single sheet of cardstock paper. You only need one print per craft.
- If choosing to print out the free file on white cardstock paper, go ahead and use your choice of coloring material to color in the pinecone design however you like.
- Now we are ready to trim out the pinecone shape from the paper.
- Discard excess paper when done cutting.
- Next grab a piece of white cardstock paper and your pencil.
- Lay your child's hand FLAT on the paper and trace around it.
- When done tracing, trim out the handprint design on the paper. This will be the beard for your gnome.
- Finally - cut out a small oval nose shape, as well as a large triangle hat from the remaining pieces of paper.
- Now you are ready to assemble it all together.
- Start off my gluing down the white handprint cutout onto pinecone design {right along the edge.} You want the fingertips facing downward on the paper. Ultimately, the pinecone is his body.
- Follow up that step by gluing down the triangle hat on the palm of the handprint cutout.
- To finish off your Paper Pine Cone Gnome Keepsake, glue down the oval nose in the center of it all.
- Now you can stop here or add any other embellishments you see fit, to give it a creative spin.
- Then display your handprint gnome pine cone paper piece proudly for ALL to see!!


NEED MORE HELP DOWNLOADING OUR FREE PRINTABLES? PLEASE REFER TO OUR FAQ PAGE