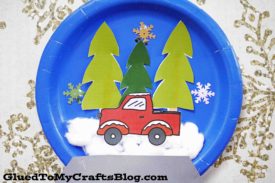
This adorable snow globe craft is perfect for kids of all ages! It's easy to make and a great way to get into the holiday spirit.

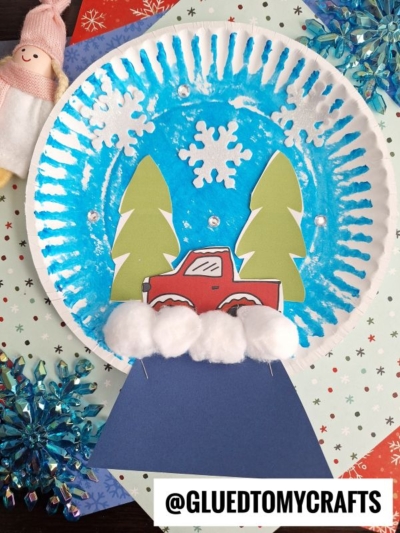
This adorable Paper Plate Red Truck Christmas Snow Globe craft is perfect for kids of all ages! It’s easy to make and a great way to get into the holiday spirit.

This year I’m going all out on the red truck EVERYTHING obsession. From our Christmas tree to the wrapping paper, everything is going to be centered around my son’s LOVE of RED TRUCKS!
If you were to ask lil man what he wants for Christmas, he will easily tell you “a BIG red truck.” In fact… this has been his request EVERY year for the past three years. And although he gets a red truck every time, my guess is it’s not the “right” red truck. Here’s to hoping Santa can deliver this time! 🙂
Anyways – that is a little back story on what inspired our latest kid craft tutorial. This post even includes a FREE printable template to get you started {the red truck is even hand-drawn by me!} Just grab the freebie file, print it out on white cardstock paper and then get ready to assemble your own custom snow globe within minutes!
Happy crafting, my friends! Please don’t forget to share pictures of your child’s finished holiday truck in a paper plate snow globe, on our Facebook page, for us to admire! #gluedtomycrafts

Looking for a fun and easy craft to do with the kids this holiday season? Look no further than this adorable Paper Plate Red Truck Christmas Snow Globe!
Craft Supplies:
- Large Paper Plate
- Cardstock Paper
- Scissors
- Stapler
- Truck Printable – on our landing page
- White Cardstock Paper
- White Cotton Balls
- School Glue
- Embellishments
Directions:
- First things first – if you aren’t using a colored paper plate, go ahead and give it some color if you like! You can use paint, tissue paper – whatever the heart desires. I just liked the look of a pre-colored paper plate but don’t let my decision stop you! When done, set it aside.
- Now grab your choice of colored cardstock, scissors and stapler. Cut out a “base” for your snow globe. Go ahead and staple it to your paper plate to make the bottom of our snow globe.
- Next grab the cotton balls and school glue. Go ahead and glue a layer of “snow” on the bottom of your snow globe. Set aside.
- Now if you haven’t already, go ahead and print out the red truck & trees file that is listed above. You only need one print per craft.
- Use scissors to trim out the pieces in the printable. Younger kids will probably need help with this step.
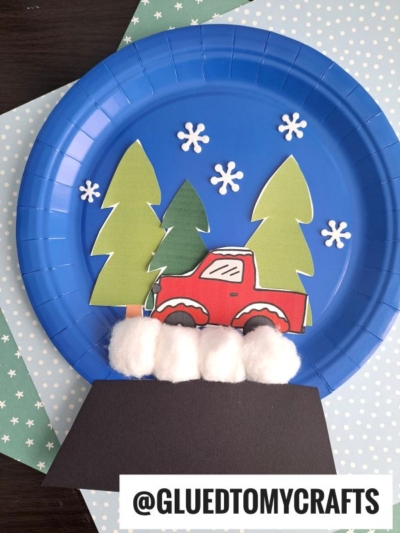
- Go ahead and glue the trees down first into your snow globe, followed by the red truck on top.
- Finally – add other embellishments you see fit {like snowflake stickers or glitter} to give it that custom one-of-a-kind look! You could even get out the glitter glue!
- When done making your masterpiece, set it all aside to let it dry completely, before you display it proudly for ALL to see!
RELATED —> Snow Tubing Snowman
This time of year is my FAVORITE time to share craft tutorials! Please be sure to check out our newest Paper Plate Reindeer Car, Gingerbread Princesses and Reindeer Frame craft posts!

Paper Plate Red Truck Christmas Snow Globe Craft Idea
This adorable snow globe craft is perfect for kids of all ages! It's easy to make and a great way to get into the holiday spirit.
Here’s your checklist of supplies to bring this craft to life:
Prepare your creative haven by laying down a protective cover before the crafting magic begins!
Directions:
- First things first - if you aren't using a colored paper plate, go ahead and give it some color if you like! You can use paint, tissue paper - whatever the heart desires. Set aside when done.
- Now grab your choice of colored cardstock paper, scissors and stapler.
- Cut out a "base" for your snow globe.
- Go ahead and staple it to your paper plate to make the bottom of our snow globe.
- Next grab the cotton balls and school glue.
- Glue a layer of "snow" on the bottom of your paper plate piece. Set aside.
- Now if you haven't already, go ahead and print out the red truck & trees file. You only need one print per craft.
- Use scissors to trim out the pieces in the printable. Younger kids will probably need help with this step.
- Go ahead and glue the trees down first into your snow globe, followed by the red truck on top.
- Finally - add other embellishments you see fit {like snowflake stickers or glitter} to give it that custom one-of-a-kind look! You could even get out the glitter glue!
- When done making your masterpiece, set it all aside to let it dry completely, before you display it proudly for ALL to see!


NEED HELP DOWNLOADING OUR FREE PRINTABLES? PLEASE REFER TO OUR FAQ PAGE
If you've enjoyed our content or have any thoughts to share, we'd love to hear from you! Mention @gluedtomycrafts or tag #gluedtomycrafts on Instagram!