These snowy winter trees are super simple for young kids to make this holiday season!
The holiday season brings magic, wonder, and countless opportunities for creative family time. Among the many activities that can transform a quiet afternoon into a memorable bonding experience, crafting stands out as both entertaining and educational. Today’s popsicle stick winter tree craft combines simplicity with creativity, making it perfect for children of all ages while requiring minimal supplies you likely already have at home.
Creating winter trees from popsicle sticks offers more than just a fun activity – it develops fine motor skills, encourages artistic expression, and provides a tangible way for kids to connect with the season.
Whether you’re looking for a rainy day project, a classroom activity, or a way to decorate for the holidays, this craft delivers on all fronts!

These popsicle stick holiday trees are super simple for young kids to make and a great way for them to get into the holiday spirit. Mix up different colors or add sparkles, glitter, and other embellishments.
Craft Supplies:
One of the best aspects of this winter tree craft is its simplicity. You won’t need to make a special trip to the craft store or invest in expensive supplies. Most materials can be found around your home or picked up during your next grocery run.
- Jumbo Popsicle Sticks – 3 per craft
- School Glue
- White Craft Paint
- Paint Brush
- Small Paper Plate
- White Cardstock Paper
- Brown Cardstock Paper
- Craft Scissors
- Silver or Gold Glitter Glue
Directions:
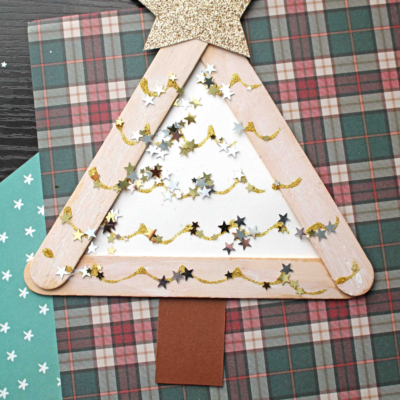
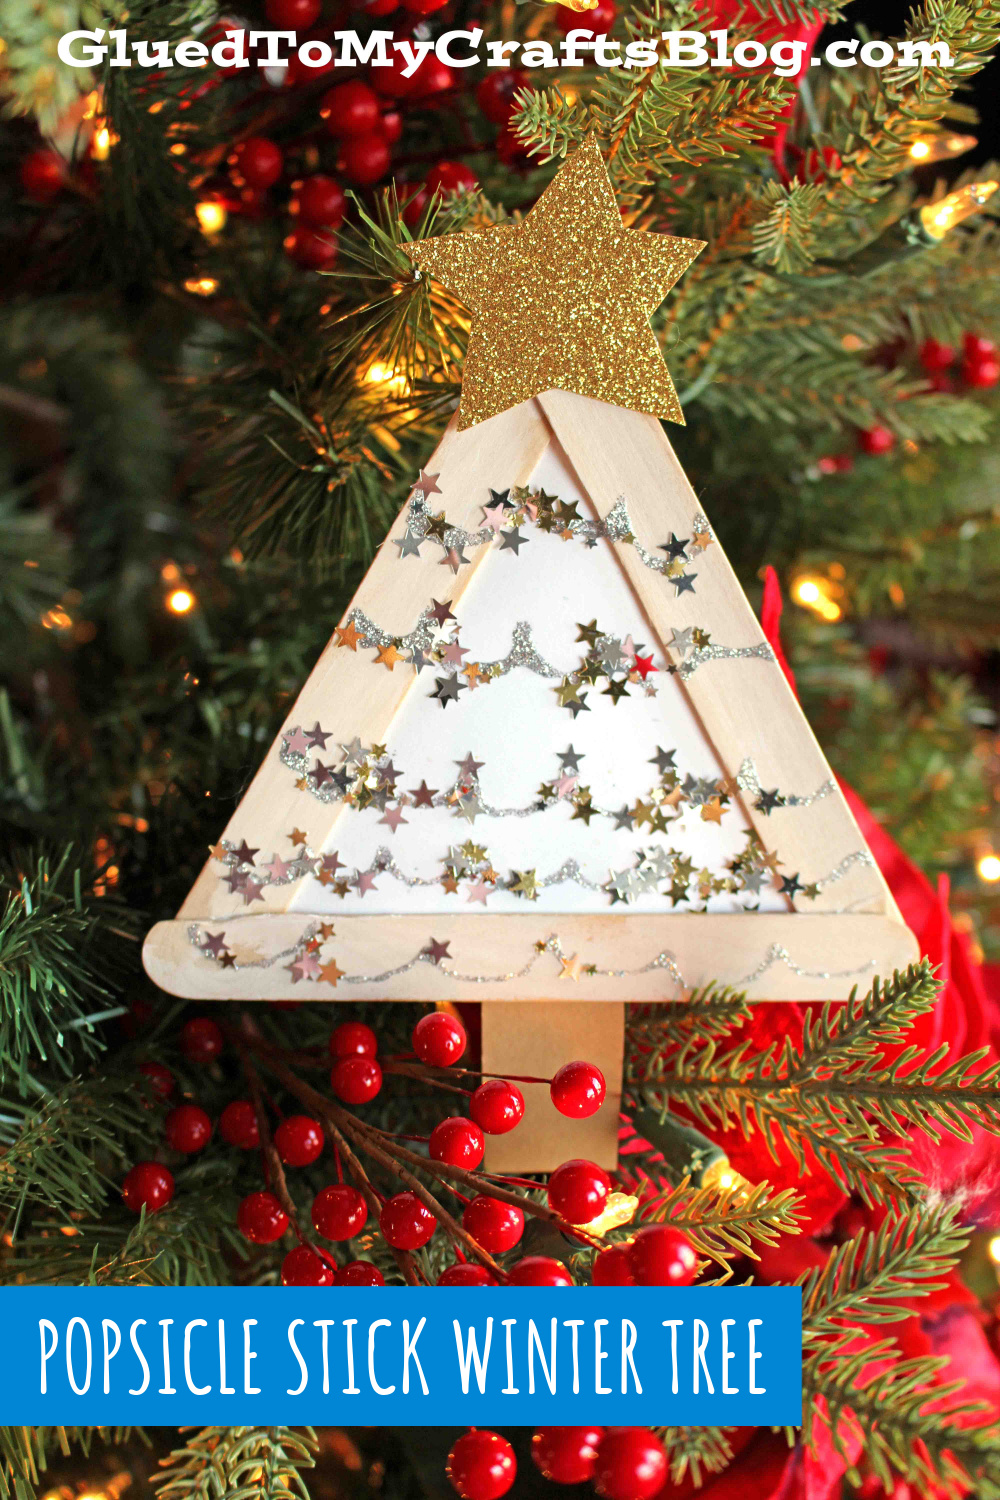
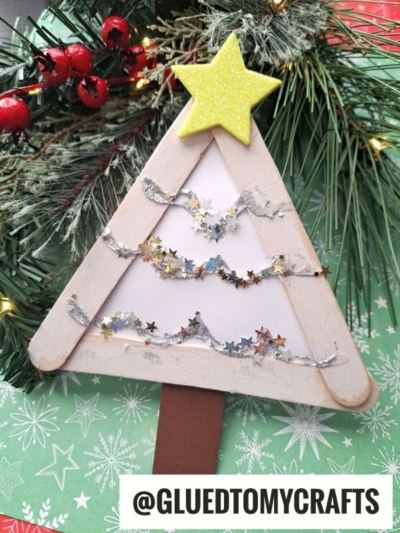
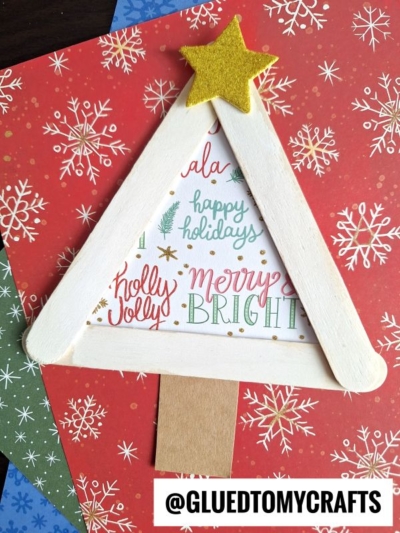
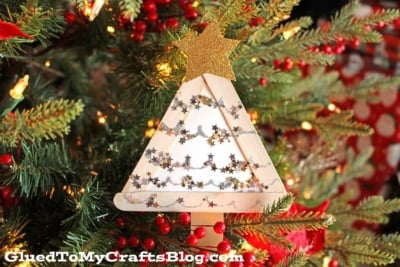
- First have children assemble the base of their winter tree by gluing THREE popsicle sticks together to look like a triangle.
- Set aside to let it dry. Repeat for each piece you want to make today.
- Next squirt some paint on a paper plate and have children paint their newly made popsicle stick shapes completely white.
- Again, set aside to let it dry completely.
- Now grab your scissors and brown & white cardstock.
- Cut out a small rectangle from the brown.
- Go ahead and glue it to the popsicle stick piece to represent the trunk of the tree.
- Next grab your white cardstock. Trim it down to fit inside the popsicle stick piece.
- Glue it to the back of your piece.
- To finish off the Popsicle Stick Winter Tree – have children use glitter glue to “paint” snow all over the popsicle stick shape. If desired, sprinkle some loose craft glitter on top of that.
- Once done, set it all aside to let it dry completely before displaying proudly!
- For easy displaying in your home – glue some string to the back for hanging on the tree or adding to gift packages!
RELATED —> Paper Plate Sleeping Bear
As always – if our crafty little post inspires you, let us know! We LOVE seeing our inspiration come to life! Be sure to snap a picture of your creations and simply tag us on Facebook or Instagram for easy sharing! #gluedtomycrafts

Popsicle Stick Winter Tree Craft Idea
These snowy winter trees are super simple for young kids to make this holiday season!
Here’s your checklist of supplies to bring this craft to life:
- School Glue
- 1 Scissors
- Glitter Glue
Prepare your creative haven by laying down a protective cover before the crafting magic begins!
Directions:
- First have children assemble the base of their winter tree by gluing THREE popsicle sticks together to look like a triangle.
- Set aside to let it dry. Repeat for each piece you want to make today.
- Next squirt some paint on a paper plate and have children paint their newly made popsicle stick shapes completely white.
- Again, set aside to let it dry completely.
- Now grab your scissors and brown & white cardstock.
- Cut out a small rectangle from the brown.
- Go ahead and glue it to the popsicle stick piece to represent the trunk of the tree.
- Next grab your white cardstock. Trim it down to fit inside the popsicle stick piece.
- Glue it to the back of your piece.
- To finish off the Popsicle Stick Winter Tree - have children use silver glitter glue to "paint" snow all over the popsicle stick shape.
- Once done, set it all aside to let it dry completely before displaying proudly!
- For easy displaying in your home - glue some string to the back for hanging on the tree or adding to gift packages!

CLICK HERE TO PRINT THE DIRECTIONS FOR THIS CRAFT
If you've enjoyed our content or have any thoughts to share, we'd love to hear from you! Mention @gluedtomycrafts or tag #gluedtomycrafts on Instagram!