
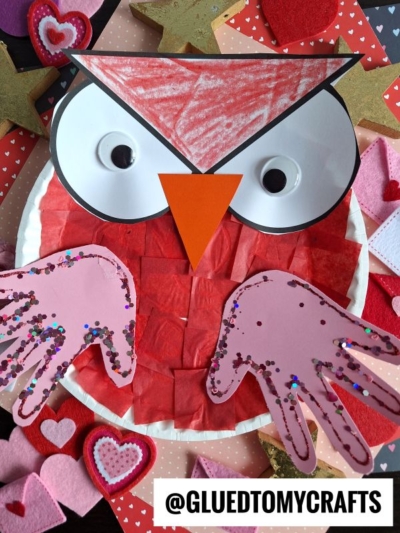
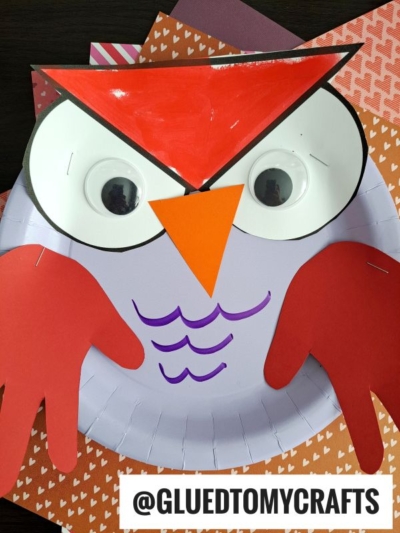
The best part is once you help the little ones create the initial version there are endless ways they can customize it exactly how they want.
Keep reading now for instructions on how to make this clever owl craft from paper plates!
Paper Plate & Tissue Paper Owl
Are you looking for a fun craft activity to do with your kids? A craft that is both educational and entertaining? Look no further than this adorable paper plate owl craft!
This project can be completed with just a few simple materials like paper plates, paint, and some colorful crafting supplies. Not only will the children have a blast creating their own personalized owls but they’ll also learn about colors and shapes in the process.
All it takes is less than an hour of creativity and patience to make these cuties–so grab your tools and get ready to dive into this exciting art project full of learning experiences!
RELATED —> Owl Always Love You Keepsake

Crafting with kids can be a rewarding and fun experience for everyone involved! Whether you have children at home, in your classroom, or even just friends and family that love to craft, this paper owl craft is the perfect way to get creative.
Craft Supplies:
- Large Paper Plate – 1 per craft
- Craft Paint
- Paint Brush
- Loose Craft Glitter
- White Cardstock Paper
- Orange Cardstock Paper
- OWL Printable – on our landing page
- Crayons, Markers or Coloring Pencils
- School Glue
- Extra Large Googly Eyes
Directions:
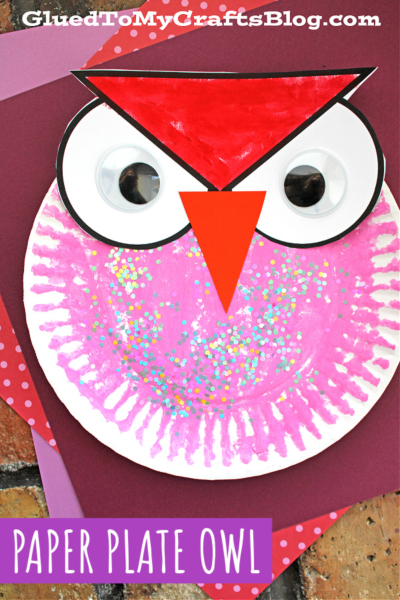
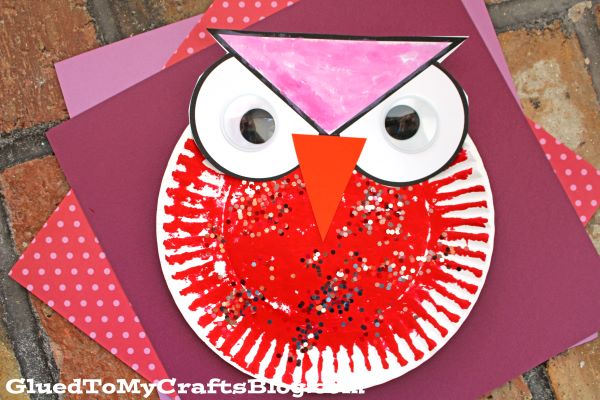
- First things first – paint your large paper plate completely. Simply squirt some craft paint in the center and use the paint brush to move it all around.
- When done painting {and while the paint is still wet} go ahead & sprinkle some loose craft glitter on top.
- Set aside the paper plate till later.
- Now grab your printable and your choice of coloring utensils.
- Color in ONE of the owl head designs.
- When done, trim it out with scissors and save the second design for repeating the craft later.
- Grab your orange cardstock paper.
- Cut out a triangle shape for the owls nose.
- When ready, it’s time to start assembling! Start off by gluing on the head shape to the painted paper plate.
- Follow that up with the nose in the center and finally, the googly eyes.
- Finish off with any other embellishments you see fit.
- Then allow it to dry completely, before displaying it proudly for ALL to see!
RELATED —> 20+ Owl Craft Ideas For Kids
If you are looking for even MORE easy kid craft ideas from Glued To My Crafts, be sure to check out these fun posts, listed below.
Paper Plate Milkshake
Handprint Owl Keepsake
Mama Bear Magnets
Craft Stick Owl On Branch
Paper Plate Love Monster
The Day It Rained Hearts
Paper Plate and Popcorn Sheep
Popsicle Stick Owls

Paper Plate Owl Craft
Here’s your checklist of supplies to bring this craft to life:
- 1 Large Paper Plate
- Craft Paint
- Loose Craft Glitter
- Cardstock Paper
- Free Owl Printable - Landing Page
- 2 Extra Large Googly Eyes
Prepare your creative haven by laying down a protective cover before the crafting magic begins!
Directions:
- First things first - paint your large paper plate completely. Simply squirt some craft paint in the center and use the paint brush to move it all around.
- When done painting {and while the paint is still wet} go ahead & sprinkle some loose craft glitter on top.
- Set aside the paper plate till later.
- Now grab your printable and your choice of coloring utensils.
- Color in ONE of the owl head designs.
- When done, trim it out with scissors and save the second design for repeating the craft later.
- Grab your orange cardstock paper.
- Cut out a triangle shape for the owls nose.
- When ready, it's time to start assembling! Start off by gluing on the head shape to the painted paper plate.
- Follow that up with the nose in the center and finally, the googly eyes.
- Finish off with any other embellishments you see fit.
- Then allow it to dry completely, before displaying it proudly for ALL to see!


NEED MORE HELP DOWNLOADING OUR FREE PRINTABLES? PLEASE REFER TO OUR FAQ PAGE