Create a stunning Paper Plate Fall Rainbow with simple materials. Enjoy crafting and let your creativity shine!

There’s something magical about fall – crisp air, vibrant leaves, and plenty of opportunities for crafting. This “Paper Plate Fall Rainbow Craft” is perfect for families and educators looking for a simple, creative project to celebrate the season.
With bright autumn colors and adorable pumpkins (thanks to our free printable!), this craft is as fun to make as it is to display. Packed with color and charm, it’s a great way to get kids excited about creative activities while exploring the beauty of fall.
Follow this easy step-by-step guide to create your very own fall-inspired rainbow!
Celebrate the vibrant colors of autumn while enjoying hands-on crafting with kids of all ages! This activity combines bright fall hues, adorable pumpkins, and a lot of creative possibilities.
Craft Supplies:
Before you get started, gather the following materials:
- Pumpkin Rainbow Printable – from our landing page
- White Cardstock Paper
- Crayons, Markers or Coloring Pencils
- Paint Crayons
- Large White Paper Plate – one makes two rainbows
- Scissors
- Stapler
- Embellishments
Directions:
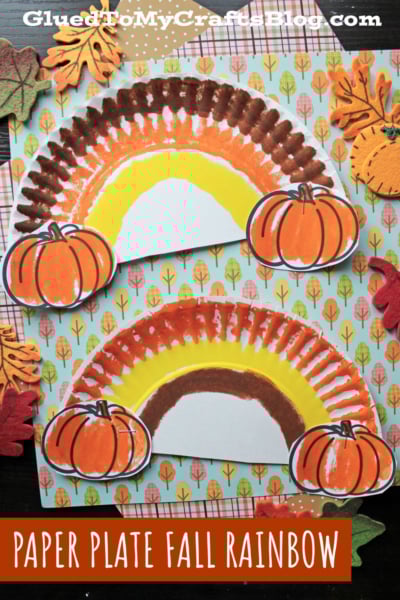
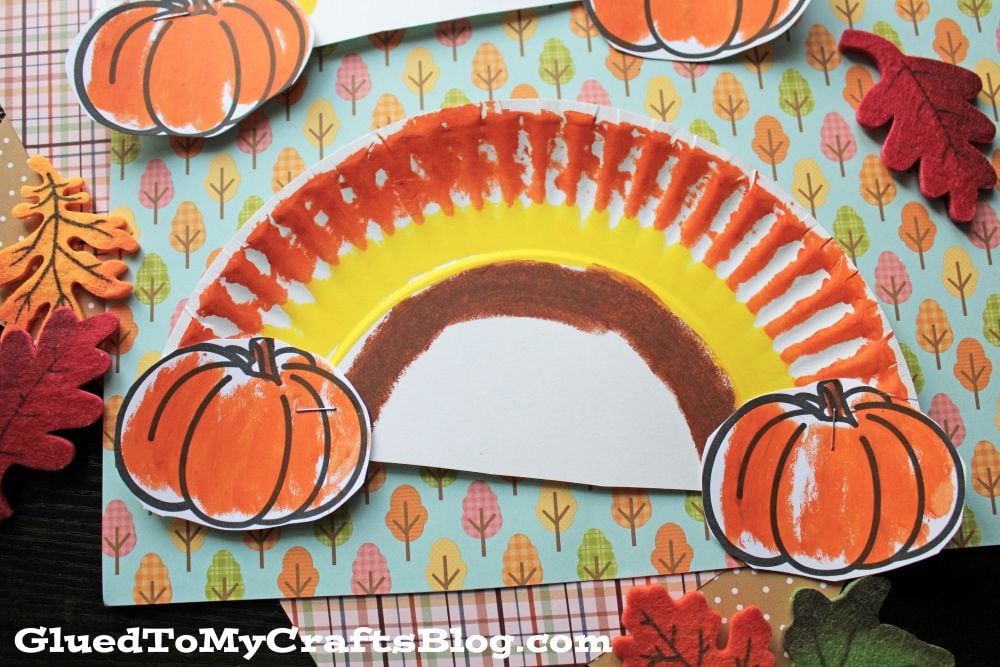
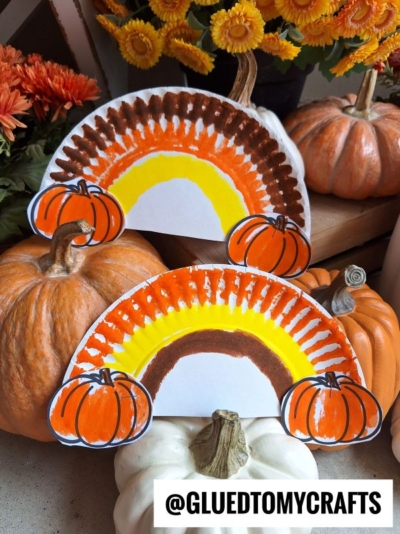
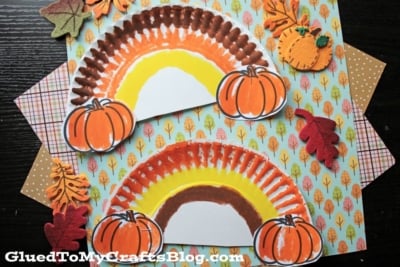
- First things first – print out the free pumpkin printable linked above. Go ahead and color in the pumpkin designs {two per rainbow} and trim them out.
- Next up, cut your paper plate in half. Each half will form the base of your rainbow. Set one half aside if you’re crafting with multiple kids or save it for a future project.
- Using your fall-colored paint crayons, create stripes on the curved side of the paper plate to mimic a rainbow. Start with the outer edge and work your way inwards, leave a small space at the innermost curve. Allow the paint to dry completely.
- Once your paint is dry, it’s time to decorate! Use a stapler {or glue} to attach the pumpkin cutouts along the bottom edge of the rainbow.
- If you’d like, add some extra details or embellishments. Then display proudly for all to see!
RELATED —> Torn Paper Leaf
And there you have it – a charming Paper Plate Fall Rainbow with pumpkins to celebrate the season! This craft is not only fun and easy to make but also a great way to teach children about fall colors and seasonal symbols.
Whether you’re a parent looking for a rainy-day activity or a teacher aiming to brighten up the classroom, this project is sure to bring smiles.
We’d love to see your creations! Share your finished rainbows with us and spread the autumn cheer. Happy crafting!

Paper Plate Fall Rainbow Craft Idea With Pumpkins
Create a stunning Paper Plate Fall Rainbow with simple materials. Enjoy crafting and let your creativity shine!
Here’s your checklist of supplies to bring this craft to life:
- School Glue
Prepare your creative haven by laying down a protective cover before the crafting magic begins!
Directions:
- First things first - print out the free pumpkin printable linked above. Go ahead and color in the pumpkin designs {two per rainbow} and trim them out.
- Next up, cut your paper plate in half. Each half will form the base of your rainbow. Set one half aside if you’re crafting with multiple kids or save it for a future project.
- Using your fall-colored paint crayons, create stripes on the curved side of the paper plate to mimic a rainbow. Start with the outer edge and work your way inwards, leave a small space at the innermost curve. Allow the paint to dry completely.
- Once your paint is dry, it’s time to decorate! Use a stapler {or glue} to attach the pumpkin cutouts along the bottom edge of the rainbow.
- If you'd like, add some extra details or embellishments. Then display proudly for all to see!


NEED MORE HELP DOWNLOADING OUR FREE PRINTABLES? PLEASE REFER TO OUR FAQ PAGE
If you've enjoyed our content or have any thoughts to share, we'd love to hear from you! Mention @gluedtomycrafts or tag #gluedtomycrafts on Instagram!