Learn how to make a colorful popsicle suncatcher craft out of tissue paper. Easy and fun tutorial that's sure to spark big smiles

It’s an inexpensive project that doesn’t require much in terms of materials or skill level – perfect for busy moms & teachers.
Let the creative juices start flowing as we dive into how to make this beautiful tissue paper popsicle suncatcher tutorial come to life in your home today!

Welcome to our latest DIY craft project! Let’s get creative with tissue paper, popsicle sticks, and clear contact paper!
We have a fun suncatcher craft idea that is perfect for your little ones or students. With just a few basic supplies you can create these beautiful decorations in no time at all!
Your kids will love this unique activity – no matter their age – as they watch the colors transform into something extraordinary right before their eyes.
So on that note, gather up your colorful tissue paper, download our free printable and let’s bring on the sunshine in your home!

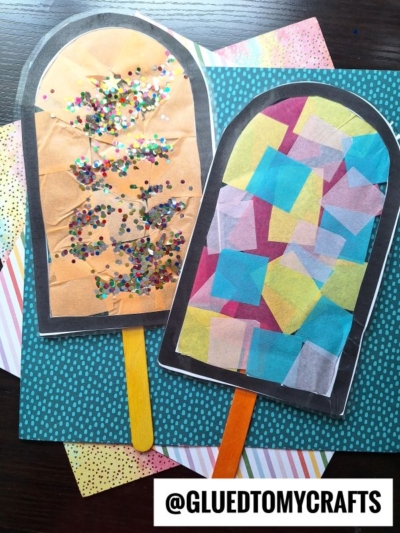
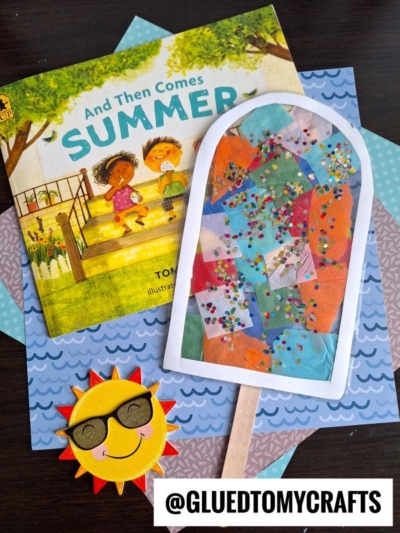
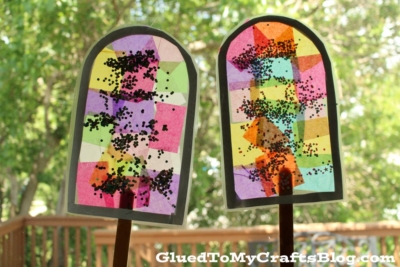
This tissue paper popsicle suncatcher craft is an easy to make craft that will bring lots of smiles as it brightens up any windowsill or porch.
Craft Supplies:
- POPSICLE PRINTABLE – on our landing page
- Clear Contact Paper
- White Cardstock Paper
- Paper Scissors
- Stapler
- Tissue Paper – several colors
- Loose Craft Glitter
- Jumbo Popsicle Stick – one per craft
Directions:
- First grab and print the provided file on a single sheet of white cardstock paper. You need ONE printout per craft.
- Next, use your scissors to trim out the blank popsicle design, as well as the center of it.
- Now grab your contact paper and cut two pieces the same length.
- Take off the protective paper off one and lay it on a flat surface.
- Lay your paper cutout on the sticky side of the contact paper, face down.
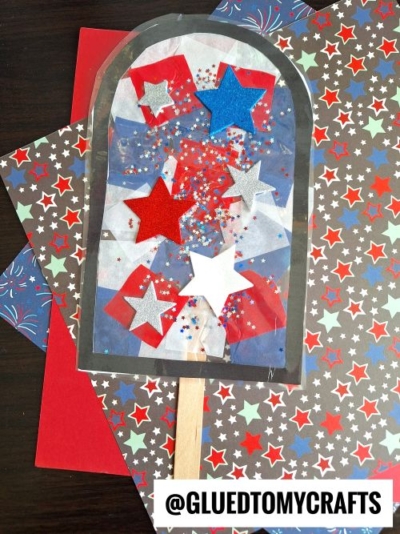
- If desired, shake some loose craft glitter on top of the contact paper {inside the design} to really add some pops of color.
- Now grab your tissue paper and cut several small squares pieces off.
- Have your child place those pieces on top of the contact paper, inside the design, to fill it in with color.
- Once done, grab the other piece of contact paper and remove it’s protective sheet.
- Lay it on top of the other piece and press firmly, making sure every corner is stuck together.
- Now cut around the popsicle design to remove the excess paper.
- To finish off the Tissue Paper Popsicle Suncatcher, staple a single jumbo popsicle stick to the bottom of the finish piece.
- And that’s it! Now display proudly on a bright window or on the kitchen fridge with a few pieces of clear tape!
RELATED —> Potato Stamped Ice Cream Cone Card
If you are looking for even MORE easy summer themed kid craft ideas, be sure to check out these fun posts listed below.
And “if” you decide to make our Stained Glass Popsicle kid craft, please share a picture on our Facebook page or tag us on Instagram with #gluedtomycrafts for us to see. We love seeing our inspiration come to life!
- Paper Plate Surf Board
- Paper Plate Ice Cream
- Paper Plate Hermit Crab
- Paper Plate Ice Cream Truck
- Paper Chalk Art Jellyfish
- Bubble Wrap Jelly Fish
- Cupcake Liner Jellyfish
- Popsicle Stick Lion Head

Tissue Paper Popsicle Suncatcher Craft
Learn how to make a colorful popsicle suncatcher craft out of tissue paper. Easy and fun tutorial that's sure to spark big smiles
Here’s your checklist of supplies to bring this craft to life:
Prepare your creative haven by laying down a protective cover before the crafting magic begins!
Directions:
- First grab and print the provided file on a single sheet of white cardstock paper. You need ONE printout per craft.
- Next, use your scissors to trim out the blank popsicle design, as well as the center of it.
- Now grab your contact paper and cut two pieces the same length.
- Take off the protective paper off one and lay it on a flat surface.
- Lay your paper cutout on the sticky side of the contact paper, face down.
- If desired, shake some loose craft glitter on top of the contact paper {inside the design} to really add some pops of color.
- Now grab your tissue paper and cut several small squares pieces off.
- Have your child place those pieces on top of the contact paper, inside the design, to fill it in with color.
- Once done, grab the other piece of contact paper and remove it’s protective sheet.
- Lay it on top of the other piece and press firmly, making sure every corner is stuck together.
- Now cut around the popsicle design to remove the excess paper.
- To finish off the Tissue Paper Popsicle Suncatcher, staple a single jumbo popsicle stick to the bottom of the finish piece.
- And that's it! Now display proudly on a bright window or on the kitchen fridge with a few pieces of clear tape!


NEED MORE HELP DOWNLOADING OUR FREE PRINTABLES? PLEASE REFER TO OUR FAQ PAGE
If you've enjoyed our content or have any thoughts to share, we'd love to hear from you! Mention @gluedtomycrafts or tag #gluedtomycrafts on Instagram!