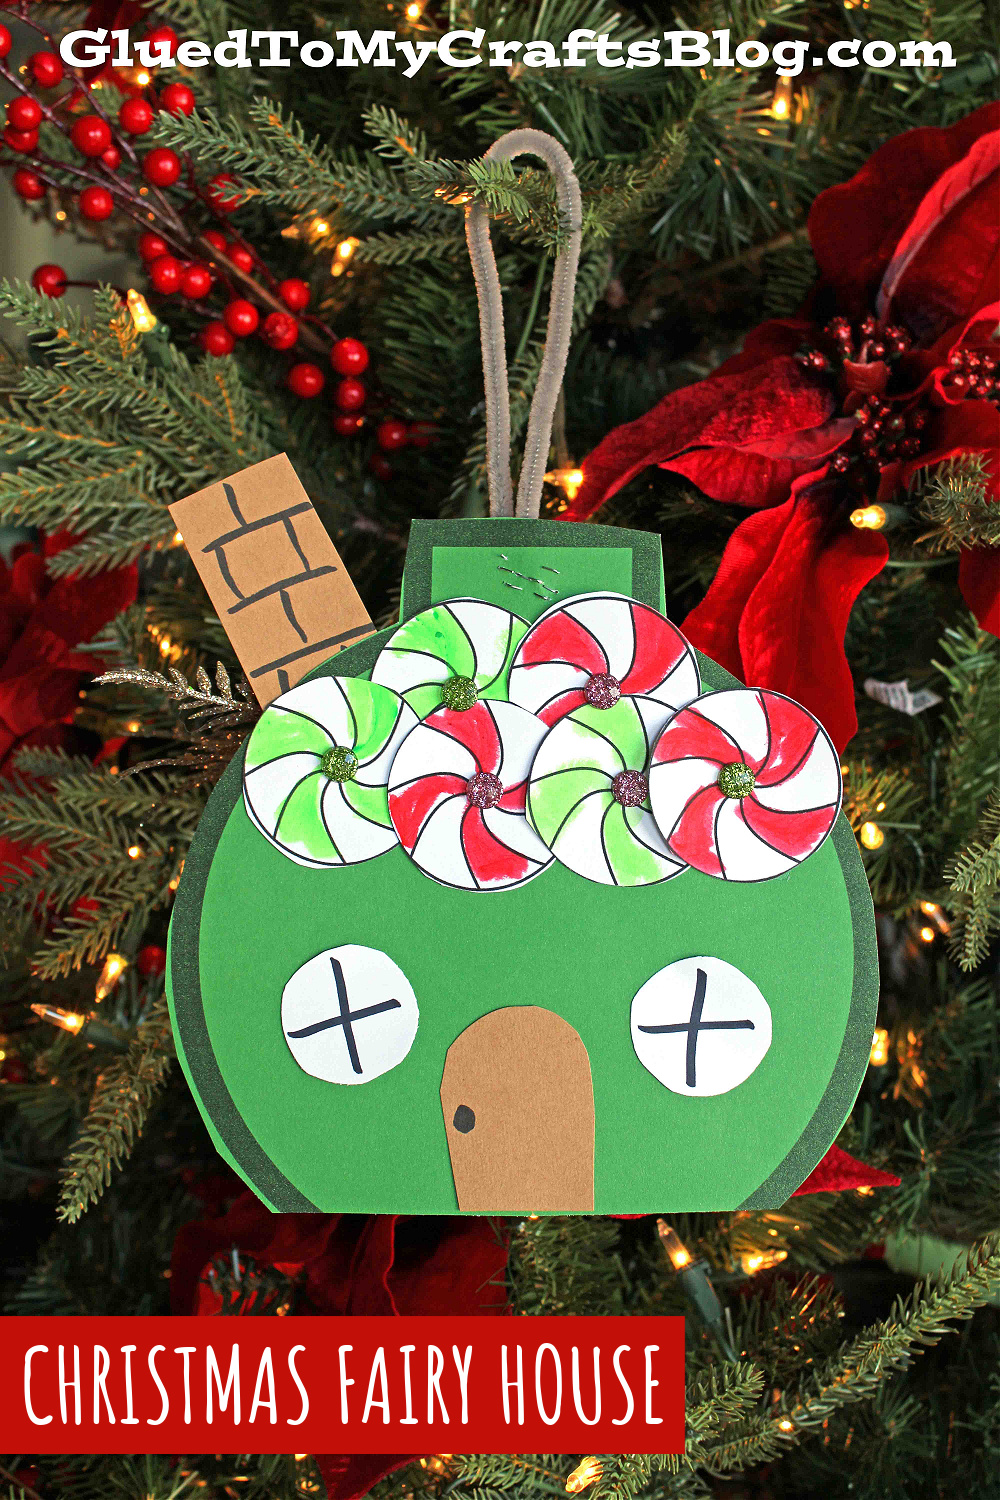
We are putting our crafty hard hats on again and building something EXTRA MAGICAL this holiday season! I’m so excited to present to you, our one-of-a-kind Christmas Bulb Fairy House kid craft tutorial today!
It’s a first seen here idea and we hope it inspires you & your little artists today!

This easy kids craft is perfect for getting into the Christmas spirit! With just a few simple supplies, you can help your child build their very own fairy house made from foam Christmas bulbs.
Let their imagination run wild and see what kind of creative designs they come up with!
Overall, this holiday DIY is rather easy and honestly, you can’t go wrong with how you decorate it!
If you would like to recreate this Paper Christmas Ornament House idea with your child today, you can find all the details below, as well as some free printables to get you started even faster!
I just want to throw out there that I really hope that you and your child are encourage to think outside the box when it comes to building a custom fairy house from a Christmas light bulb. I want you both to feel good about what you use, so don’t feel limited by what you see in my pictures. If you want it to sparkle – grab the glitter, the sequins – whatever your crafty heart desires to make it shine! You want it more plain? No worries! Add as little or as much as you like! With today’s post, I just hope to inspire and get those wheels spinning as you build away! After all – that’s the BEST part of crafting in the first place. You take my idea and expand on it & the creativity just grows from there!
So without further ado, I’ll let you get to “designing” your perfect Christmas bulb fairy house today!
And on last note – one of the steps is to add a pipe cleaner towards the top of the paper Christmas bulb cutout. This way it becomes the PERFECT piece to display on the Christmas tree afterwards, just like a real ornament! Mind blown?! Anyways… I’ll let you get to it!
Happy crafting, my dear friends and don’t forget to share pictures of your new mixed media Christmas light bulb ornament houses with us on our Facebook page! I can’t wait to see what you BUILD for guests this holiday season! #gluedtomycrafts
RELATED: Christmas Gnomes and Christmas Fairy House

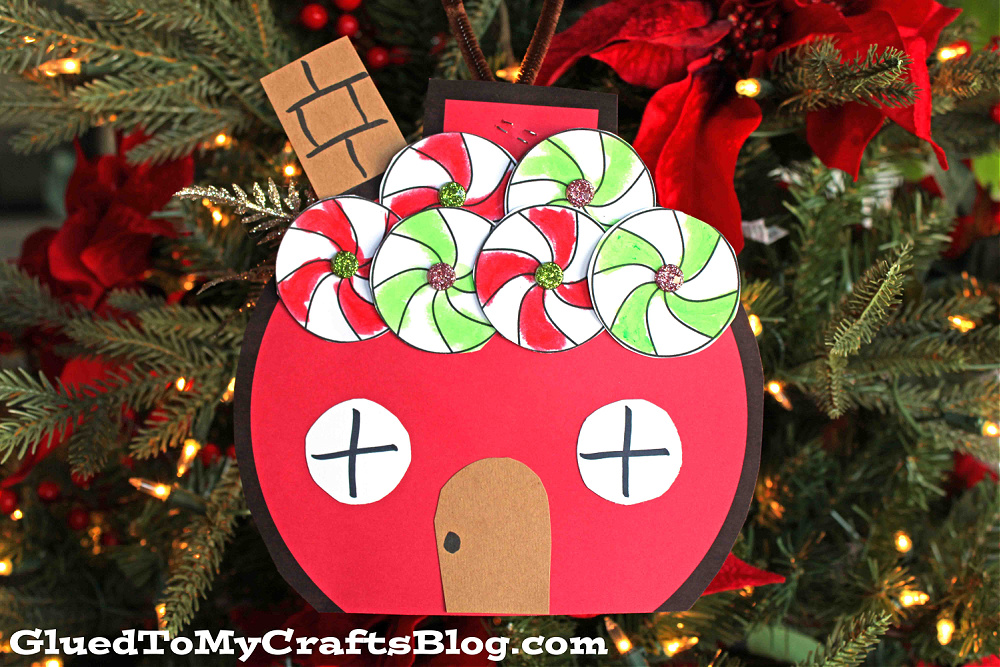
Christmas Bulb Fairy House
Looking for a fun and easy craft to do with your kids this holiday season? Look no further than our Craft Foam Christmas Bulb Fairy House!
Craft Supplies:
PASSWORD FOR FREE FILES – GLUEDTOMYCRAFTS2026
- Christmas Bulb Printable – on box.com
- Peppermint Candy Printable – on box.com
- White Cardstock Paper
- Crayons, Markers or Coloring Pencils
- Craft Scissors
- Colored Cardstock paper
- Brown Cardstock Paper
- School Glue
- Holiday Stickers
- Pipe Cleaner
- Stapler
Directions:
- First things first – download and print out the TWO free printables listed above. You will want the candy printable printed on white, while the ornament shape should be printed on colored paper.
- Go ahead and decorate the candy designs however you like with crayons, markers or coloring pencils.
- When done, trim them out and set them aside.
- Next cut out the Christmas bulb shape.
- Cut off a sliver, from the bottom of the ornament, so it lays flatly like a house.
- Now grab your pipe cleaner and the stapler.
- Twist and staple the pipe cleaner to the top of the bulb paper piece, just like a hanger on a real ornament.
- Now for the fun part! Decorate the Christmas bulb shape however you like.
- Use the peppermint candy pieces for the roof, while you cut out small circular windows, a rectangle chimney and a door for our ornament light bulb shaped house.
- Using the marker, give each piece some dimension, by drawing on lines for the windows, bricks on the chimney and a knob for the door.
- Glue down all your newly made small paper pieces to the craft foam ornament shape, in their designated spots.
- Finally, to finish off the Christmas Light Bulb Fairy House project, take some small holiday stickers and stick them in random places to set the scene.
- Then allow it to dry completely before you display it proudly!
- Don’t forget to share pictures with us on your various social media sites! #gluedtomycrafts
RELATED —> Paper Plate Christmas Camper