This is a great project for kids and can be customized to fit any personality.
Build something EXTRA MAGICAL for Santa this Christmas season with the help of Glued To My Crafts! We are so excited to present to you, our unique Paper Christmas Stocking House kid craft tutorial today!
It’s a first seen here idea and we hope it inspires you & your child this holiday season!

Looking for a fun and festive craft idea to do with your kids this Christmas? This easy mixed media project is perfect for crafters of all ages, and is sure to get you in the holiday spirit.
All you need is some paper, embellishments, scissors and glue – and in just minutes, you’ll have a Christmas stocking inspired craft that will add some extra magic to your holiday season!
RELATED: Paper Christmas Train and Christmas Fairy House
Not only is it a great activity to keep little hands busy, but it also turns out looking pretty magical too. So what are you waiting for? Get started today!
Craft Supplies:
- Cardstock Paper
- STOCKING Printable – on our landing page
- Scissors
- Sharpie Markers
- School Glue
- Cotton Balls
- Holiday Stickers
Directions:
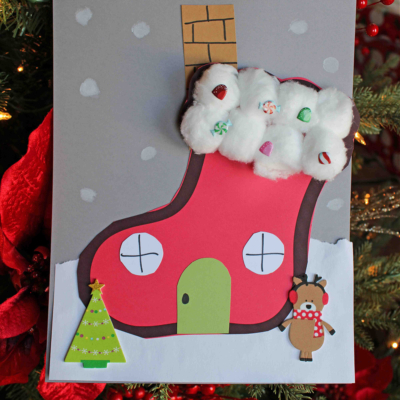
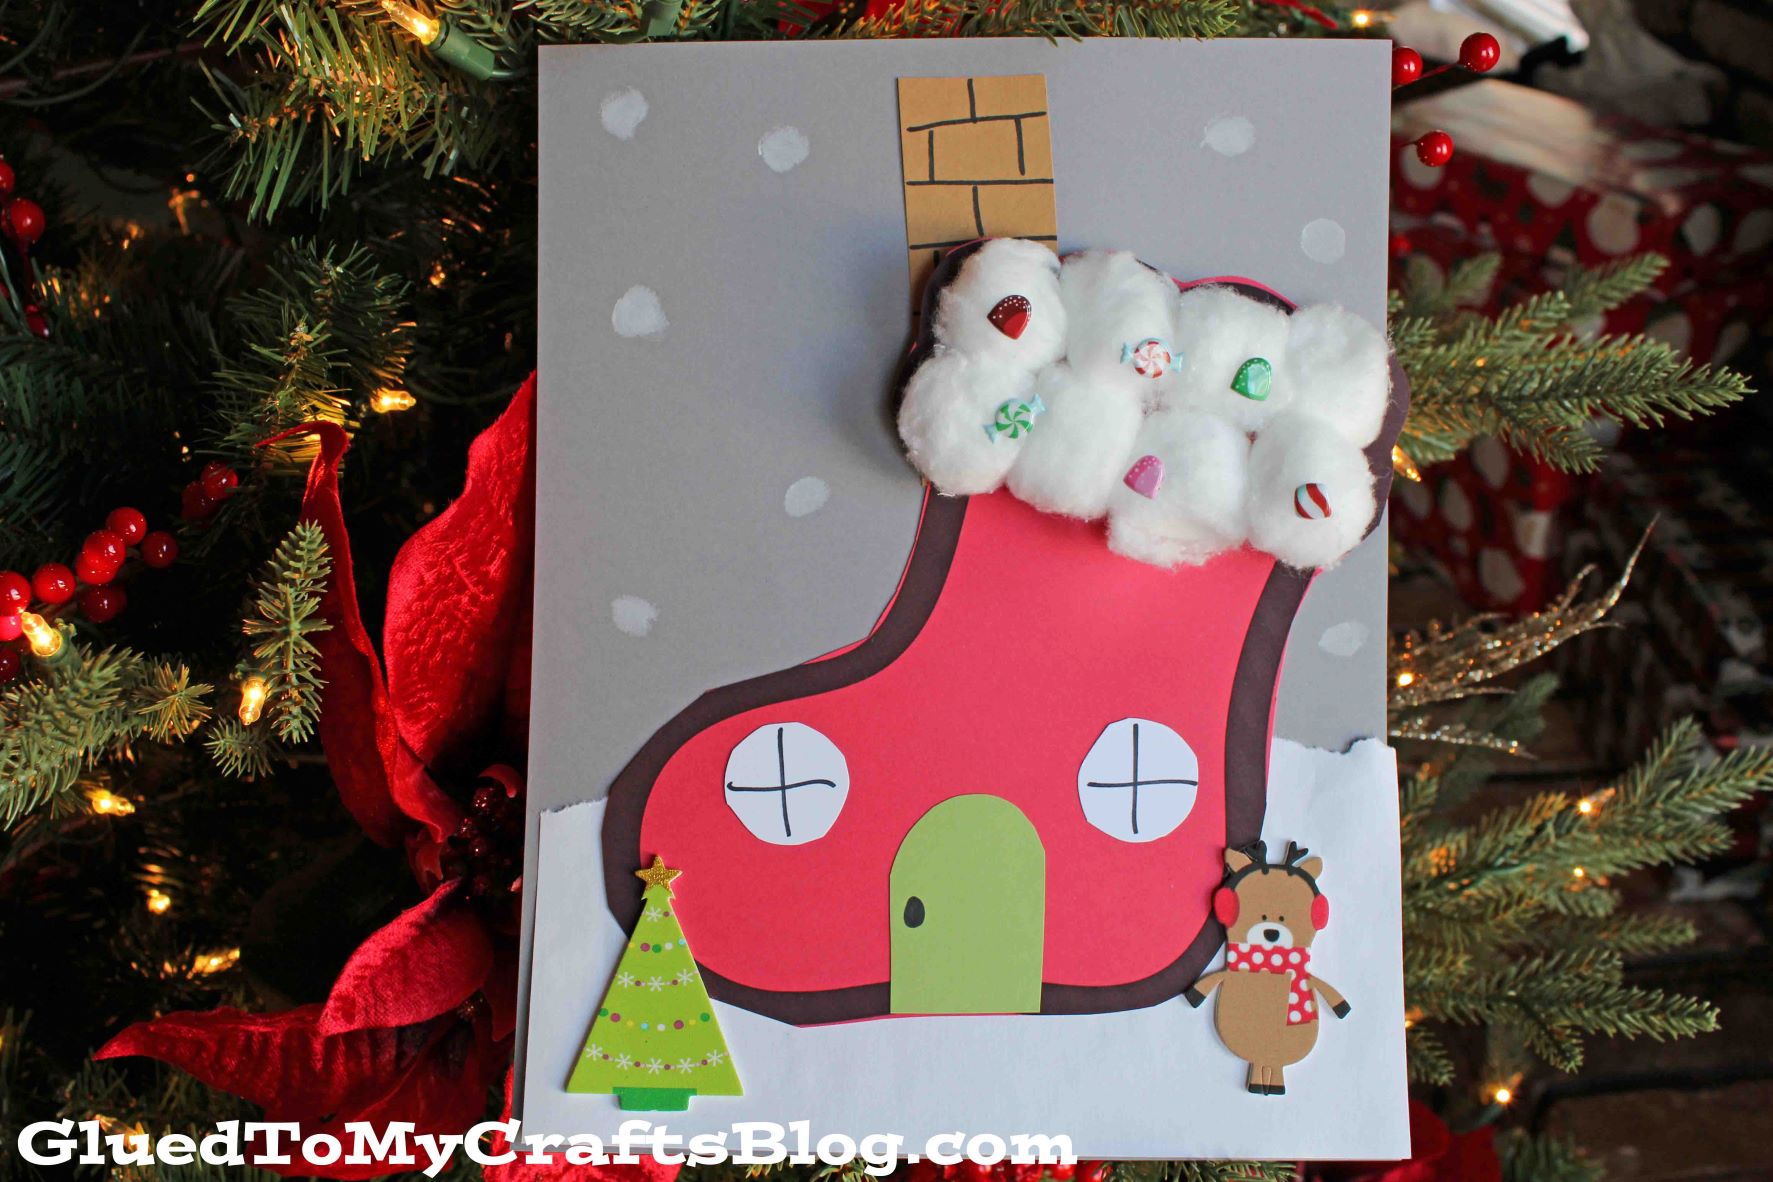
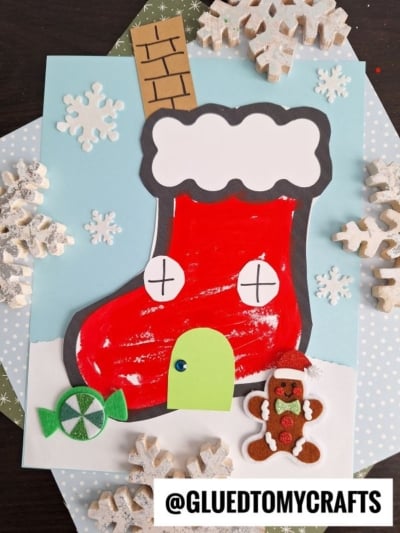
- Your canvas will be your single sheet of GRAY cardstock paper. This piece will be left uncut and just serve as your background. Lay it on your table either portrait or horizontal.
- Now grab your white cardstock and tear {or cut} a section to be the “snow” of the craft. You don’t want it bigger than half of the gray paper.
- Secure your white cardstock piece, in place on the bottom of your gray cardstock.
- Now grab your printed printable.
- Trim out the stocking shape.
- Cut off a sliver, from the bottom of the stocking, so it lays flatly like a house in the snow.
- Secure the stocking piece on top of the paper “snow.”
- Now grab your pieces of cardstock paper, scissors and black marker.
- Cut out small circular windows, a rectangle chimney and a door for our stocking house.
- Using the marker, give each piece some dimension, by drawing on lines for the windows, bricks on the chimney and a knob for the door.
- Glue down all your newly made small paper pieces to the stocking shape, in their designated spots.
- Now grab your cotton balls.
- One by one, layer them on the top portion of the stocking, to create a roof.
- Finally, to finish off the Christmas Stocking House project, take the remaining holiday stickers and stick them in random places to set the scene.
- For added sparkle and a little snow, add some silver glitter glue dots in the empty spaces.
- Then allow it to dry completely before you display it proudly!
- Don’t forget to share pictures with us on your various social media sites! #gluedtomycrafts
RELATED —> Popsicle Stick Santa Gnome
Cozy up this winter season with tons of crafty inspiration from us! We want YOU to check out our SUPER POPULAR Reindeer Frame, Reindeer Car and Christmas Snow Globe craft posts!
We also LOVE talking crafts with our lovely readers. Come join our private Facebook group where we chit chat, share and laugh together! Everyone is welcomed so come join the fun!!! #gluedtomycrafts

Mixed Media Christmas Stocking House
This is a great project for kids and can be customized to fit any personality.
Here’s your checklist of supplies to bring this craft to life:
Prepare your creative haven by laying down a protective cover before the crafting magic begins!
Directions:
- Your canvas will be your single sheet of GRAY cardstock paper. This piece will be left uncut and just serve as your background. Lay it on your table either portrait or horizontal.
- Now grab your white cardstock and tear {or cut} a section to be the "snow" of the craft. You don't want it bigger than half of the gray paper.
- Secure your white cardstock piece, in place on the bottom of your gray cardstock.
- Now grab your printed printable.
- Trim out the stocking shape.
- Cut off a sliver, from the bottom of the stocking, so it lays flatly like a house in the snow.
- Secure the stocking piece on top of the paper "snow."
- Now grab your pieces of cardstock paper, scissors and black marker.
- Cut out small circular windows, a rectangle chimney and a door for our stocking house.
- Using the marker, give each piece some dimension, by drawing on lines for the windows, bricks on the chimney and a knob for the door.
- Glue down all your newly made small paper pieces to the stocking shape, in their designated spots.
- Now grab your cotton balls.
- One by one, layer them on the top portion of the stocking, to create a roof.
- Finally, to finish off the Christmas Stocking House project, take the remaining holiday stickers and stick them in random places to set the scene.
- For added sparkle and a little snow, add some silver glitter glue dots in the empty spaces.
- Then allow it to dry completely before you display it proudly!


NEED HELP DOWNLOADING OUR FREE PRINTABLES? PLEASE REFER TO OUR FAQ PAGE
If you've enjoyed our content or have any thoughts to share, we'd love to hear from you! Mention @gluedtomycrafts or tag #gluedtomycrafts on Instagram!