
Get inspired for fall and Halloween with these easy DIY pumpkin craft idea for kids. Perfect for art class activities or simple at-home fun!

Stained Glass Pumpkin Craft Idea
It’s time for another PUMPKIN themed craft on Glued To My Crafts! This time we are going INSIDE the iconic icon of the season!!!
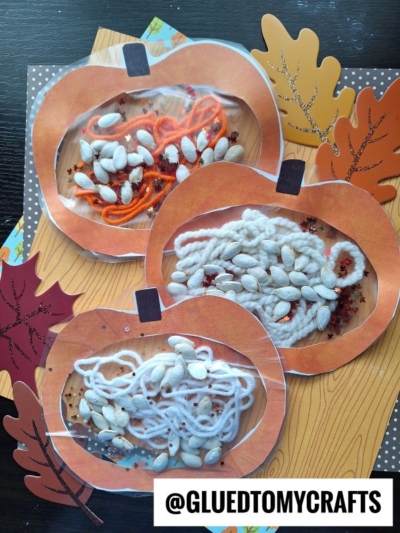
With today’s Stained Glass – What’s Inside My Pumpkin kid craft idea and free printable template, your child is sure to get those crafty juices flowing AND have a piece to display on the windows, all autumn season long!
This DIY is a classic and I think is perfect for the younger kids to recreate this month {especially those in preschool and kindergarten!}
So what will be inside YOUR pumpkin? Glitter, sequins, maybe even some real pumpkin seeds? Whatever you decide to place in it – we hope you have fun creating it.
On that note, find everything you need to know, in the FULL step-by-step tutorial below. Then get ready to “carve” some time out of your day, to recreate this idea just some simple supplies!!!
Happy crafting, my dear friends! I can’t wait to see pictures of what you and your child make! So be sure to show off those proud paper and contact paper pumpkin creations with us on our Facebook page! We love seeing those pics from you so please don’t be shy! #gluedtomycrafts
RELATED —> Popsicle Stick Pumpkins

This eye-catching project will dazzle you with its stunning visuals and will bring straight autumn vibes to any room.
Craft Supplies:
- Pumpkin Template – on our landing page
- White Cardstock Paper
- Craft Scissors
- Clear Contact Paper
- Glitter, String, Pumpkin Seeds, Sequins
Directions:
- First print the FREE pumpkin shape template above. You will want one pumpkin printable per craft.
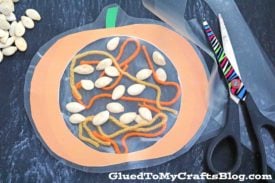
- Grab your scissors. Trim out the pumpkin shape, as well as the circular center from it. Discard excess paper.
- Now grab your clear contact paper. Cut out TWO pieces that are bigger than the pumpkin cutout.
- Remove the backing from one piece of contact paper. Lay it on a flat surface. Place the pumpkin cutout, face down, on the contact paper.
- Next have children decorate the inside of their pumpkin however they like {remember – it’s whatever THEY want inside their pumpkin/the pumpkin guts.}
- Once they are done creating their special “guts”, grab the second piece of contact paper.
- Peel off the backing and place it on top of the other piece of contact paper, moving your hand around to “squish” everything together.
- To finish off the Stained Glass Pumpkin Guts craft, use your scissors to trim out the pumpkin/remove the excess contact paper. Then display proudly on a window with tape!!!
Book Suggestions:
Here are some recommended books that beautifully complement our craft idea. You can conveniently purchase them through our affiliate links on Amazon.
- Little Pumpkin: A First Halloween Story by Lisa Edwards
- Pick A Pumpkin by Patricia Toht
- The Berenstain Bears and the Prize Pumpkin by Stan Berenstain
- It’s Pumpkin Day, Mouse! by Laura Numeroff
- The Happy Pumpkin by DK
- The Biggest Pumpkin Ever by Steven Kroll
- Halloween in the Orchard by Phyllis Alsdurf
- The Roll-Away Pumpkin by Junia Wonder
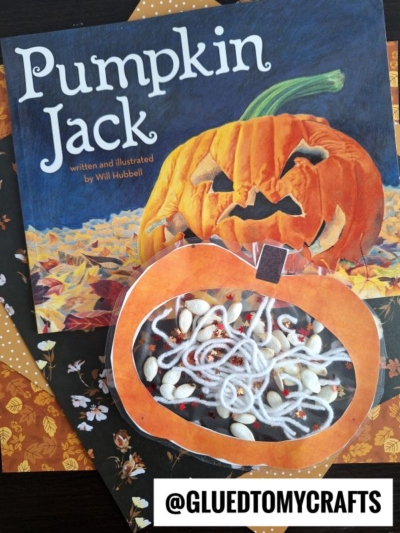
- Pumpkin Jack by Will Hubbell
RELATED —> Paper Plate Scarecrow
We are your one-stop-shop when it comes to fall kid craft ideas! Please be sure to check out our popular Pumpkin Monster, Welcome To My Pumpkin Patch and Paint Splat Indian Corn tutorials!
We also have a great Facebook community where you can get ideas as well!
RELATED —> Stained Glass Monster

What's Inside My Pumpkin Craft
Here’s your checklist of supplies to bring this craft to life:
Prepare your creative haven by laying down a protective cover before the crafting magic begins!
Directions:
- First print the FREE pumpkin shape template on white cardstock paper. You will want one pumpkin printable per craft.
- Grab your scissors. Trim out the pumpkin shape, as well as the circular center from it. Discard excess paper.
- Now grab your clear contact paper. Cut out TWO pieces that are bigger than the pumpkin cutout.
- Remove the backing from one piece of contact paper. Lay it on a flat surface. Place the pumpkin cutout, face down, on the contact paper.
- Next have children decorate the inside of their pumpkin however they like {remember - it's whatever THEY want inside their pumpkin/the pumpkin guts.}
- Once they are done creating their special "guts", grab the second piece of contact paper.
- Peel off the backing and place it on top of the other piece of contact paper, moving your hand around to "squish" everything together.
- To finish off the Stained Glass Pumpkin Guts craft, use your scissors to trim out the pumpkin/remove the excess contact paper.
- Then display proudly on a window with tape!!!


NEED MORE HELP DOWNLOADING OUR FREE PRINTABLES? PLEASE REFER TO OUR FAQ PAGE