This is a great activity for kids of all ages to recreate this spring season.

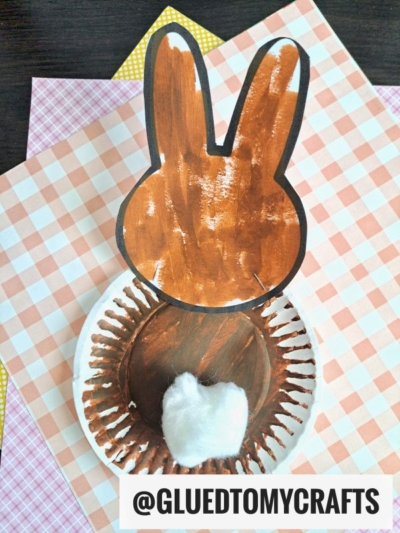
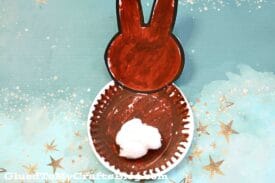
Hop into creativity with this adorable paper plate bunny butt craft idea for kids! 🐰🎨 Let your little ones’ imaginations run wild as they create their own fluffy-tailed friends. Who knew a paper plate could be so fun?

It doesn’t take a lot of supplies or time to create. You can even customize your bunny butt piece with different colors, cardstock and even embellishments.
No BUTTS about it – it’s a MUST DO this spring season! I’ve even included a FREE BUNNY HEAD PRINTABLE to get you started even faster today! Just grab it and your paper plate – that’s it!
So let those handy little helpers of yours create some masterpieces today! You don’t even have to tell them the “full tutorial.” Let them have their take on it and see how MIGHTY they take a small idea and make it grand! Happy crafting, my friends!!

Easter is right around the corner and we’ve got the perfect craft idea for you! This paper plate bunny butt is simple to make and tons of fun for kids.
Craft Supplies:
- Small White Paper Plate
- Bunny Head Printable
- White Cardstock Paper
- Brown Paint Crayon
- Scissors
- Stapler
- School Glue
- White Cotton Balls
Directions:
- First things first – go ahead and print out the bunny head printable listed above. You only need to print ONE bunny head per craft.
- Now that you have it printed out, it’s time to color in the head with your paint crayon {I used brown but you can change this step up!}
- Once done coloring it in, use the scissors to trim out the shape.
- Discard excess paper and set aside the head till later.
- Now grab your small paper and the same paint crayon pen.
- Go ahead and paint the entire paper plate completely brown.
- Now grab your stapler and the bunny head cutout from earlier.
- Staple the head piece to the painted paper plate piece.
- To finish off the Paper Plate Bunny Butt – glue a handful of white cotton balls to the center of the small paper plate for his tail.
- Add any other embellishments you see fit.
- When done crafting, set aside your piece to let it dry completely.
- Then display proudly for all to see!
RELATED —> Popsicle Stick Bunny
These past and popular tutorials on Glued To My Crafts are just a click away! They also pair nicely with today’s paper plate bunny butt tutorial – hint hint!

Paper Plate Bunny Butt Craft
This is a great activity for kids of all ages to recreate this spring season.
Here’s your checklist of supplies to bring this craft to life:
- School Glue
Prepare your creative haven by laying down a protective cover before the crafting magic begins!
Directions:
- First print out our provided printable, in color, on a single sheet of white cardstock paper. You only need one print per craft.
- Now that you have it printed out, it's time to color in the head with your paint crayon {I used brown but you can change this step up!}
- Once done coloring it in, use the scissors to trim out the shape.
- Discard excess paper and set aside the head till later.
- Now grab your small paper and the same paint crayon pen.
- Go ahead and paint the entire paper plate completely brown.
- Now grab your stapler and the bunny head cutout from earlier.
- Staple the head piece to the painted paper plate piece.
- To finish off the Paper Plate Bunny Butt - glue a handful of white cotton balls to the center of the small paper plate for his tail.
- Add any other embellishments you see fit.
- When done crafting, set aside your piece to let it dry completely.
- Then display proudly for all to see!


NEED MORE HELP DOWNLOADING OUR FREE PRINTABLES? PLEASE REFER TO OUR FAQ PAGE
If you've enjoyed our content or have any thoughts to share, we'd love to hear from you! Mention @gluedtomycrafts or tag #gluedtomycrafts on Instagram!