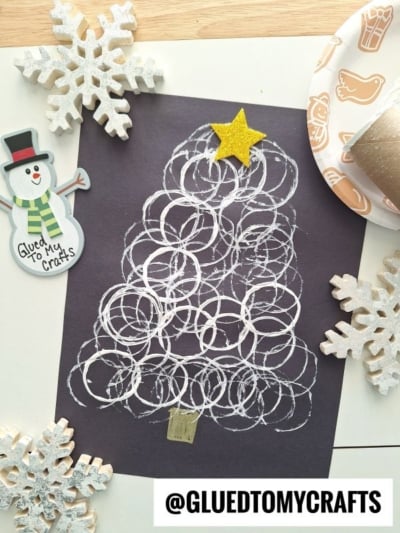
Christmas trees don’t always have to be green. This Toilet Paper Roll Snowy Christmas Tree Craft swaps the classic evergreen for crisp white rings stamped onto dark paper. The result looks like a tree dusted in fresh snow on a quiet winter night.
It’s one of our favorite holiday crafts here at Glued To My Crafts. It’s simple, budget-friendly, and uses something you already have in the bathroom cabinet. The dark background makes every white ring pop, so even the littlest hands end up with art that looks gallery-worthy. And because it feels more winter wonderland than standard Christmas card, it stands out on the fridge, the classroom bulletin board, or a holiday card.
Kids get to stamp, dot, and decorate. You get a low-prep activity with a big wow factor.
Craft Supplies:
Gather these supplies before you start:
- Toilet paper roll (an empty cardboard tube)
- White paint (washable tempera or acrylic craft paint works best)
- Dark gray or black construction paper
- Paper plate (for holding the paint)
- Gold star sticker or felt star for the tree topper
- Gold marker for the tree trunk
Optional extras:
- Rhinestones or gems for sparkly ornaments
- Cotton swabs for painting tiny snowy dots
- White printer paper to tear into a snowy hill at the bottom
- Pencil for a light guide triangle
- Scissors
- Glue stick or school glue
Directions:
Step 1: Set Up Your Craft Space
Cover your table with newspaper or a plastic tablecloth. Squeeze a puddle of white paint onto the paper plate and spread it out a bit so the tube’s rim can sit flat in it.
Place your dark construction paper in front of your child in a vertical (portrait) position.
Step 2: Sketch a Guide (Optional)
For older kids, or anyone who likes a tidy tree, lightly draw a tall triangle in pencil. This helps them see where the rings should go. Younger kids can skip this and stamp freely. Wonky trees have tons of charm!
Step 3: Stamp the Bottom Row
Dip one end of the toilet paper roll into the white paint. Gently tap off any extra paint on the edge of the plate. Too much paint makes blobs instead of crisp rings.
Start near the bottom of the paper and press the tube straight down. Lift it straight up to reveal a white circle. Keep stamping side by side, letting the circles overlap slightly. Aim for about five to seven rings across.
Step 4: Build the Tree Upward
Move up a row and stamp one fewer ring than the row below. Keep going, row by row, until you reach a single ring at the top. Your overlapping circles will form a classic triangle tree shape.
Re-dip the tube after every one or two stamps to keep the rings bright and snowy. A slightly uneven, textured print is part of the look, so don’t worry if some rings look faded. That’s the “fresh snow” effect!
Step 5: Add Snowy Dots (Optional)
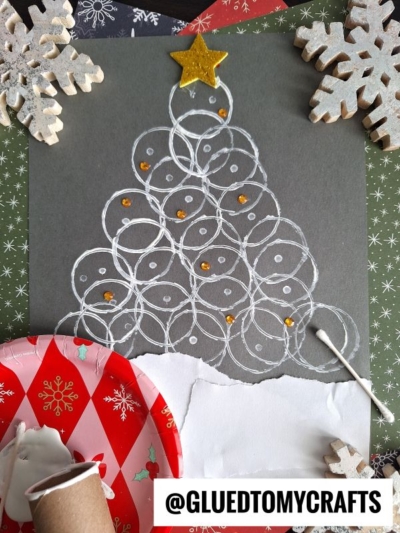
Dip a cotton swab in the white paint and dab a small dot in the center of each ring. These little dots add extra texture and make the tree look like it’s covered in snowflakes.
Step 6: Let It Dry
Set the artwork aside for about 30 minutes, or until the paint feels dry to the touch.
Step 7: Top It With a Star
Stick a gold star sticker or glue a felt star to the very top ring. This is often every kid’s favorite step, so let them do the honors. At this point in time you can also add a trunk at the bottom.
Step 8: Decorate With Ornaments (Optional)
Glue rhinestones or gems inside some of the rings to look like twinkling ornaments. Gold and silver gems look gorgeous against the white and dark gray.
Step 9: Make a Snowy Hill (Optional)
Tear a strip of white printer paper along one edge to create a bumpy, uneven top. Glue it across the bottom of the page so your tree looks like it’s standing in a snowdrift.
Now display your winter tree art proudly for ALL to see!
RELATED —> Pool Noodle Stamped Owl Craft Tutorial
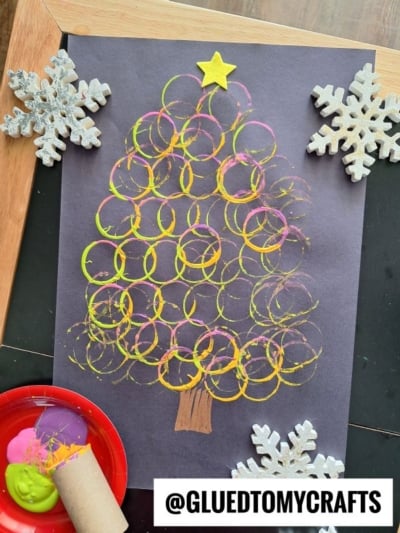
There’s something magical about watching a plain cardboard tube turn into a snowy Christmas tree. We hope this Toilet Paper Roll Snowy Christmas Tree Craft brings a little winter sparkle to your home or classroom this season.
Made one of your own? We’d love to see it! Share your snowy creations and tag us @GLUEDTOMYCRAFTS so we can cheer on your little artists.
Stay cozy, keep creating, and happy holidays from our craft table to yours! ❄️🎄
