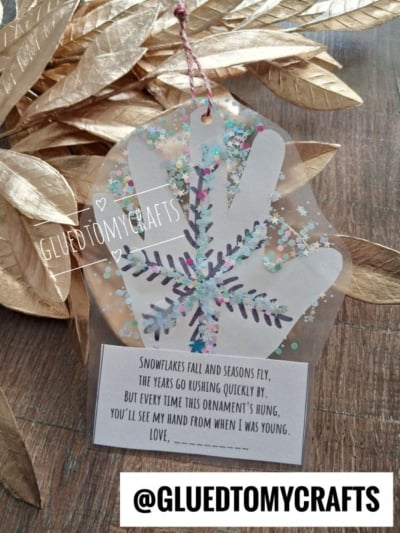
Little hands grow up so fast. One day they’re reaching for your finger, and the next they’re tying their own shoes and waving goodbye at the school bus. That’s exactly why we love this Handprint Snowflake Ornament.
It’s simple, sparkly, and full of heart. Kids trace their hand, turn it into a glittery snowflake, and seal it all up with a sweet poem that makes grandparents reach for the tissues. Best of all, you can make it in under 30 minutes with supplies you probably already have.
Whether you’re crafting at the kitchen table, planning a classroom winter party, or building your own collection of handmade keepsakes, this project is a winner. And yes, the poem tag is a free printable, so the hardest part is already done for you!
Craft Supplies:
Gather these supplies before you start, and the whole project will flow smoothly:
- Clear contact paper
- White cardstock paper (for the poem)
- White construction paper
- Markers {for drawing the snowflake design}
- School glue
- Loose craft glitter
- Hole punch
- Twine
- Scissors
- Poem printable – on box.com – password is GLUEDTOMYCRAFTS2026
- Pencil for tracing
Directions:
Step 1: Trace Your Child’s Handprint
Have your child place their hand flat on the white construction paper with their fingers spread apart. Gently trace around it with a pencil.
Step 2: Cut Out the Handprint
Carefully cut along your traced line. Older kids can do this part themselves with safety scissors. For little ones, a grown-up should take the lead.
Step 3: Draw the Snowflake
Now for the magic! With your marker, draw a snowflake right over the center of the handprint:
- Draw a vertical line down the middle of the palm.
- Add two diagonal lines that cross through the center, making six “arms.”
- Add small V-shaped branches along each arm to create that classic snowflake look.
Kids can make their snowflake simple or super detailed. Every snowflake is one of a kind, just like the little artist who made it!
Step 4: Add the Glitter
Time to sparkle! Add lines of school glue on the drawn lines and sprinkle loose craft glitter on top. Shake off excess.
Step 5: Print and Place the Poem Tag
Print the free poem tag and cut one of the tags out. Write your child’s name on the “Love, ______” line. Adding the year is a sweet bonus.
Step 6: “Seal” Your Ornament
Cut out TWO equal sized pieces of contact paper. Remove the paper off of one and lay it {sticky side up} on your work surface. Now lay your decorated handprint cutout and poem on top.
Peel the backing off the second sheet and lay it on top of the first. Smooth the sheet down slowly from one side to the other to avoid air bubbles. Trim out.
Step 7: Trim Out The Design & Make Hanger
Finally, cut around your laminated design, leaving about a ¼-inch clear border.
Then, punch a small hole near the top of the handprint design. Thread a ribbon or piece of twine through the hole and tie it into a loop for hanging.
RELATED —> Fingerprint & Glitter Snowflake Ornament
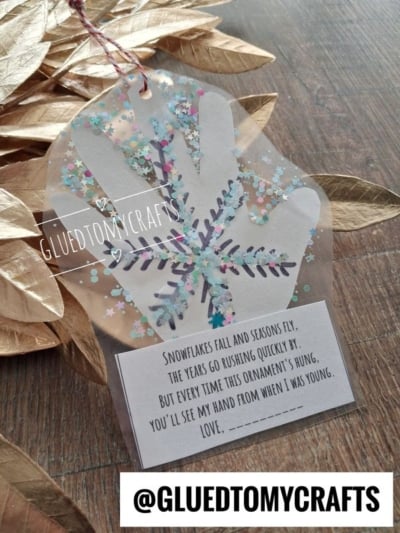
There’s something truly magical about a handmade ornament. It doesn’t come from a shelf or a store – it comes from a quiet afternoon, a little hand covered in glitter, and a whole lot of love.
Every time this handprint snowflake ornament finds its way back onto the tree, it will bring that moment rushing back. The snowflake you drew together, the poem that made someone cry happy tears, the wobbly signature on the tag – those are the details that make a holiday feel like a holiday.
So go ahead, clear the kitchen table, pour out the glitter, and make something worth keeping. Years from now, when those little hands are much bigger, you’ll be so glad you did. Happy crafting, my friends!🎄
