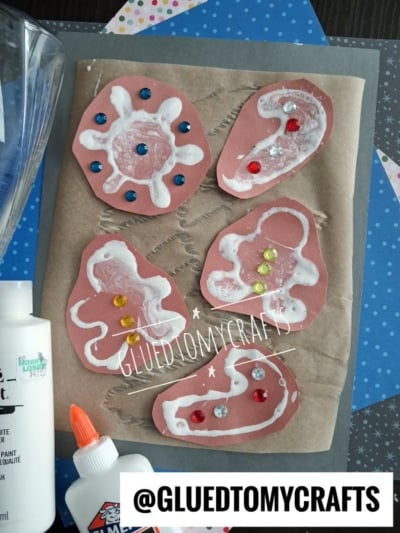
Some of the best holiday crafts start with things you already have in your kitchen. This one uses a squirt of dish soap, a bit of white paint, and your favorite cookie cutters. The result looks just like a tray of freshly frosted gingerbread cookies, with no oven and no cleanup of sticky dough.
Here’s how it works. When you mix dish soap into white paint, it creates tiny bubbles. Dip the edge of a cookie cutter into that bubbly mix and press it onto paper, and you get a soft, lacy outline that looks like royal icing piped around a cookie. Kids love watching each shape appear, and every print turns out a little different.
This craft is cheap, quick to set up, and works for toddlers through tweens. It’s perfect for a cozy afternoon at home, a classroom holiday party, or a winter break activity when everyone needs something fun to do.
Craft Supplies:
- Dawn Free & Clear dish soap. The clear, dye-free formula keeps your white paint bright.
- White Acrylic Paint. The matte finish gives a soft, frosting-like look.
- Cookie cutters. Gingerbread men, candy canes, and snowflakes all work well. Plastic or metal is fine.
- Colored construction paper. Brown paper looks like a baking sheet full of cookies.
- A small paper bowl. Shallow bowls work best so the cookie cutter can rest flat.
- A spoon or craft stick for mixing.
- Gray cardstock paper. This forms the base of your cookie sheet.
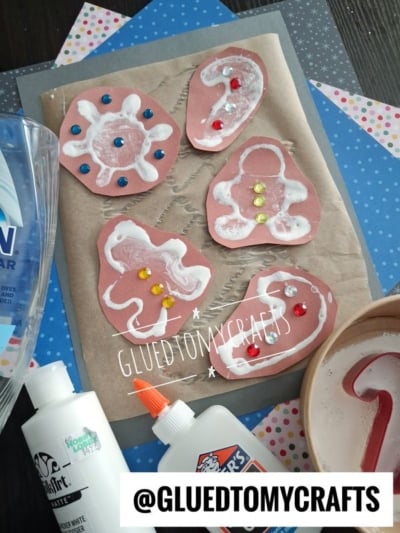
- Wax paper. Cut it to size and glue it onto the gray cardstock to create the look of a real baking sheet.
- School glue or a glue stick. Used to attach the wax paper to the cardstock.
- Scissors. For cutting out your cookies.
- Optional embellishments: rhinestones, craft gems, sequins, or glitter for decorating.
- Optional: school glue for attaching embellishments, plus paper towels and a smock.
Directions:
Step 1: Set Up Your Workspace
Cover your table with newspaper, a plastic tablecloth, or a craft mat. Acrylic paint can stain clothes, so put an old shirt or smock on your little crafter. Lay your construction paper flat and keep a few paper towels nearby.
Step 2: Mix Your Bubbly Paint
Squeeze about 2 tablespoons of white paint into your bowl. Add about 1 tablespoon of dish soap. Stir gently with a spoon or craft stick until the two blend together.
You should see small bubbles forming on top. That’s exactly what you want! Those bubbles are the secret to the frosted, textured prints.
Step 3: Dip the Cookie Cutter
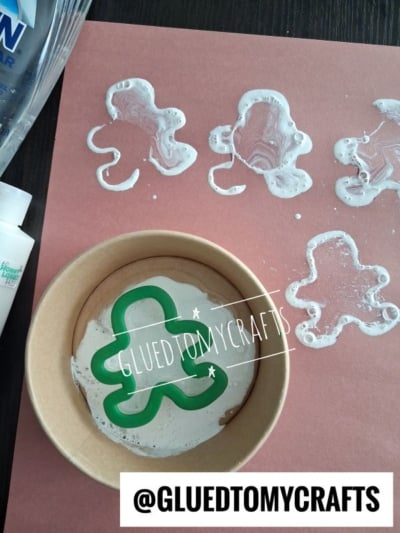
Hold your cookie cutter with the sharp edge facing down. Dip it straight into the paint mixture so the whole edge gets coated. Lift it out and let any big drips fall back into the bowl.
Step 4: Stamp Your Cookies
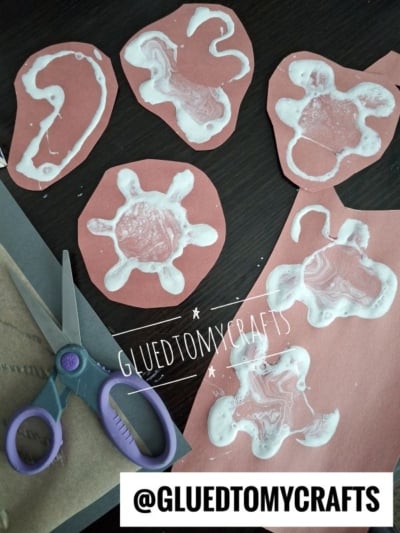
Place the cookie cutter on your paper and press down firmly. Hold it for a second or two, then lift it straight up. You’ll see a bubbly white outline in the shape of your cutter.
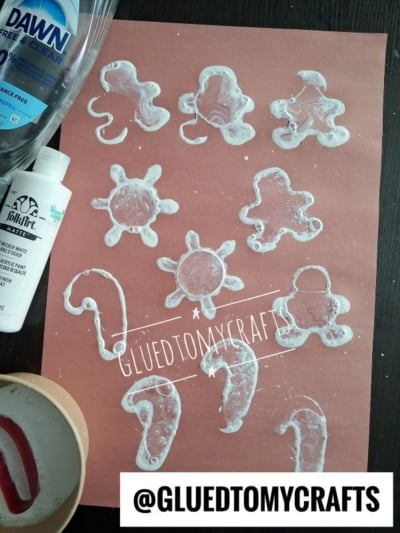
Keep going! Re-dip the cutter before each new print. Fill the page with rows of gingerbread men, candy canes, and snowflakes until it looks like a cookie sheet straight from the oven.
Step 5: Let It Dry
Set your paper somewhere flat to dry. Most prints dry in about 20 to 30 minutes, depending on how thick the paint is. Thicker prints may need a little longer.
Step 6: Make Your Cookie Sheet
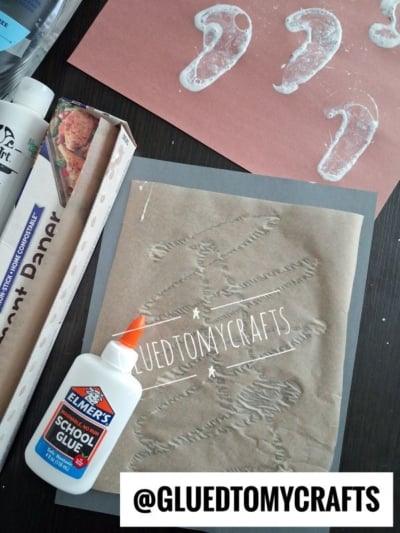
Next, cut your wax paper to roughly the same size as your gray cardstock. Spread an even layer of school glue or run a glue stick over the cardstock, then smooth the wax paper on top. Press out any air bubbles and set it aside to dry. This becomes your cookie sheet base! Once it’s ready, lay it flat on your workspace and keep a few paper towels nearby.
Step 7: Cut Out Your Cookie Shapes
Once your cookie shapes are dry, cut them out from your paper. You will want to leave a slight border so it looks like edged “frosting” on your cookies.
Step 8: “Bake” Your Pieces Onto The Cookie Sheet
Now arrange and glue your cookie cutouts in the center of your wax paper. There is no right or wrong way to this step!
Step 9: Add Some Sparkle (Optional)
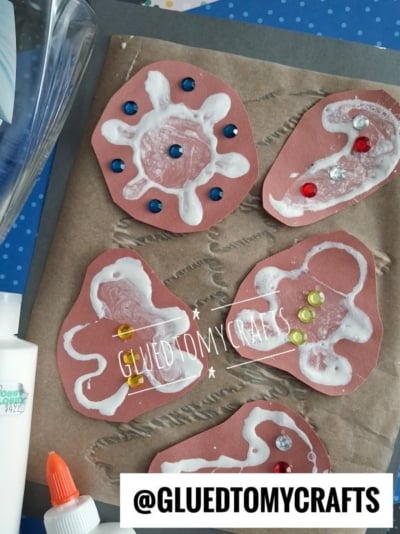
For added flair, you can dress up your cookies. Use a dot of school glue to add rhinestones as gingerbread buttons, candy cane stripes, or snowflake centers. Kids can also add glitter, sequins, or draw little faces with a marker.
When done decorating, allow it to dry completely before displaying proudly!
Tips for the Best Results
- Find the right ratio. Start with 2 parts paint to 1 part soap. If your prints look too thin or watery, add more paint. If you want more bubbles, add a little more soap.
- Press firmly and evenly. Push down on all parts of the cutter so the whole shape prints. Small kids may need a grown-up’s hand on top to help.
- Don’t wiggle. Lift the cutter straight up to keep the edges crisp.
- Re-dip every time. Each stamp uses up most of the paint on the edge, so a fresh dip gives the best print.
- Stir often. The paint and soap can separate as you work. A quick stir keeps the bubbles coming.
- Use a shallow bowl. If the paint is too deep, the cutter picks up too much and the print gets blobby.
- Try darker paper. White paint pops best on brown, red, terracotta, or dark pink paper.
- Rinse right away. Wash your cookie cutters in warm, soapy water before the paint dries. They’ll be ready for baking again in no time.
RELATED —> Dish Soap Stamped Snowman Craft Idea)
Once you’ve mastered gingerbread men, raid your cookie cutter drawer and try every shape you can find. Stars, trees, mittens, hearts, and even dinosaurs all make fun bubbly prints. You can swap the white paint for red, green, or gold to change up the look, or mix two colors for a swirly effect.
That’s the best part of this craft: there’s no wrong way to do it. Every print is a little different, and every sheet tells its own story. So grab your dish soap, pull out the cookie cutters, and start stamping. Your tray of “cookies” will be the sweetest treat that never needs an oven!