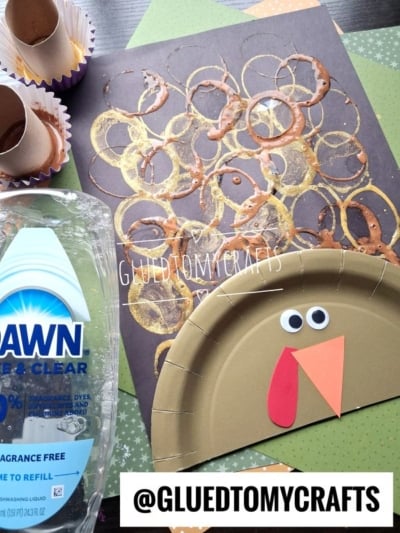
Dish soap isn’t just for the sink anymore. A little squeeze of clear dish soap stirred into metallic paint turns a plain toilet paper roll into a magic bubble stamp. Each print comes out different. Some are crisp gold rings. Some are swirly, marbled circles. A few even keep tiny 3D bubbles that dry right on the page.
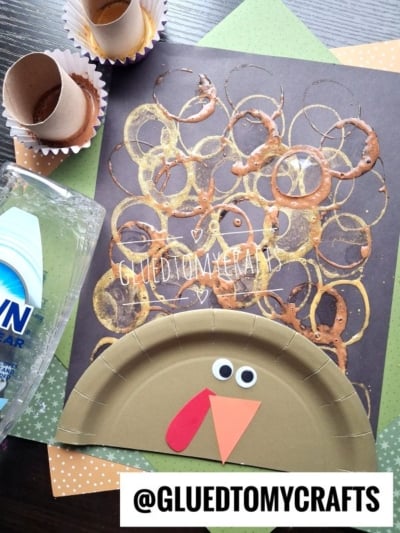
This viral technique has been all over craft feeds for good reason. It’s cheap, it’s easy, and kids think it’s pure magic. We used it to make the shimmering tail feathers for this sweet Bubble Stamped Turkey, and it might be the most fun we’ve had with a toilet paper roll all year.
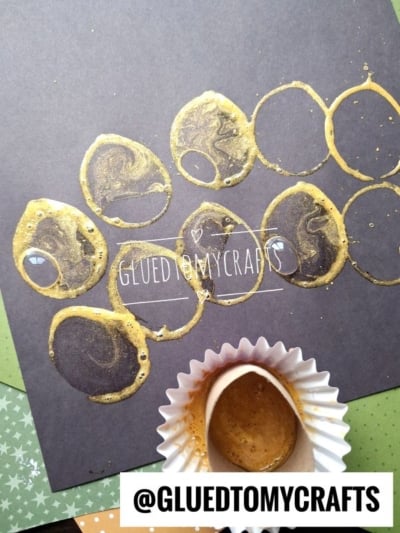
Dish soap thins the paint and fills it with tiny air pockets. When you dip a cardboard tube into the soapy paint and lift it, a thin film often stretches across the opening, like a bubble wand. Press it onto paper and that film turns into a marbled, swirly print.
The rim leaves a bold ring around the edge. The result has texture, shine, and depth that regular paint can’t match. Because no two stamps are the same, there’s no “wrong” way to recreate this dish soap stamped turkey craft. That makes it a great process-art activity for little hands!
Craft Supplies:
- Black cardstock (one sheet per turkey)
- 2 or more empty toilet paper rolls
- 2 paper cupcake liners (to hold paint)
- Metallic gold paint
- Metallic copper or brown paint
- Clear dish soap (we used Dawn Clear)
- 1 gold (or brown painted!) paper plate
- 2 googly eyes
- Orange construction paper
- Red construction paper
- Scissors
- Glue (a glue stick for paper, plus white school glue or a glue dot for the eyes)
Helpful extras: craft sticks or plastic spoons for stirring, a plastic tablecloth or newspaper, and baby wipes for quick cleanup.
Directions:
Step 1: Set Up Your Space
Cover your table with a plastic cloth or newspaper. This craft gets bubbly and a little messy, which is half the fun. Lay a sheet of black cardstock in the center and keep your supplies close by.
Step 2: Mix the Bubble Paint
Pour a small puddle of gold paint into one cupcake liner. Pour copper or brown paint into the other.
Add a squeeze of dish soap to each liner. A good starting point is about two parts paint to one part soap. Stir gently with a craft stick until it looks glossy and a little foamy.
- More soap = more bubbles and lighter, see-through swirls
- Less soap = bolder rings with richer color
Try a test stamp on scrap paper and adjust until you love the look.
Step 3: Dip Your Tube
Stand a toilet paper roll in the gold paint and give it a little twist. Lift it slowly and straight up. Look at the bottom! You may see a thin soapy film stretched across the opening. That’s your bubble.
If there’s no film, that’s okay too. You’ll still get a gorgeous shimmery ring.
Step 4: Stamp Your Feathers
Press the tube gently onto the black cardstock, then lift it straight up. Don’t twist or slide.
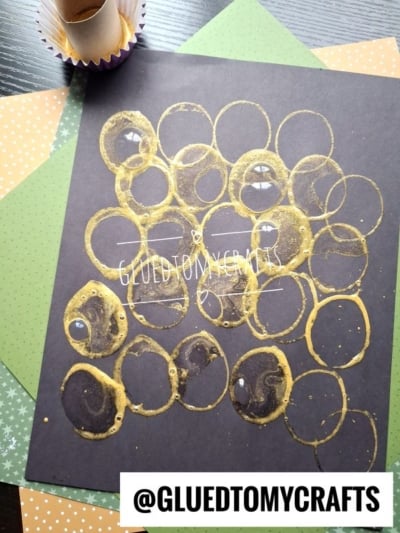
Fill the top half to two-thirds of the paper with gold circles. Let them overlap. Some will be faint rings, others will be thick and marbled. Every one of them counts.
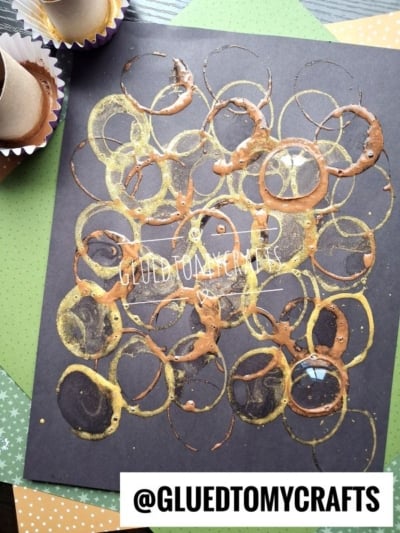
Now grab a fresh tube and repeat with the copper or brown paint. Layer these circles over and between the gold ones. The two colors together look like shiny, fall-colored turkey feathers.
Tip: Leave the bottom third of the paper mostly clear. That’s where the turkey body will go.
Step 5: Let It Dry
Set the paper flat somewhere safe to dry. Soapy paint takes a bit longer than regular paint, usually 30 to 60 minutes depending on how thick it is. Some bubbles may stay puffy until they dry. Try not to poke them. They add amazing texture.
While you wait, it’s the perfect time to make the turkey body.
Step 6: Make the Turkey Body
Cut the gold paper plate in half. One half becomes your turkey’s round body.
Take your scissors and make small snips all along the curved, ridged rim of the plate. Space them about half an inch apart. These little cuts give your turkey a fun, feathery edge.
Little hands tip: Younger kids can practice their scissor skills on the snips while a grown-up handles cutting the plate in half.
Step 7: Cut the Face Pieces
- Beak: Cut a small triangle from orange construction paper.
- Wattle: Cut a teardrop shape from red construction paper.
They don’t need to be perfect. A wonky beak just adds personality!
Step 8: Assemble Your Turkey
Once the feathers are dry, glue the plate half to the bottom of the black cardstock. Place the flat, cut edge along the bottom of the paper and the curved, snipped edge facing up. Now your bubble circles fan out behind it like a tail.
Step 9: Add the Face
Glue two googly eyes near the top center of the plate. Glue the orange triangle beak just below the eyes, pointing down. Then tuck the red wattle right beside the beak.
Step back and admire your shimmering, bubbly turkey!
Tips for Bubble Stamping Success:
- Use clear dish soap. Colored soap can tint your paint and dull the metallic shine.
- Go slow. Slow dips and slow lifts help the bubble film form.
- Have extra tubes ready. Rolls get soggy after lots of stamping. Swap in a fresh one when the rim gets floppy.
- Remind kids it’s for stamping only. Soapy paint looks like bubble solution, so make it clear that we don’t blow into the tubes or put them near our mouths.
- Embrace the mess. Smudges and drips are part of the charm of process art.
RELATED —> Bubble Wrap Stamped Autumn Tree Craft
It works for preschoolers, big kids, and whole classrooms. You probably have most of the supplies in your house right now so I hope you are inspired to recreate it today!
BTW – we would love to see your bubble stamped turkeys! Snap a photo of your little artist’s masterpiece and tag us @gluedtomycrafts so we can cheer you on. Happy crafting, and happy Thanksgiving from all of us at Glued To My Crafts!
