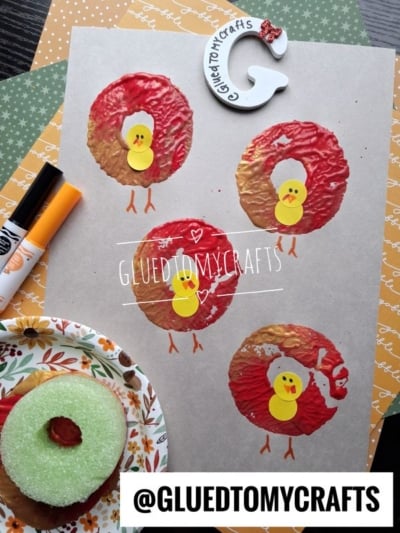
This Thanksgiving craft might be the easiest turkey project you make all season, and it’s one of the most colorful. A single slice of pool noodle becomes a perfect turkey stamp. Dip it in shimmery fall paint, press it onto paper, and you get a round burst of feathers in seconds.
Then comes the best part for little hands. Two yellow dot stickers form the turkey’s body and head, and a few quick marker strokes bring each bird to life. No glue, no mess from tiny paper pieces, and no fussing with cutting out lots of shapes.
This project works well at the kitchen table, in a classroom, or at a Thanksgiving kids’ table while the grown-ups finish cooking. Toddlers love the stamping. Older kids love adding personality to their turkeys. Everyone ends up with a flock of gobblers worth showing off.
Craft Supplies:
- 1 pool noodle slice, about 1 inch thick
- Acrylic paint in metallic gold, copper or bronze, and red
- Paper plate to use as a paint palette
- Cardstock or heavy paper (gray, light brown, or yellow all look great)
- Round dot stickers in yellow
- Markers in orange, red and black
Grown-up prep: Use a serrated kitchen knife to cut the pool noodle into 1-inch slices. This step is for adults only. A smooth, even cut gives you the cleanest rings, so take it slow.
Directions:
1. Set Up Your Paint Palette
Squeeze small puddles of gold, copper, and red paint onto the paper plate. Place them close together so they touch a little. When you dip the noodle, the colors will swirl together and create a beautiful feathered look.
2. Load the Pool Noodle Slice
Press one flat side of the pool noodle slice into the paint. Wiggle it gently so the whole ring gets coated. You want a nice, even layer, not a thick glob. If it looks drippy, dab it once on a clean part of the plate.
3. Stamp Your Turkey Feathers
Press the painted noodle slice straight down onto your cardstock. Hold it for a second or two, then lift it straight up. Ta-da! You’ve made your first ring of turkey feathers.
Repeat to add more turkeys to the page. Three or four turkeys fit nicely on a standard sheet. Leave a little space below each ring for the legs you’ll draw later.
Tip: Reload the noodle with paint before each stamp for bold, bright rings. Skip a reload if you want a softer, more textured look.
4. Let the Paint Dry
Give the paint time to dry completely before adding stickers. Acrylic paint usually dries in 15 to 30 minutes, depending on how thick it is. This is a great time for a snack break!
5. Add the Turkey Body and Head
Stick one yellow dot sticker in the open center of each painted ring. This is your turkey’s body. Then add a second yellow dot just above it, slightly overlapping, for the head.
6. Draw the Eyes
Use the black marker to add two small dots on the head. That’s it. Big eyes, tiny eyes, or even one winking eye all add charm.
7. Add the Beak
Grab the orange marker and draw a small triangle just below the eyes. Point it to one side so your turkey looks like it’s mid-gobble.
8. Draw the Wattle
Use the red marker to draw a little squiggle hanging down next to the beak. This is the wattle, the floppy red bit that makes a turkey look like a turkey. Kids always giggle at this part.
9. Give Your Turkey Legs and Feet
With the orange marker, draw two short lines down from the bottom of the ring. Add three little toes at the end of each leg. Now your turkeys are ready to strut!
RELATED —> Pool Noodle Stamped Reindeer Craft Idea
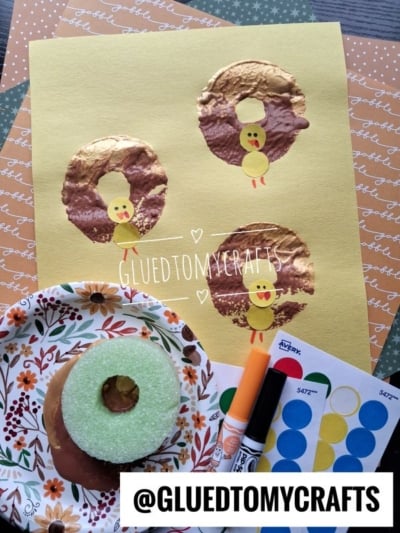

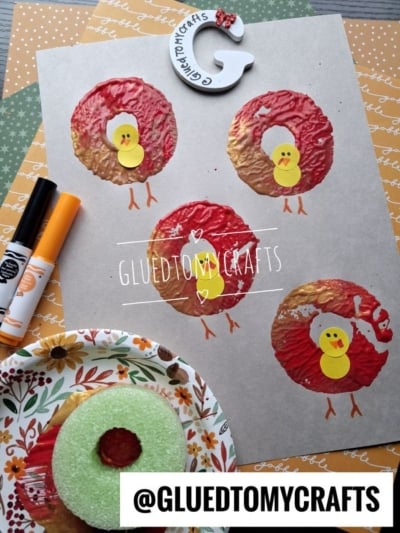
This craft proves that the best holiday projects don’t need to be complicated. A pool noodle, a few dot stickers, and some markers are all it takes to make a page full of happy turkeys. Don’t worry about making them perfect. Smudgy rings, crooked beaks, and wild wattles give each turkey its own personality, and those are the ones you’ll treasure most.
Grab your paint, slice that noodle, and have a gobble-gobble good time! Happy crafting, my friends!
