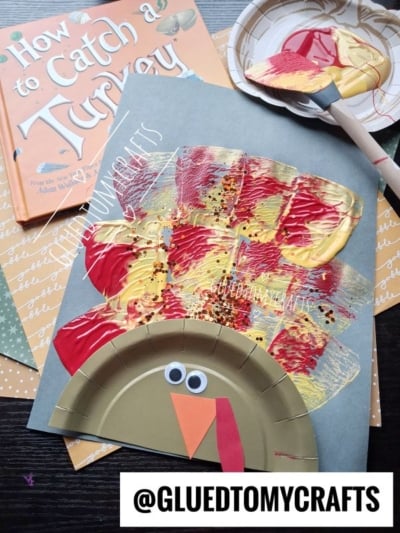
This spatula stamped turkey craft turns a simple kitchen tool into a feather-making machine. Kids press, twist, and sprinkle their way to a bold, glittery Thanksgiving turkey in about 30 minutes, plus drying time.
Finding a holiday craft that’s easy to set up, fun to make, and nice enough to display can be tricky. This one does all three. The spatula creates thick, textured “feathers” with almost no effort, so even little hands get great results. When you’re done, you’ll have a proud gobbler ready for the fridge, a classroom bulletin board, or the Thanksgiving table.
This turkey craft is ALSO perfect match for a Thanksgiving story time built around How to Catch a Turkey by Alice Walstead and Andy Elkerton, from the New York Times bestselling How to Catch series.
GRAB THE “HOW TO CATCH A TURKEY” BOOK VIA OUR AMAZON AFFILIATE LINK
Craft Supplies:
Gather everything before you start so little crafters can jump right in:
- 1 sheet of cardstock paper (dark grey makes the colors pop)
- 1 gold paper plate (for the turkey’s body)
- Acrylic paint (we used red, yellow and gold)
- 1 silicone spatula
- Loose craft glitter
- 2 googly eyes
- Orange construction paper (for the beak)
- Red construction paper (for the wattle)
- Glue (craft glue or a glue stick)
- Scissors
- An extra paper plate to use as a paint palette
Prep tip: Cover your table with newspaper or a plastic tablecloth. Acrylic paint can be hard to remove once it dries, so dress kids in old shirts or smocks.
Directions:
Step 1: Make the turkey body first
Cut your gold paper plate in half. If using a plain white paper plate, paint it gold and set it aside to dry.
Step 2: Set up your paint palette
Squeeze a pool of red, yellow and gold paint onto your spare paper plate. Place the two colors side by side so they touch slightly.
Step 3: Load the spatula
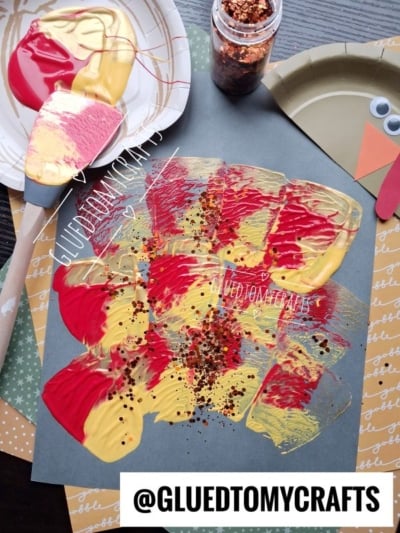
Press the flat silicone blade into the paint so it picks up all three colors. A little swirl of the colors on the blade creates a gorgeous marbled effect.
Step 4: Stamp the first feather
Place the grey cardstock in front of your child. Start near the bottom center, where the turkey’s body will go. Press the paint-covered blade firmly onto the paper, then lift it straight up. That’s your first feather design.
Step 5: Build the fan shape
Reload the spatula and stamp again. Angle each new feather slightly so the stamps spread out like a hand of playing cards.
- Keep the bottom of every feather near the same center point.
- Work from left to right, or right to left, to form a half-circle.
- Add a second layer of shorter feathers on top for extra fullness.
Tip: Let kids give the spatula a small wiggle or drag as they press. This adds even more texture, and no two turkeys will look the same.
Step 6: Sprinkle on the glitter
While the paint is still wet, sprinkle glitter over the center of the feathers. The wet paint acts like glue.
Common mistake: Waiting too long. If the paint dries first, the glitter won’t stick. Glitter right after stamping.
Step 7: Let the feathers dry
Set the cardstock somewhere flat to dry. Thick acrylic paint typically takes 30 to 60 minutes, depending on how heavily it was applied.
This is a great time to read a turkey story together (more on that below).
Step 8: Cut out the face pieces
While you wait, cut a small triangle from orange construction paper for the beak. Then cut a teardrop or thin strip from red construction paper for the wattle.
Step 9: Glue on the face
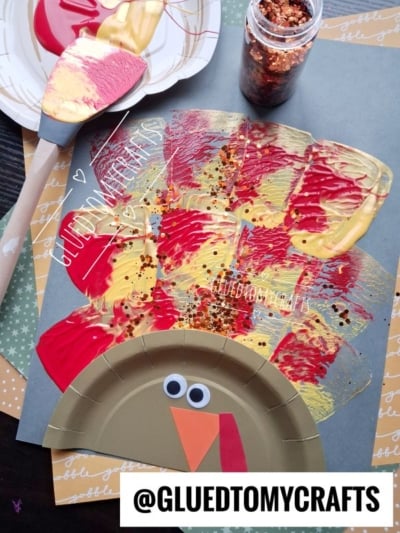
Glue two googly eyes onto the dried gold plate half. Add the orange beak just below the eyes, pointing down. Glue the red wattle beside the beak so it hangs over the edge slightly.
Step 10: Attach the body to the feathers
Glue the turkey body, curved side up, at the bottom center of the cardstock. It should cover the spot where all the feathers meet. Press gently and hold for a few seconds.
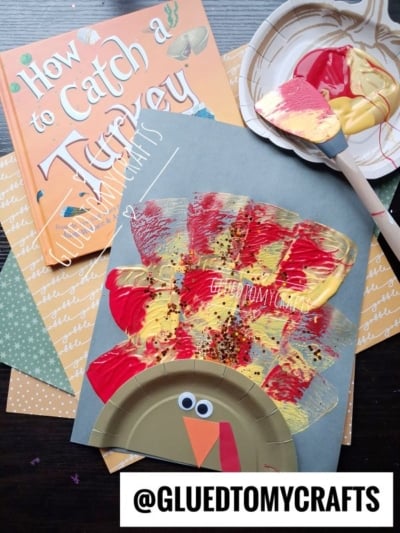
Your spatula stamped turkey is done.
RELATED —> Spatula Stamped Owl Craft Idea For Fall
GRAB THE “HOW TO CATCH A TURKEY” BOOK VIA OUR AMAZON AFFILIATE LINK
This craft goes perfectly with How to Catch a Turkey by Adam Wallace. Read it aloud while the paint dries, then ask kids to dream up their own turkey traps. It’s an easy way to connect reading and art, and it works especially well in classrooms and library story times!
So on that note, grab a spatula, squeeze out some paint, and let the stamping begin. Every turkey turns out a little different, and that’s what makes this craft so much fun.
Try it this week, then tag @GluedToMyCrafts with a photo of your finished turkey. We’d love to see your feather colors, glitter choices, and proud little crafters. Happy crafting, my friends!
