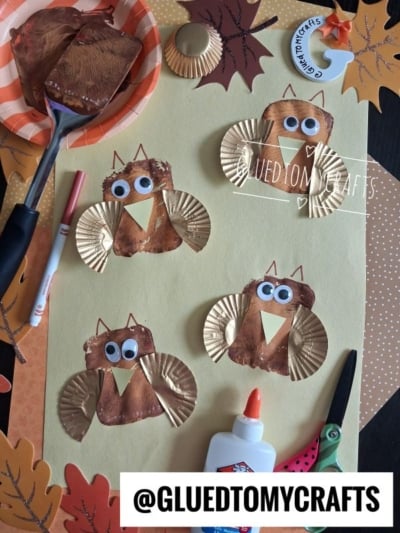
Looking for a fall craft that’s messy in all the right ways? This spatula stamped owl is about to become your new favorite autumn activity. Kids get to dip a sponge, press it onto paper, and watch a cute little owl appear like magic. The texture from the sponge gives each owl a fuzzy, feathery look that’s impossible to get with a plain paintbrush.
The best part? This craft uses simple supplies you probably already have at home. Mini gold foil cupcake liners get cut in half and turned into shimmery little wings, which adds just the right touch of sparkle for the season. Whether you’re a parent looking for a rainy-day project or a teacher planning your next classroom activity, this owl craft delivers big smiles with very little prep. Let’s make some owls!
Craft Supplies:
Gather everything before you start so little hands don’t have to wait:
- Brown paint (washable is best for easy cleanup)
- A spatula (used to stamp the owl bodies)
- Construction paper for the background
- Mini gold foil cupcake liners (cut in half to make the wings)
- Large googly eyes
- Yellow paper for the triangle beak
- A brown marker
- Elmer’s glue
- Scissors
- A paper plate for the paint
That’s it! Nothing fancy, nothing expensive.
Directions:
- Squeeze a good amount of brown paint onto your paper plate. Spread it out into an even layer so the back of the spatula can pick up a nice, consistent coat of color. A paper plate makes cleanup quick and easy.
- Press the back of your spatula into the brown paint until it’s evenly coated. Then press it firmly onto your construction paper and lift straight up. That single stamp becomes the owl’s body! The spatula leaves behind a bumpy, feathery texture that looks just like fluffy owl feathers. Make as many owls as you like, then set the paper aside to dry.
- Once the paint feels dry to the touch, grab your copper or brown marker. Draw two small pointed triangles at the top of each owl’s head to create the ears. This tiny detail gives your owl loads of personality.
- Take your mini gold foil cupcake liners and cut each one in half with your scissors. Each half becomes one wing! Add a dab of Elmer’s glue to the straight edge of each half, then press one wing onto each side of the owl’s body. The gold foil catches the light and gives your owl a little seasonal sparkle.
- Glue two googly eyes near the top of the owl’s body, just below the ears. Wiggly eyes bring your owl to life and always get the giggles going.
- Cut a small triangle from your yellow paper. Glue it point-side down, right between and slightly below the eyes. Now your owl has a beak and is officially finished!
RELATED —> Toilet Roll Stamped Owl Craft Idea


There’s something so satisfying about turning the back of a spatula, some paint, and a few cupcake liners into an adorable little owl. This craft is perfect for chilly afternoons, classroom fun, or anytime you want to bring a bit of autumn magic to the table.
Give it a try with your kids or students, and don’t forget to snap a photo of your finished owls. We’d love to see how yours turn out, so share your creations and spread the crafty fall cheer! Happy crafting, my friends!

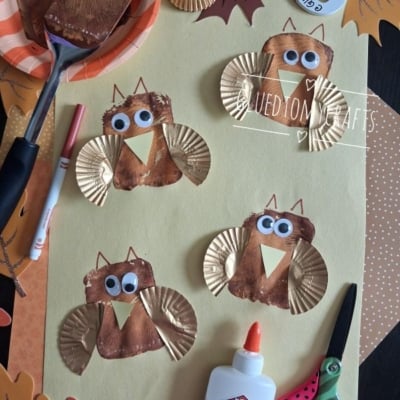
Spatula Stamped Owl Craft Idea For Fall
Make this easy fall owl craft with kids! Stamp a spatula in paint for the body, then add cupcake liner wings. A fun, simple autumn craft for all ages.
Here’s your checklist of supplies to bring this craft to life:
Prepare your creative haven by laying down a protective cover before the crafting magic begins!
Directions:
- Squeeze a good amount of brown paint onto your paper plate. Spread it out into an even layer so the back of the spatula can pick up a nice, consistent coat of color. A paper plate makes cleanup quick and easy.
- Press the back of your spatula into the brown paint until it's evenly coated. Then press it firmly onto your construction paper and lift straight up. That single stamp becomes the owl's body! The spatula leaves behind a bumpy, feathery texture that looks just like fluffy owl feathers. Make as many owls as you like, then set the paper aside to dry.
- Once the paint feels dry to the touch, grab your copper or brown marker. Draw two small pointed triangles at the top of each owl's head to create the ears. This tiny detail gives your owl loads of personality.
- Take your mini gold foil cupcake liners and cut each one in half with your scissors. Each half becomes one wing! Add a dab of Elmer's glue to the straight edge of each half, then press one wing onto each side of the owl's body. The gold foil catches the light and gives your owl a little seasonal sparkle.
- Glue two googly eyes near the top of the owl's body, just below the ears. Wiggly eyes bring your owl to life and always get the giggles going.
- Cut a small triangle from your yellow paper. Glue it point-side down, right between and slightly below the eyes. Now your owl has a beak and is officially finished!


Grab our favorite books via our Amazon affiliate link! In our Amazon storefront you will find books, toys and craft supplies we absolutely love using for our Glued To My Crafts tutorials!
If you've enjoyed our content or have any thoughts to share, we'd love to hear from you! Mention @gluedtomycrafts or tag #gluedtomycrafts on Instagram!