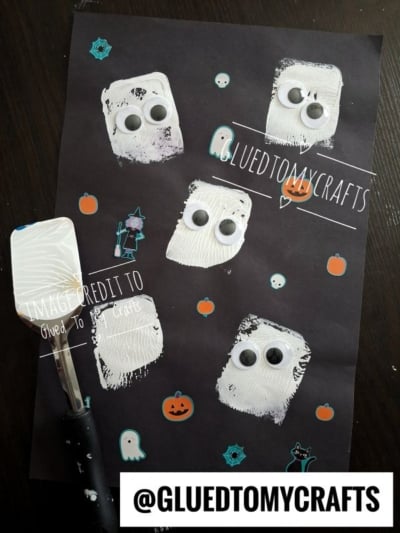
Some of the best Halloween crafts don’t need a trip to the craft store. They start with a quick peek inside your kitchen drawer. This spooky-cute project turns an ordinary flat spatula into a ghost-making machine, and the results are adorable.
With just a few swipes of white paint and a firm press, your little crafters can fill a page with friendly phantoms in minutes. It’s quick, low-mess (mostly!), and perfect for classrooms, playdates, or a cozy afternoon at home. Best of all, every ghost turns out a little different, so there’s no wrong way to do it.
Grab your spatula. It’s time to get stamping!
Craft Supplies:
- A flat kitchen spatula (a metal one with a rectangular head works best)
- White craft paint (washable paint is a smart pick for younger kids)
- Black construction paper or cardstock
- Googly eyes (larger ones make extra-silly ghosts)
- Craft glue or glue dots
- A paper plate or shallow dish for the paint
- Stickers
- Optional: A paintbrush, smock, and newspaper or a plastic tablecloth to protect your workspace
Helpful tip: If you’d rather not use your everyday cooking spatula, pick up an inexpensive one to keep in your craft bin. If you do borrow one from the kitchen, wash it well with warm, soapy water as soon as you’re done.
Directions:
Step 1: Set Up Your Ghostly Workspace
Cover your table with newspaper or a plastic cloth, and slip a smock or old T-shirt over your crafter’s clothes. Squeeze a puddle of white paint onto a paper plate. Then lay a sheet of black paper flat in front of each child.
Step 2: Coat the Spatula Head in White Paint
Press the flat head of the spatula into the paint, or use a paintbrush to spread an even layer across the surface. You want a nice, solid coat, but not so much that it drips. Too little paint makes faint ghosts. Too much makes blobby ones. Somewhere in the middle is just right!
Step 3: Stamp Your Ghosts onto the Paper
Here comes the magic! Press the painted side of the spatula firmly onto the black paper. Hold it there for a second or two, then lift it straight up. Ta-da! You’ve got a ghost body.
Repeat to make a whole haunted crowd. Try these fun variations:
- Wiggle it: Give the spatula a tiny wiggle as you press for a wavy, floaty look.
- Tilt it: Stamp at different angles so your ghosts look like they’re swooping and swirling.
- Mix the sizes: Press only part of the spatula down to create baby ghosts.
Re-coat the spatula with paint every one or two stamps. The ridges or texture on the spatula will leave cool lines in the paint, giving each ghost a wispy, spooky feel.
Step 4: Let the Paint Dry
Set your artwork somewhere safe and let it dry completely, usually about 15 to 30 minutes, depending on how thick the paint is. This is a great time to wash the spatula, tidy up, or pick out stickers for the next step.
Step 5: Glue on the Googly Eyes
Once the paint is dry, it’s time to bring your ghosts to life! Add a small dot of glue near the top of each ghost and press on two googly eyes. Kids love this part, so let them get creative:
- Give one ghost mismatched eyes
- Add three eyes to a silly monster-ghost
- Leave one ghost eyeless for an extra-mysterious look
Glue dots are a handy, mess-free option for younger kids.
Step 6: Decorate with Halloween Stickers
Now for the finishing touch! Scatter Halloween stickers around your ghosts to build a spooky scene. Pumpkins and jack-o’-lanterns add pops of orange. Spiderwebs and skulls bring the creepy factor. A witch on a broom or a sneaky black cat can make your ghosts look like they’re throwing a midnight party.
No stickers on hand? Kids can draw moons, stars, bats, or pumpkins with chalk, white crayon, or metallic markers instead.
RELATED —> 10+ Spatula Stamped Halloween Crafts


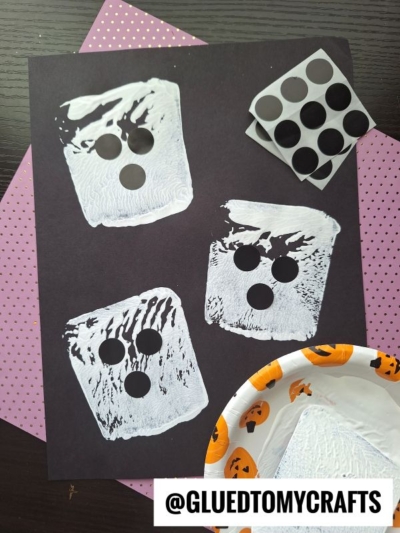

This spatula-stamped ghost craft proves that a little paint, a kitchen tool, and a big imagination are all you need for Halloween magic. Whether your ghosts come out perfectly neat or wonderfully wobbly, each one tells a story and captures a sweet moment of creativity.
So clear off the table, pass out the googly eyes, and let the spooky fun begin. We hope your Halloween is filled with laughter, painty fingerprints, and plenty of friendly little ghosts. Boo!
