Glued To My Crafts

Join thousands of others who have gotten GLUED to our craft tutorials!

  • Home
  • About Us
  • Safety Guidelines
  • Seasonal Crafts
    • New Years
    • Valentine’s Day
    • St. Patrick’s Day
    • Spring
    • Easter
    • Mother’s Day
    • Summer
    • Father’s Day
    • Patriotic
    • Halloween
    • Thanksgiving
    • Fall
    • Winter
    • Christmas
    • Snowmen
    • Story Time
  • Monthly Themes
    • January Craft Ideas
    • February Craft Ideas
    • March Craft Ideas
    • April Craft Ideas
    • May Craft Ideas
    • June Craft Ideas
    • July Craft Ideas
    • August Craft Ideas
    • September Crafts
    • October Crafts
    • November Crafts
    • December Crafts
  • Amazon Storefront
  • Privacy Policy

Dish Soap Stamped Snowman Craft Idea

When engaging in craft activities, it is important for young children to have adult supervision at ALL times. It is also recommended to use supplies that are suitable for your child's age. Feel free to modify materials or steps to meet your specific requirements. Please refer to our safety guidelines for more information.

As an Amazon Associate I earn from qualifying purchases. This post may contain affiliate links. Glued To My Crafts is independent and not affiliated with or endorsed by the publishers of the books featured on our website. For more information, please see our disclosure policy.

UPDATE FOR 2026 - To reduce storage costs and download fees, we recently made some changes to our website. The password for all our files this year is GLUEDTOMYCRAFTS2026. No sign-up is required to download our free printables! You can enjoy our printables without creating an account or paying for Box.com. Simply follow the download instructions on our FAQ PAGE.

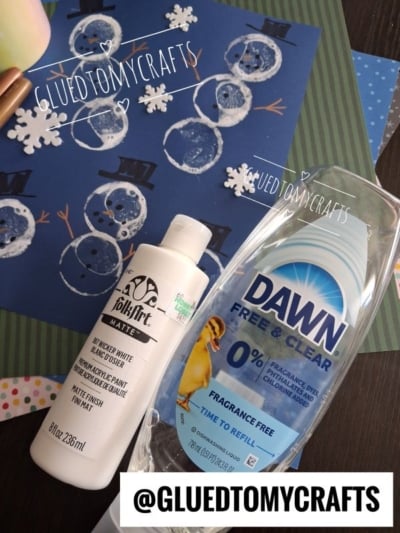
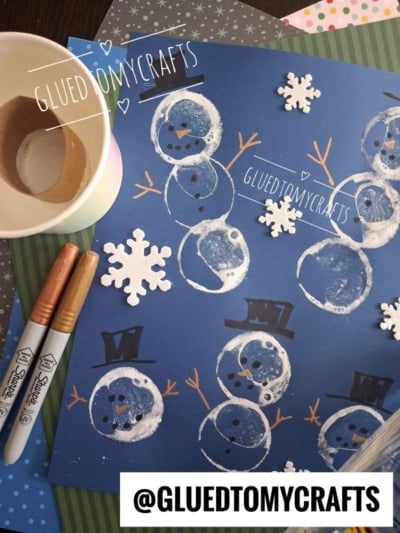
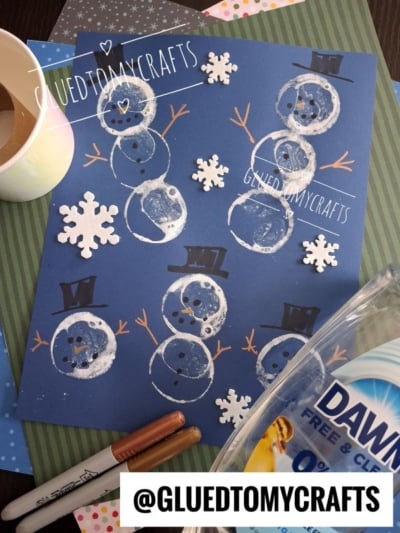
Blue cardstock featuring four stamped snowmen created from circular prints, decorated with drawn hats, arms, and buttons, and accented with white foam snowflake stickers.

Snow days, chilly afternoons, and long winter breaks all call for one thing: a craft that’s easy to set up, fun to make, and cute enough to hang on the fridge. This dish soap stamped snowman craft checks every box.

With a cardboard toilet paper roll, a little white paint, and a squeeze of dish soap, kids can stamp bubbly, textured circles that turn into a whole family of snowmen. No two prints come out the same, which is half the magic. Some circles fill with frothy bubbles, some come out as thin, frosty rings, and every snowman ends up with its own personality.

This winter kids’ activity works for toddlers who love to stamp, for older kids who want to add funny details, and for classrooms that need a simple, low-cost art project. Let’s get stamping!

Craft Supplies:

  • Blue cardstock paper
  • White acrylic paint
  • Dawn dish soap
  • Cardboard toilet paper rolls (one or two per child)
  • A cup or small container for mixing (a paper cup works great)
  • Markers
  • Glittery foam snowflake stickers
  • Optional: a spoon or craft stick for stirring, and newspaper or a plastic tablecloth to protect your table

Directions:

Step 1: Set Up Your Craft Space

Cover your table with newspaper, a plastic tablecloth, or a craft mat. Lay out a sheet of blue cardstock for each child. Keep a damp paper towel nearby for quick cleanups and messy fingers.

Step 2: Mix the Paint and Dish Soap

Pour a few tablespoons of white acrylic paint into your cup. Add about half as much dish soap. A good starting point is 2 parts paint to 1 part dish soap.

Stir gently with a spoon or craft stick. You want a smooth, milky white mixture with small bubbles around the edges. Keep the mixture shallow in the bottom of the cup so the end of the roll gets coated without soaking through.

Tip: If the mixture feels too thick, add a tiny splash of water. Thinner paint makes more bubbles, while thicker paint makes bolder, solid circles. Try a test stamp on scrap paper first to see what you like.

Step 3: Dip the Toilet Paper Roll

Stand the toilet paper roll upright in the cup and press it into the paint mixture. Give it a little wiggle so the whole rim gets coated.

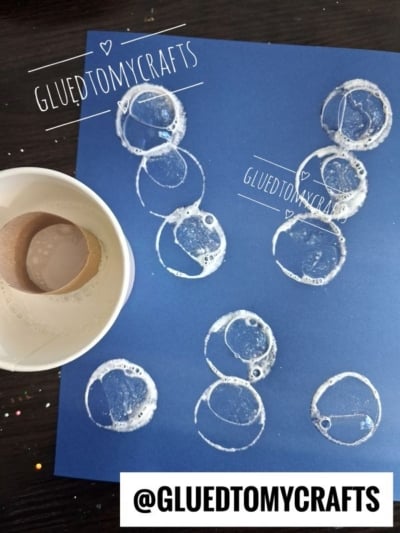
Here’s where the fun happens. When you lift the roll out, the soapy paint often forms a thin bubbly film across the opening. That film is what gives your snowmen their frothy, snowy texture.

Step 4: Stamp Your First Circle

Press the painted end of the roll straight down onto the blue cardstock. Hold it for a second, then lift it straight up.

You’ll see a white ring, and many times the center fills with delicate dried bubbles. Every print is a little different. Some look like fluffy snowballs, others look like frosty outlines. Both make adorable snowmen!

Step 5: Layer Circles to Build Snowman Bodies

Now it’s time to build. Dip the roll again and stamp a second circle just above the first, letting the edges overlap slightly. Add a third circle on top for a classic three-tier snowman.

Mix it up across the page:

  • Three-tier snowmen for the tall, traditional look
  • Two-tier snowmen for chubby little buddies
  • Single-circle snowman heads for a playful, peeking-out style

Want different sizes? Gently squeeze the roll into a slightly smaller oval before stamping the head, or use a smaller round object like a bottle cap for a tiny top circle.

Re-dip the roll before each stamp to keep the bubbles coming.

Step 6: Let the Paint Dry

Set the artwork aside to dry completely. This usually takes about 20 to 30 minutes, depending on how thick the paint went on. The bubbles will settle into a soft, textured finish as they dry.

This is a perfect time for a snack, a winter story, or a quick hand wash.

Step 7: Draw the Hats, Faces, and Noses

Once the paint is dry, bring your snowmen to life:

  • Top hats: Use a black marker to draw a hat on each snowman’s head.
  • Eyes and mouths: Add black dots for eyes and a curved row of dots for a smile.
  • Carrot noses: Draw a small orange triangle in the middle of each face.
  • Buttons: Dot a few black buttons down the middle circle.

Encourage kids to give each snowman a different expression. A surprised snowman, a sleepy snowman, and a silly snowman make the scene feel like a real snowman family.

Step 8: Add Stick Arms

Grab the bronze and gold metallic Sharpie markers and draw stick arms coming out from each side of the body. Add little branches at the ends for twiggy fingers. The metallic shine gives the arms a fun, wintery glow against the blue paper.

Step 9: Finish With Snowflakes

Peel and stick glittery foam snowflake stickers across the sky. Scatter them between the snowmen to fill empty space and add sparkle. Now your snowy scene is complete!

RELATED —> Bubble Stamped Turkey
A cup of soapy water with a cardboard tube and bubble prints on blue paper. A bottle of white acrylic paint and a bottle of Dawn dish soap placed on a surface with a handmade snowman craft project. Blue construction paper with several hand-stamped white paint snowmen, decorated with drawn hats, orange stick arms, and snowflake embellishments.

We love seeing your kids’ snowy masterpieces! Snap a photo of your dish soap stamped snowmen and tag @GLUEDTOMYCRAFTS so we can cheer on your little artists. Don’t forget to save this tutorial for your next snow day, and check out more easy winter crafts for kids here on Glued To My Crafts. Happy stamping, and stay cozy! ☃️

A blue text on a white background, perfect for creating a charming the places you'll go keepsake.


OUR PRIVACY POLICY

OUR COPYRIGHT POLICY

  • Email
  • Facebook
  • Instagram
  • Pinterest
  • Twitter
  • YouTube

Love our crafts?

Follow us on Google

Click & check the box to see us more in your search results!

LOOKING FOR SOMETHING?

EXPLORE OUR SITE:

© 2012–2026 Glued To My Crafts

© All Rights Reserved. All images, artwork, and visual materials contained herein are the exclusive property of the copyright holder and are protected under applicable copyright laws and international treaties. No individual, entity, or organization is authorized to reproduce, distribute, or use any of these images in any manner without express written consent from the copyright holder. The following actions are strictly prohibited: copying, pasting, saving, screenshotting, downloading, or otherwise distributing any images, in whole or in part, by any means or method. Furthermore, it is strictly forbidden to input, upload, submit, or process any of these images through any artificial intelligence system, generative model, machine learning algorithm, neural network, or similar technology for the purpose of creating derivative, modified, reproduced, or newly generated works of any kind. Any output, image, or material generated by artificial intelligence or comparable technology that is derived from, trained upon, or based in any way on these images is likewise subject to this prohibition. Claiming, presenting, or asserting any such AI-generated output as one's own original work is expressly prohibited and constitutes a violation of the copyright holder's rights. Any unauthorized use, reproduction, or exploitation of these images, whether by human or automated means, constitutes copyright infringement. Infringement may result in legal action, including but not limited to claims for damages, injunctive relief, and recovery of legal costs. All rights not expressly granted herein are reserved.

All activities should be supervised by an adult at all times. Please refer to our safety guidelines for more information.


Please note that all the content of the website, including printables, are for classroom and personal use only. This means that any digital item you download from our site can be used for non-commercial use only. We kindly request that you do not reproduce or sell our creations. We appreciate your understanding and cooperation in respecting our content and intellectual property rights.

Accessibility Adjustments

Powered by OneTap

How long do you want to hide the toolbar?
Hide Toolbar Duration
Select your accessibility profile
Vision Impaired Mode
Enhances website's visuals
Seizure Safe Profile
Clear flashes & reduces color
ADHD Friendly Mode
Focused browsing, distraction-free
Blindness Mode
Reduces distractions, improves focus
Epilepsy Safe Mode
Dims colors and stops blinking
Content Modules
Font Size

Default

Line Height

Default

Color Modules
Orientation Modules