
With the arrival of spring, it’s time to start planning activities to celebrate the season with your little ones. One of our favorite craft ideas for kids this year are these adorable paint splat bunny creations!

Paint Splatter Bunny Craft
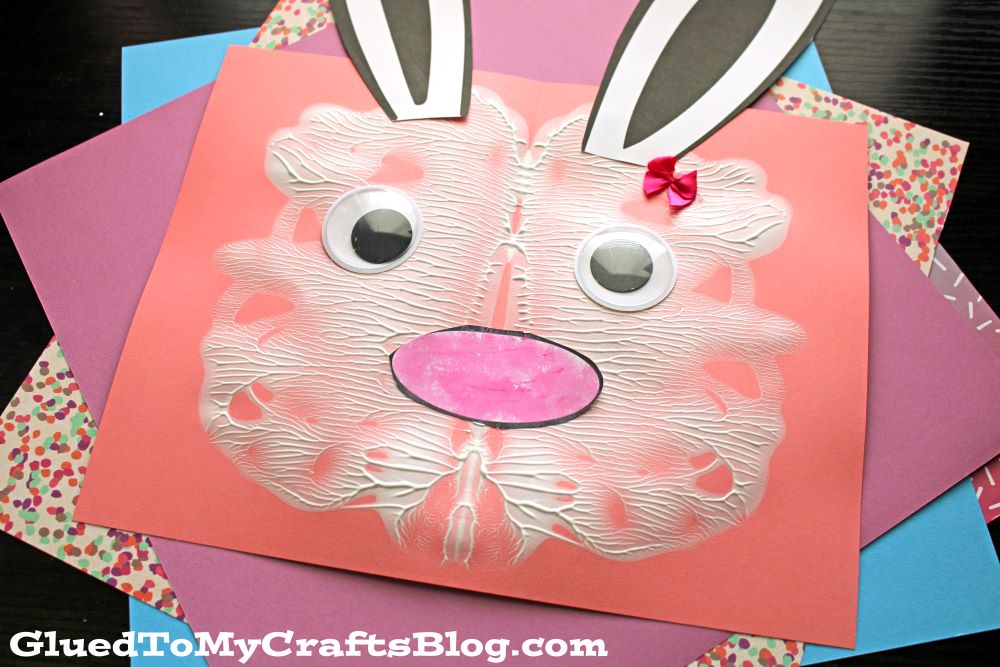
Are you ready for some fun this spring? Unleash your creativity and make our latest adorable paint splat bunny craft with the kids this afternoon!
Everyone will love creating these out-of-the-ordinary bunnies on paper, while showing off their own unique style and flair.
This project encourages imagination, exploration of media and so much more. Attainable for most ages, this fun Easter bunny rabbit art project can help instill creativity even in those who feel like their artistic abilities are limited.
You and your children will have a blast making lots of happy bunnies out of splashes of paint-and who knows? Maybe they’ll even inspire future masterpieces too!
Ready to make it happen in your home? Find ALL the details, along with a FREE printable to get you started even faster on making a white rabbit on paper. Happy crafting, my friends!
RELATED —> Fork Painted Bunny
Why we love this: It’s a total confidence booster for kids! The ‘paint splat’ method ensures a perfectly symmetrical bunny face every single time, so there’s no such thing as a ‘mistake.’ Plus, it’s the perfect way to use up those extra white or brown paint bottles in your stash!
Craft Supplies:
- White Puffy Paint
- Pink Cardstock Paper
- White Cardstock Paper
- Bunny Printable – on our spring landing page
- Crayons, Markers or Coloring Pencils
- Craft Scissors
- School Glue
- Extra Large Wiggle Eyes – 2 per craft
I’ve found that using Tulip Puffy Paint gives this bunny a great 3D texture, but if you’re using regular craft paint, don’t over-squish! You want a ‘furry’ look, not a flat pancake. Also, if the paint oozes out the sides, just tell the kids the bunny is ‘growing his winter coat’ – it’s all part of the fun!
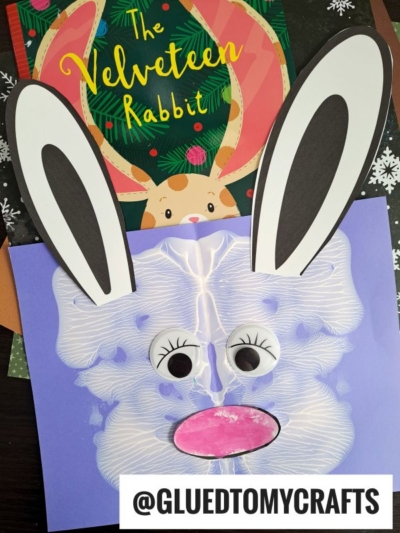
✨ Stacey’s Pro-Tip: Out of ink? Don’t let that stop the bunny fun! To free-hand your own ears, simply cut two long ‘tall oval’ shapes from your scrap paper. If you want them to look extra floppy and cute, just slightly bend the top of one oval downward before gluing it to the back of your paint-splat face. It gives the bunny so much personality without needing a template!
Directions:
- First things first – fold your PINK cardstock paper in half and open it back up.
- Grab your Tulip puffy paint and squirt some white craft paint ON ONE SIDE before closing it up again.
- Once the paper is closed for the second time, gently take your hand and “caress” the paper so the white paint inside, makes a fun symmetrical print design on both sides of the paper {keep in mind – paint might ooze from the sides of the cardstock, so be sure to work in an area that can get dirty!}
- Now you are ready to open it back up and see the BEGINNING of what your bunny’s head will eventually be. From there you decorate it to bring it to life and give it life.
- Next up, grab the printed printable and your choice of coloring utensil.
- Color in the nose of the printable.
- Now cut out ALL three of the design pieces.
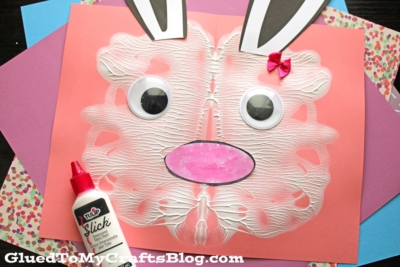
- Finally – the last step in completing this white bunny paper craft is to glue down ALL the cardstock cutout pieces and the googly eyes, on top of the paint splat design. I would highly suggest starting with the nose in the center and building from there.
- Once finished with your custom paint splatter bunny masterpiece, then set aside to let it dry completely, before displaying proudly! And of course – repeat as many times as you like! No two pieces will be the same and I think that’s what makes it even more fun!
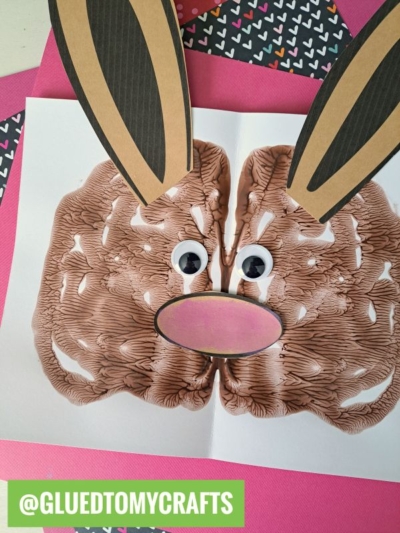
P.S. If you’re feeling more like ‘Team Chocolate,’ be sure to check out our Chocolate Paint Splat Bunny version – it uses the same technique but with a delicious brown twist!
Unleash your child’s creativity and help them make some awesome crafts today. Our tutorials are perfect for kids of all ages and are sure to bring out the inner artist within them!
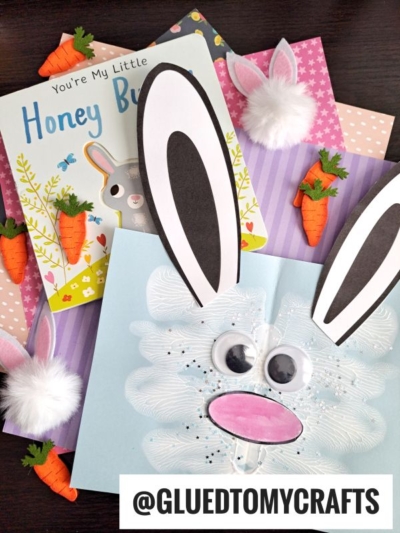
We want YOU to check out our super popular Clothespin Bunny, Bunny Cupcake and Easter Bunny House craft posts! Then pair all three of these Easter craft ideas with today’s easy bunny painting tutorial for an epic day!
We also LOVE talking crafts with our lovely readers. Come join our private Facebook group where we chit chat, share and laugh together! Everyone is welcomed so come join the fun and share their craft creations!!! #gluedtomycrafts

Paint Splat Bunny Craft Idea For Spring
Here’s your checklist of supplies to bring this craft to life:
- School Glue
Prepare your creative haven by laying down a protective cover before the crafting magic begins!
Directions:
- First things first - fold your PINK cardstock paper in half and open it back up.1 Cardstock Paper
- Grab your Tulip puffy paint and squirt some white craft paint ON ONE SIDE before closing it up again.Tulip Puffy Paint
- Once the paper is closed for the second time, gently take your hand and "caress" the paper so the white paint inside, makes a fun symmetrical print design on both sides of the paper {keep in mind - paint might ooze from the sides of the cardstock, so be sure to work in an area that can get dirty!}
- Now you are ready to open it back up and see the BEGINNING of what your bunny's head will eventually be. From there you decorate it to bring it to life and give it life.
- Next up, grab the printed printable and your choice of coloring utensil.
- Color in the nose of the printable.
- Now cut out ALL three of the design pieces.
- Finally - the last step in completing this white bunny paper craft is to glue down ALL the cardstock cutout pieces and the googly eyes, on top of the paint splat design. I would highly suggest starting with the nose in the center and building from there.2 Googly Eyes
- Once finished with your custom paint splatter bunny masterpiece, then set aside to let it dry completely, before displaying proudly!


NEED MORE HELP DOWNLOADING OUR FREE PRINTABLES? PLEASE REFER TO OUR FAQ PAGE