Our snow covered mountain craft tutorial is a budget-friendly project that uses inexpensive materials & simple techniques


Capture all the joys of the season with today’s latest idea from us! Snow covered mountains are not only great to represent the holiday season but honestly ALL year long.
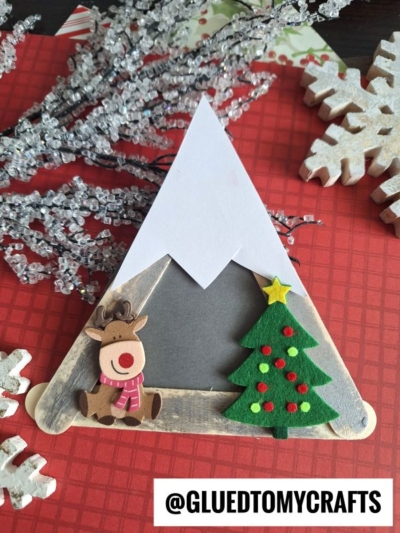
Although today’s woodland themed craft tutorial was inspired by some adorable felt reindeer stickers I recently picked up at Michaels, I could see this craft being done beyond the cold winter months! I’m sure there are even some great children’s books out there to pair with today’s idea.
Our craft stick snowy mountain project is just one those crafts that your little one will be happy to recreate and display in their home proudly! You could prop it up on a shelf or add some ribbon to the back for easy hanging.
So without further ado – hop on board for a great afternoon of crafting with your child! Simply grab some jumbo popsicle sticks, sheets of cardstock and some glue to recreate your own popsicle stick snowy mountain creation. You can find ALL the details in the full tutorial below! The real attention-getter is the reindeer stickers so don’t forget those as well!
Happy crafting, my dear friends and please don’t forget to share pictures of your mountains with us on our Facebook page! #gluedtomycrafts

Our Popsicle Stick Snowy Mountain tutorial is a budget-friendly project that uses inexpensive materials & simple techniques
Craft Supplies:
- Jumbo Popsicle Sticks – 3 per craft
- School Glue
- Gray Craft Paint
- Foam Paint Brush
- Small Paper Plate
- Gray Cardstock Paper
- White Cardstock Paper
- Scissors
- Reindeer Stickers
Directions:
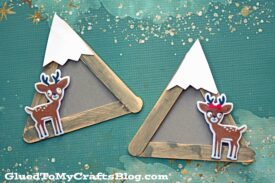
- First things first – grab your THREE jumbo popsicle sticks and glue them together in a simple triangle formation.
- Set it aside to allow it to dry a bit. Repeat for each mountain you want to create.
- When dry enough to touch, grab your popsicle stick shape, craft paint, paper plate and paint brush.
- Squirt some gray craft paint on the paper plate.
- Use the paint brush to paint one side of the popsicle stick triangle shape completely gray.
- Again, set it aside to allow it to dry completely.
- Now grab your sheets of cardstock and scissors.
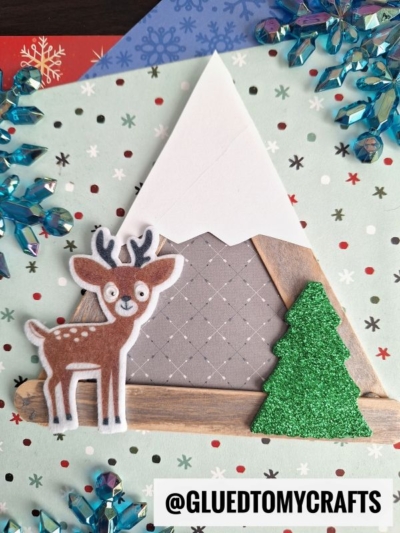
- Cut out a large triangle from the gray cardstock, that will fit inside the painted popsicle stick shape.
- Out of the white cardstock, cut out a snowy mountain tip.
- When ready – it’s time to assemble! Grab all your paper pieces, popsicle stick shape and school glue.
- Start off my gluing the gray triangle to the back of the painted popsicle stick shape.
- Follow that up with the “snow” in the top, front area.
- Finally – add the reindeer sticker to the bottom of the popsicle stick mountain shape, to tie it all together.
- Now allow it to dry completely before you display your popsicle stick snowy mountain creation proudly in your home!
- Don’t forget to share pictures with us on your social media sites! #gluedtomycrafts
RELATED —> Cupcake Liner Snowy Tree
When the season inspires you – you get creative! At Glued To My Crafts we have built quite a collection of Christmas themed tutorials!
We really pride ourselves on having the best and EASIEST ideas on the web! My personal favorites are our Christmas Fairy House, Tree Gnomes and Christmas Truck craft tutorials!

Popsicle Stick Snowy Mountain Craft For Winter
Our snow covered mountain craft tutorial is a budget-friendly project that uses inexpensive materials & simple techniques
Here’s your checklist of supplies to bring this craft to life:
- 3 Jumbo Popsicle Sticks
- Cardstock Paper gray and white
- Craft Paint gray
- Embellishments
- School Glue
- 1 Scissors
Prepare your creative haven by laying down a protective cover before the crafting magic begins!
Directions:
- First things first - grab your THREE jumbo popsicle sticks and glue them together in a simple triangle formation.
- Set it aside to allow it to dry a bit. Repeat for each mountain you want to create.
- When dry enough to touch, grab your popsicle stick shape, craft paint, paper plate and paint brush.
- Squirt some gray craft paint on the paper plate.
- Use the paint brush to paint one side of the popsicle stick triangle shape completely gray.
- Again, set it aside to allow it to dry completely.
- Now grab your sheets of cardstock and scissors.
- Cut out a large triangle from the gray cardstock, that will fit inside the painted popsicle stick shape.
- Out of the white cardstock, cut out a snowy mountain tip.
- When ready - it's time to assemble! Grab all your paper pieces, popsicle stick shape and school glue.
- Start off my gluing the gray triangle to the back of the painted popsicle stick shape.
- Follow that up with the "snow" in the top, front area.
- Finally - add the reindeer sticker to the bottom of the popsicle stick mountain shape, to tie it all together.
- Now allow it to dry completely before you display your popsicle stick snowy mountain creation proudly in your home!

CLICK HERE TO PRINT THE DIRECTIONS FOR THIS CRAFT
If you've enjoyed our content or have any thoughts to share, we'd love to hear from you! Mention @gluedtomycrafts or tag #gluedtomycrafts on Instagram!