Oh you know – just hanging out with my ghoul friends today! Keep scrolling to see how I made this Paper Handprint Ghost In Haunted House tutorial come to life within minutes. It’s sure to bring some gh’oul times your way this Halloween season!

Haunted House With Handprint Ghost Inside
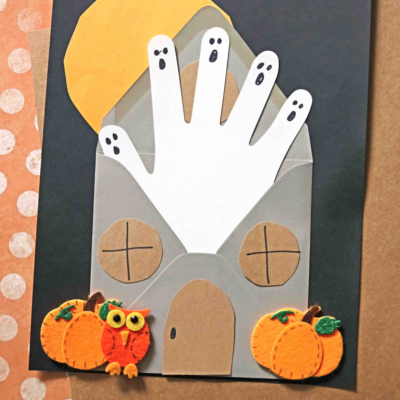
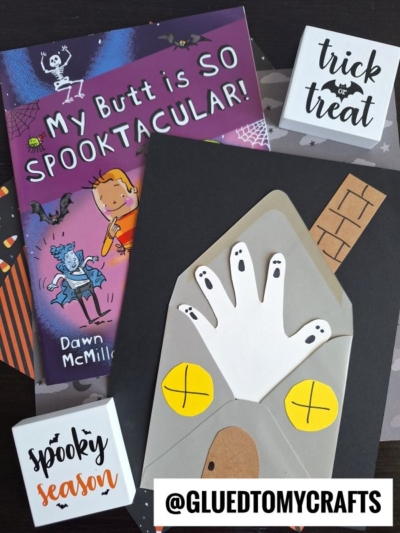
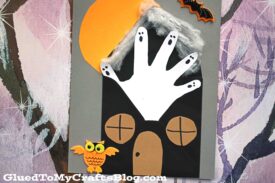
Today’s paper ghost in haunted house craft idea evokes the FUN of everything Halloween should be! We got a little spooky in the mix but also a little bit of cuteness, in this Halloween inspired art project tutorial!
Inspired by some basic black square envelopes I purchased at Paper Source recently, I was inspired to “host” some adorable finger cutout ghosts {with the help of my son} inside the envelope flap, to create a haunted house that doubles as a great keepsake as well.
If you would like to recreate this simple and spellbinding craft with your child, you can find all the details below in our ghostly themed tutorial. I just hope this quick post inspired you to kick-start the fun in your home today!
Happy crafting, my dear spooky friends! I can’t wait to see what you and your child come up! Maybe you can even “scare us silly” with how you customize it!
So on that note, be sure to share pictures of your Handprint Ghost In Haunted House creations with us. You can ALWAYS find us on Facebook or use our special branded #gluedtomycrafts hashtag for us to see from!
RELATED —> Thumbprint Ghosts

It’s spooky season! Get your kids in the spirit with this easy-to-make handprint ghost craft. Perfect for you and your little ones to have fun and get creative this Halloween!
Craft Supplies:
- Colored Cardstock Paper
- White Cardstock Paper
- Square Black Envelope
- Scissors
- Pencil
- Black Sharpie Marker
- School Glue or Glue Stick
- Halloween Stickers
- Fake Spider Webs
Directions:
- The directions are simple but we will start with the handprint ghost cutout first. Gather your pencil, white cardstock and scissors.
- Trace your hand on a sheet of white cardstock paper.
- Use scissors to trim out the shape you just made. Discard excess paper.
- Take the black Sharpie marker and draw eyes & a mouth on EACH finger. This will give the look of ghosts.
- Set it aside.
- Now grab a single sheet of colored cardstock and your black square envelope.
- Open the lid up from the envelope and lay it flat so it looks like a house.
- Next glue it in place, on the single sheet of colored cardstock, with the opening of the envelope facing you. This way you can slip the handprint “ghost” cutout from earlier, inside the opening.
- Go ahead and glue in the handprint cutout.
- Finally – the embellishments! Go to town on decorating the ghost in haunted house piece however you like. You can add a circular moon cutout to the back of the envelope, add spider webs along the roof – whatever your craft heart desires! Don’t be “scared-y cat” when it comes to this step.
- When done – snap a few pictures to share with us and display it proudly for ALL to see! #gluedtomycrafts
RELATED —> Popsicle Stick Witch House
Have a FRIGHTFULLY crafty Halloween season with the help of us at Glued To My Crafts!
Before you leave, check out our Footprint Haunted House, Paper Plate Cauldron, and Jack-O-Lantern Teddy Bear craft posts! We know they will scare-you-silly with how EASY they are to recreate!
Handprint Ghost In Haunted House Craft
Here’s your checklist of supplies to bring this craft to life:
- Cardstock Paper
- Square Envelopes
- Fake Spider Webs
- Embellishments
Prepare your creative haven by laying down a protective cover before the crafting magic begins!
Directions:
- The directions are simple but we will start with the handprint ghost cutout first. Gather your pencil, white cardstock and scissors.
- Trace your hand on a sheet of white cardstock paper.
- Use scissors to trim out the shape you just made. Discard excess paper.
- Take the black Sharpie marker and draw eyes & a mouth on EACH finger. This will give the look of ghosts.
- Set it aside.
- Now grab a single sheet of colored cardstock and your black square envelope.
- Open the lid up from the envelope and lay it flat so it looks like a house.
- Next glue it in place, on the single sheet of colored cardstock, with the opening of the envelope facing you. This way you can slip the handprint "ghost" cutout from earlier, inside the opening.
- Go ahead and glue in the handprint cutout.
- Finally - the embellishments! Go to town on decorating the ghost in haunted house piece however you like. You can add a circular moon cutout to the back of the envelope, add spider webs along the roof - whatever your craft heart desires! Don't be "scared-y cat" when it comes to this step.

Grab our favorite books via our Amazon affiliate link! In our Amazon storefront you will find books, toys and craft supplies we absolutely love using for our Glued To My Crafts tutorials!
