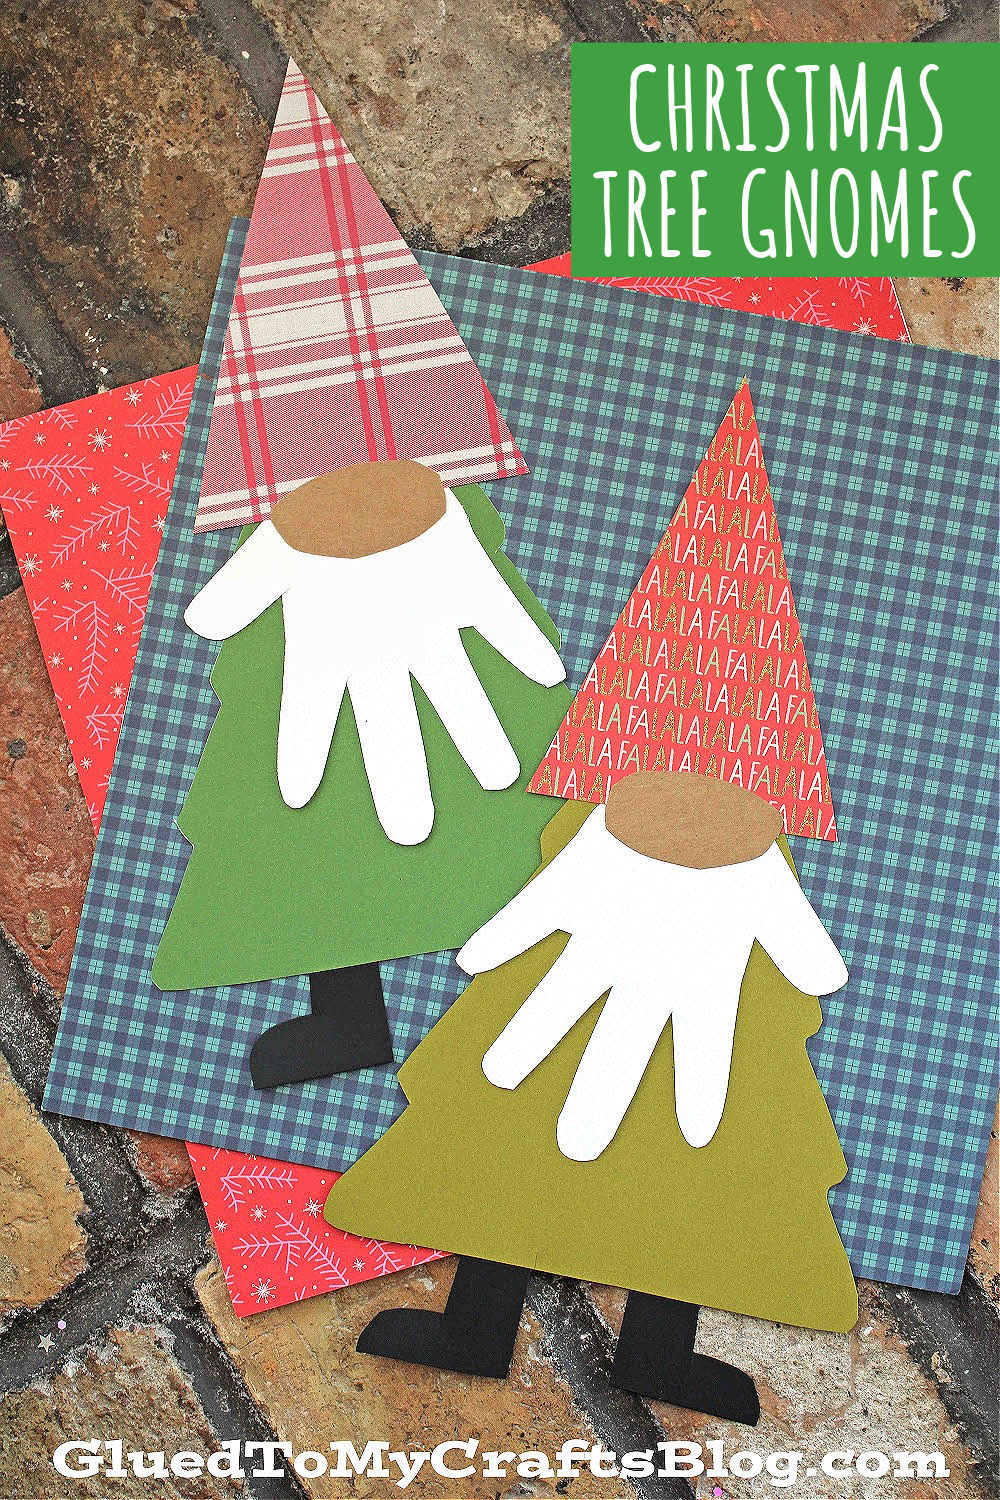
We are going to transform a cardstock paper tree shape into an adorable Christmas Tree Gnome with just THREE steps!

Deck the halls with this newest craft idea from us! We are going to transform a basic paper tree shape into an adorable Christmas Tree Gnome with just THREE steps! Keep scrolling for the full details, so you can recreate it today and share the spirit of craft time with your child.
If you are looking for a fun and easy Christmas craft to do with your kids, look no further than this paper Christmas tree gnome!
This is a great project for crafters of all levels and can easily be adapted to fit any age group. Best of all, it’s really cheap and easy to make – perfect for those on a budget or who are short on time.
So get creative and have some holiday fun with your family! Be sure to cozy up in your favorite sweater and join your child in the making of your own Handprint Christmas Tree Gnome. I wanna see pics of everything you create that day, so be sure to share some with us on our Facebook page!

Christmas Tree Gnome Craft
Looking for a fun and festive Christmas crafting project for the kids? Why not try making these adorable paper Christmas tree gnomes?!
Craft Supplies:
- Tree Shape – on our landing page
- Green Cardstock Paper
- Scrapbook Paper
- Black Cardstock Paper
- Kraft Cardstock Paper
- White Cardstock Paper
- Scissors
- Glue Stick
- Embellishments
Directions:
- First things first – download, print and cut out your Christmas tree shape from the green cardstock paper.
- Go ahead and cut off the tree stump on the bottom of the cutout.
- Discard excess paper.
- Flip over your tree cutout, so the lines can’t be seen anymore.
- Now grab your remaining pieces of paper.
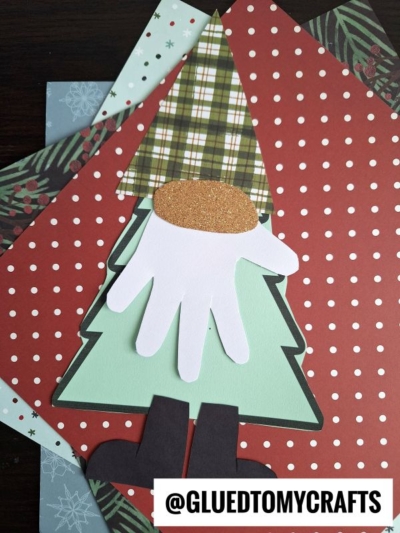
- Trace/cut out a HANDPRINT beard from the white, a large triangle hat from the scrapbook paper, an oval nose from the kraft and finally – two boots from the black.
- Now you are ready to assemble! Grab your green tree shape, the glue stick and all the paper pieces.
- Start off with the boots. Secure them to the bottom/back side of the tree shape.
- Now glue down the beard on the front side, in the center of the tree.
- Follow that up with the hat for the “tree topper” and then the nose on top, to tie it all together.
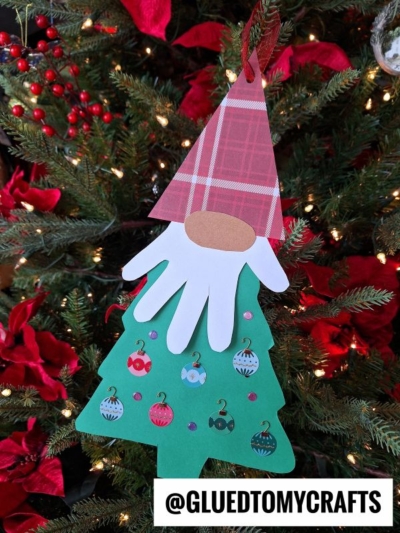
- Add any other embellishments you see fit. Maybe some glitter or a pom pom on the hat!
- Finally – display proudly for ALL to see!
- You can also hole punch a hole on the top of it and string it, to make an ornament or gift tag.
- Don’t forget to share pictures of your Christmas Tree Gnomes with us on your social media sites! #gluedtomycrafts
RELATED —> Popsicle Stick Christmas Truck
Holiday paper crafts are my favorite this time of year! The supplies and steps are usually pretty simple, which is perfect for the hectic season!
So before you head out to recreate today’s Christmas Gnomes craft idea, be sure to also check out our Christmas Fairy House and Christmas Gnome craft posts!

Christmas Tree Gnome Paper Craft For Kids
We are going to transform a cardstock paper tree shape into an adorable Christmas Tree Gnome with just THREE steps!
Here’s your checklist of supplies to bring this craft to life:
Prepare your creative haven by laying down a protective cover before the crafting magic begins!
Directions:
- First things first - download, print and cut out your Christmas tree shape from the green cardstock paper.Cardstock Paper
- Go ahead and cut off the tree stump on the bottom of the cutout.
- Discard excess paper.
- Flip over your tree cutout, so the lines can't be seen anymore.
- Now grab your remaining pieces of paper.
- Trace/cut out a HANDPRINT beard from the white, a large triangle hat from the scrapbook paper, an oval nose from the kraft and finally - two boots from the black.Scrapbook Paper
- Now you are ready to assemble! Grab your green tree shape, the glue stick and all the paper pieces.
- Start off with the boots. Secure them to the bottom/back side of the tree shape.
- Now glue down the beard on the front side, in the center of the tree.
- Follow that up with the hat for the "tree topper" and then the nose on top, to tie it all together.
- Add any other embellishments you see fit. Maybe some glitter or a pom pom on the hat!
- Finally - display proudly for ALL to see!
- You can also hole punch a hole on the top of it and string it, to make an ornament or gift tag.


NEED HELP DOWNLOADING OUR FREE PRINTABLES? PLEASE REFER TO OUR FAQ PAGE
If you've enjoyed our content or have any thoughts to share, we'd love to hear from you! Mention @gluedtomycrafts or tag #gluedtomycrafts on Instagram!