
Celebrate the start of spring with our latest and greatest Crinkle Paper Bunny Friend kid craft tutorial!
If you are a fan of our previous crinkle paper kids craft ideas, you are going to love this one even more! Keep scrolling for all the details, as well as bunny body freebie for you to enjoy today as well!

Shredded Paper Bunny Craft
At Glued To My Crafts we absolutely LOVE the thought of a cheap and really easy craft idea!
I know first hand that spending tons of money on a kid craft is overrated & if it involves a lot of steps – forget about it! I’m out!
So what if you told you that today’s crinkle paper bunny craft idea is NEARLY on the free spectrum AND it only has about THREE steps to it. Would that get you excited?!
Many of us already have sandwich bags in our pantry right now {free} and more than likely, you are either going to be buying or somehow receiving some Easter basket crinkle paper in the coming weeks.
Right? It just seems inevitable that you will have a hand full {or two} by the end of the season. It’s typically something you just throw away because you have no use for it. Right?
So my dear friends, why not up-cycle that “messy” paper and make some cute bunnies instead?! I’m plugging this as toddler friendly craft {because it’s really easy for their little hands} but older kids would probably enjoy this idea as well!
One last thing – Dollar Tree is my best suggestion for picking up a cheap bag or two but Walmart & Target are also just as great. And remember – although I used white for the purpose of this tutorial, bunnies come in ALL colors this time of year, so if you have pink, blue or yellow crinkle paper, this DIY will still work regardless!
Find all the crafty details below, as well as a FREE BUNNY BODY PRINTABLE to get you started even faster today! Happy crafting my friends and may your EASTER holiday be extra creative!! #gluedtomycrafts
RELATED: Popsicle Stick Bunny and Bunny Lollipops

These crinkle paper bunnies are a great craft idea for Easter, spring or even to make as gifts! Easy and kid friendly DIY project.
Craft Supplies:
- Sandwich Baggie
- White Crinkle Paper
- FREE Bunny Printable
- White Cardstock Paper
- Scissors
- Crayons, Markers, Coloring Pencils etc.
- Adhesive
- Stapler
Directions:
- First things first – grab ONE sandwich baggie and your white shredded paper.
- Open up the baggie – nice and wide!
- Go ahead and stuff the opened sandwich baggie with a handful or two of white crinkle paper.
- When it’s stuffed enough to your liking, carefully squeeze the air out of the bag and seal it off at the top.
- Set it aside till later.
- If you haven’t already, print out the FREE printable listed above in the supply list. You only need one print per craft.
- Grab your choice of coloring utensils {I did a pink marker.}
- Give some dimension to your bunny by coloring in some paws and adding some pink to the ears.
- When done coloring, trim out ALL the pieces with your scissors.
- Discard excess paper.
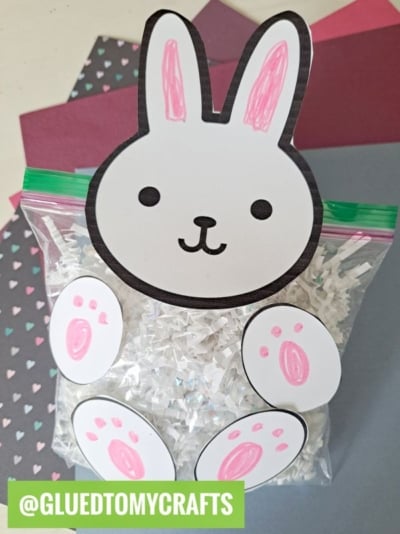
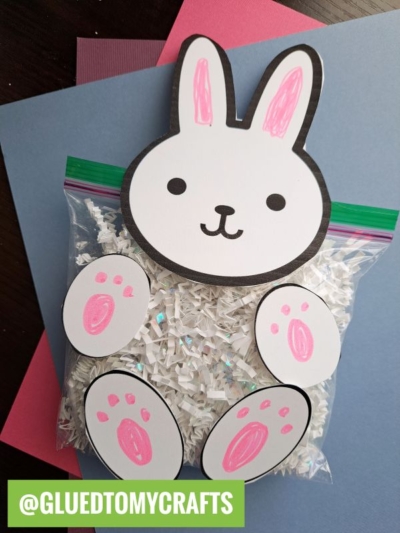
- To finish off the Plastic Baggie and Crinkle Paper Bunny craft, you are going to use the tape runner adhesive and stapler to adhere ALL the paper pieces you just cut out, onto the stuffed bag. The feet go on the bottom, while the head will go towards the top.
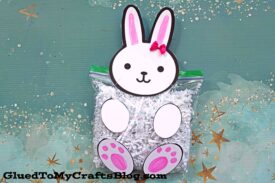
- Add any other embellishments you see fit {maybe a small bow or a few stickers!}
- Then display your stuffed bunny friend made out of crinkle paper for ALL to see and don’t forget to share a picture with us on your social media sites! #gluedtomycrafts
RELATED —> Cherry Blossom Popcorn Tree
Please be sure to check out our Bunny In Grass, Peeking Bunny and Spring Flower Truck craft posts! All of which are perfect for this beautiful spring season we are currently in!!! #gluedtomycrafts

Crinkle Paper Bunny Craft
Here’s your checklist of supplies to bring this craft to life:
Prepare your creative haven by laying down a protective cover before the crafting magic begins!
Directions:
- First things first - grab ONE sandwich baggie and your white shredded paper.1 Sandwich Baggie, Crinkle Paper
- Open up the baggie - nice and wide!
- Go ahead and stuff the opened sandwich baggie with a handful or two of white crinkle paper.
- When it's stuffed enough to your liking, carefully squeeze the air out of the bag and seal it off at the top.
- Set it aside till later.
- If you haven't already, print out the FREE provided printable. You only need one print per craft.Cardstock Paper
- Grab your choice of coloring utensils {I did a pink marker.}
- Give some dimension to your bunny by coloring in some paws and adding some pink to the ears.
- When done coloring, trim out ALL the pieces with your scissors.
- Discard excess paper.
- To finish off the Plastic Baggie and Crinkle Paper BUnny craft, you are going to use the tape runner adhesive and stapler to adhere ALL the paper pieces you just cut out, onto the stuffed bag. The feet go on the bottom, while the head will go towards the top.
- Add any other embellishments you see fit {maybe a small bow or a few stickers!}


NEED MORE HELP DOWNLOADING OUR FREE PRINTABLES? PLEASE REFER TO OUR FAQ PAGE