Create a vibrant Paint Splat Sunny Day Craft with this fun summer project! Perfect for kids, using simple materials to inspire creativity and seasonal joy.

This summer break, keep your kids entertained with this fun and easy kids craft idea. Kids can help them create a beautiful piece of art that will remind them of sunny days even when the weather is gray.

Are you looking for something fun to do with your kids? This easy and creative kids craft is perfect for summer break.
With just a few supplies, your little one can create a work of art that they will be super proud of. So get out the paint and have some fun together!

Create a fun craft with paint splat for a sunny day. This kid-friendly activity uses colorful papers and fun materials.
CRAFT SUPPLIES:
- Blue Cardstock Paper
- Yellow Cardstock Paper
- White Tulip Puffy Paint
- White, Loose Craft Glitter
- Yellow Cupcake Liners
- Basic Paper Craft Scissors
- School Glue or Glue Stick
- Googly Eyes
- Marker
DIRECTIONS:
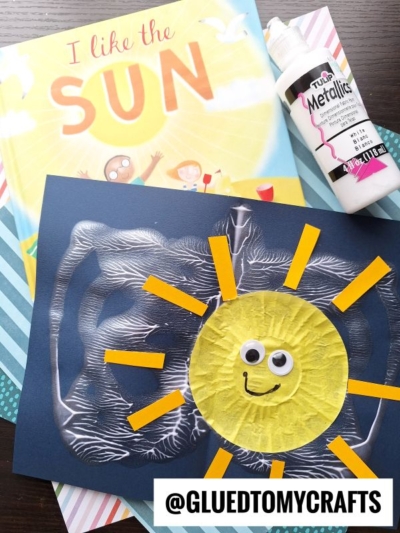
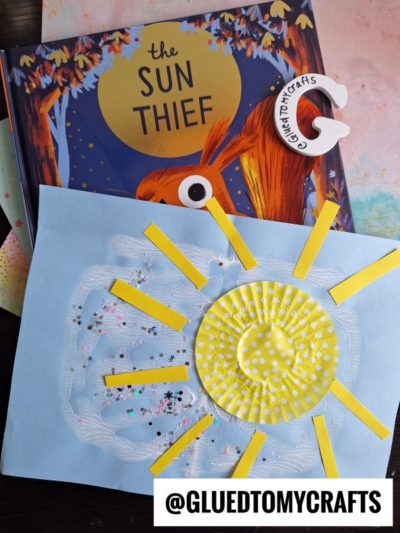
- First things first – fold your blue cardstock in half. Straight up the center.
- Next open it back up and squirt a few lines of white paint squiggles with ON ONE SIDE before closing up the cardstock paper again.
- Once the paper is closed for the second time, gently take your hand and “caress” the paint around inside, so it makes a fun symmetrical “cloud” print design on both sides of the paper {keep in mind – paint might ooze from the sides of the cardstock, so be sure to work in an area that can get dirty!}
- Now you are ready to open it back up to reveal the cloud design underneath.
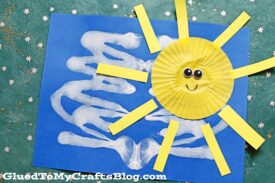
- Grab ONE large yellow cupcake liner. Flatten it with your hands.
- Add some glue to the back of it and secure it to your painted cloud paper piece.
- Now grab some yellow cardstock paper and the scissors.
- Cut out some thin sunshine “rays” and glue them to the decorated piece as well.
- Once finished, add any other embellishments you like {maybe add a smile to the sun!}
- Then set aside to let it dry completely, before displaying proudly!
- And of course – repeat as many times as you like! No two pieces will be the same and I think that’s what makes it even more fun!
RELATED —> Paint Splat Unicorn Hair
Be sure to also head on over to my blog post titled Chalk Art Jellyfish post and follow the full tutorial from there as well. It’s just like this paint splat sunny day post but we changed it up for an ocean theme instead!
Again, happy crafting, my dear friends!!! Please don’t forget to support our website and share pictures with us when you can!
FOLLOW US ON PINTEREST SO YOU NEVER MISS A TUTORIAL FROM US!

Paint Splat Sunny Day Craft
Create a vibrant Paint Splat Sunny Day Craft with this fun summer project! Perfect for kids, using simple materials to inspire creativity and seasonal joy.
Here’s your checklist of supplies to bring this craft to life:
Prepare your creative haven by laying down a protective cover before the crafting magic begins!
Directions:
- First things first - fold your blue cardstock in half. Straight up the center.
- Next open it back up and squirt a few lines of white paint squiggles with ON ONE SIDE before closing up the cardstock paper again.
- Once the paper is closed for the second time, gently take your hand and "caress" the paint around inside, so it makes a fun symmetrical "cloud" print design on both sides of the paper {keep in mind - paint might ooze from the sides of the cardstock, so be sure to work in an area that can get dirty!}
- Now you are ready to open it back up to reveal the cloud design underneath.
- Grab ONE large yellow cupcake liner. Flatten it with your hands.
- Add some glue to the back of it and secure it to your painted cloud paper piece.
- Now grab some yellow cardstock paper and the scissors.
- Cut out some thin sunshine "rays" and glue them to the decorated piece as well.
- Once finished, add any other embellishments you like {maybe add a smile to the sun!}
- Then set aside to let it dry completely, before displaying proudly!

CLICK HERE TO PRINT THE DIRECTIONS FOR THIS CRAFT
If you've enjoyed our content or have any thoughts to share, we'd love to hear from you! Mention @gluedtomycrafts or tag #gluedtomycrafts on Instagram!